
Cisco Howto Configure Console Port/Terminal/Comm Server with Async Cable Setup
This assumes that you've already installed the relevant HWIC cards eg. Cisco Asynchronous Serial NIM
These are essentially cards that you install into your router, once installed you connect an Async cable to one of the ports on the card which normally gives you 8 console cables and are normally labelled 1 through 8.
You connect all of the cables to the devices you need (even non-Cisco devices) whether switches, routers or firewalls, they will usually work.
The real magic happens in just checking your lines and configuring them with telnet for easy access (of course the router should be secured to only authorized users only for this reason).
1.) Check your cables/ports
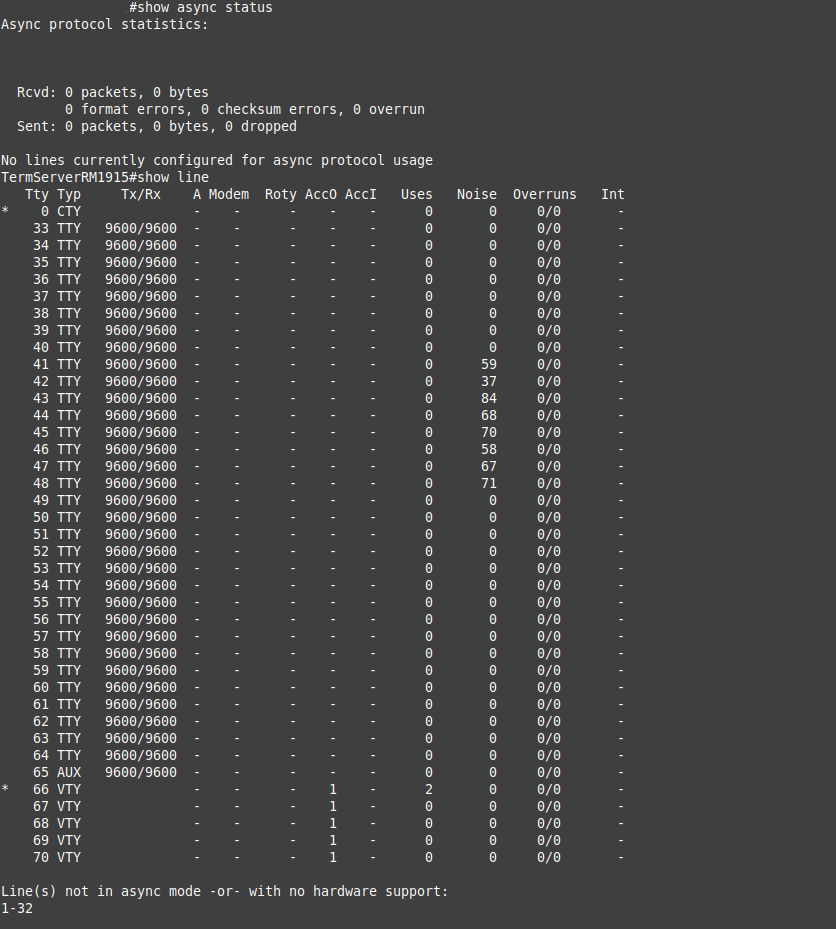
First just type show line to know what ports and cables are available.
Normally as you can see that the lines will start with 33. To remotely connect to line 33 you would telnet to the IP of the router on port 2033 as all ports start with 2000. The TTY types are the ASYNC lines.
show line
2.) Configure line access
The standard way is to just enable telnet access like this:
From config mode just do this:
line tty 33 64
password realtechtalk.com
login
transport input all
end
The line tty 33 64 specifies that we are applying this config to all of our async lines as shown in the previous screen they are tty 33-64.
Then we set a password, enable login and enable all input or we could have just enabled transport input telnet etc...
3.) telnet into the correct line
telnet yourIP 2064
Then enter your password and you will be at the console of the attached device.
This would connect you to line 64. It is useful to label the physical devices according to the async number, as a rule you can normally just divide by 8 to get an idea of which group of lines go where (assuming you've connected them in a sequential order).
Tags:
cisco, howto, configure, console, terminal, comm, server, async, setupthis, assumes, ve, installed, relevant, hwic, eg, asynchronous, nim, essentially, install, router, ports, cables, labelled, devices, switches, routers, firewalls, configuring, telnet, secured, authorized, users, remotely, ip, tty, enable, config, mode, password, realtechtalk, login, input, specifies, applying, previous, enabled, etc, yourip, label, divide, sequential,