
How to Install Any OS on a Physical Drive from Windows Using VMware Workstation (Linux, Windows, BSD)
Uses:
- Install OS on physical drive
- Linux installation VMware
- Install Windows on physical drive
- Boot OS from physical drive
- VMware Workstation tutorial
- Linux virtual machine to physical disk
- Windows to Linux migration
- Dual boot OS installation
- Boot from external SSD
- Linux, Windows, BSD installation guide
- Physical drive boot OS
- Create bootable OS drive VMware
- Install OS on external drive
Description:
"Learn how to install any operating system—Linux, BSD, Windows, and more—on a physical drive from within Windows using VMware Workstation! This step-by-step guide shows you how to set up any OS on an external or internal drive and boot directly from it. Whether you're looking to dual boot or completely migrate from Windows to a new OS, this tutorial covers everything you need. You don’t need a bootable USB drive—everything is done directly through VMware Workstation on Windows.
🔹 What you’ll learn:
- Installing any OS (Linux, BSD, Windows, etc.) on a physical disk using VMware Workstation
- Creating a bootable drive from Windows
- Dual boot setup with Windows and another OS
- Setting up any OS to boot from an external or internal drive
- Troubleshooting common installation issues
🔹 Tools needed:
- VMware Workstation
- OS ISO file (Linux, BSD, Windows, etc.)
- Physical drive (internal/external HDD or SSD)
Youtube Video of Installing Linux to a physical drive from VMWare Workstation in Windows.
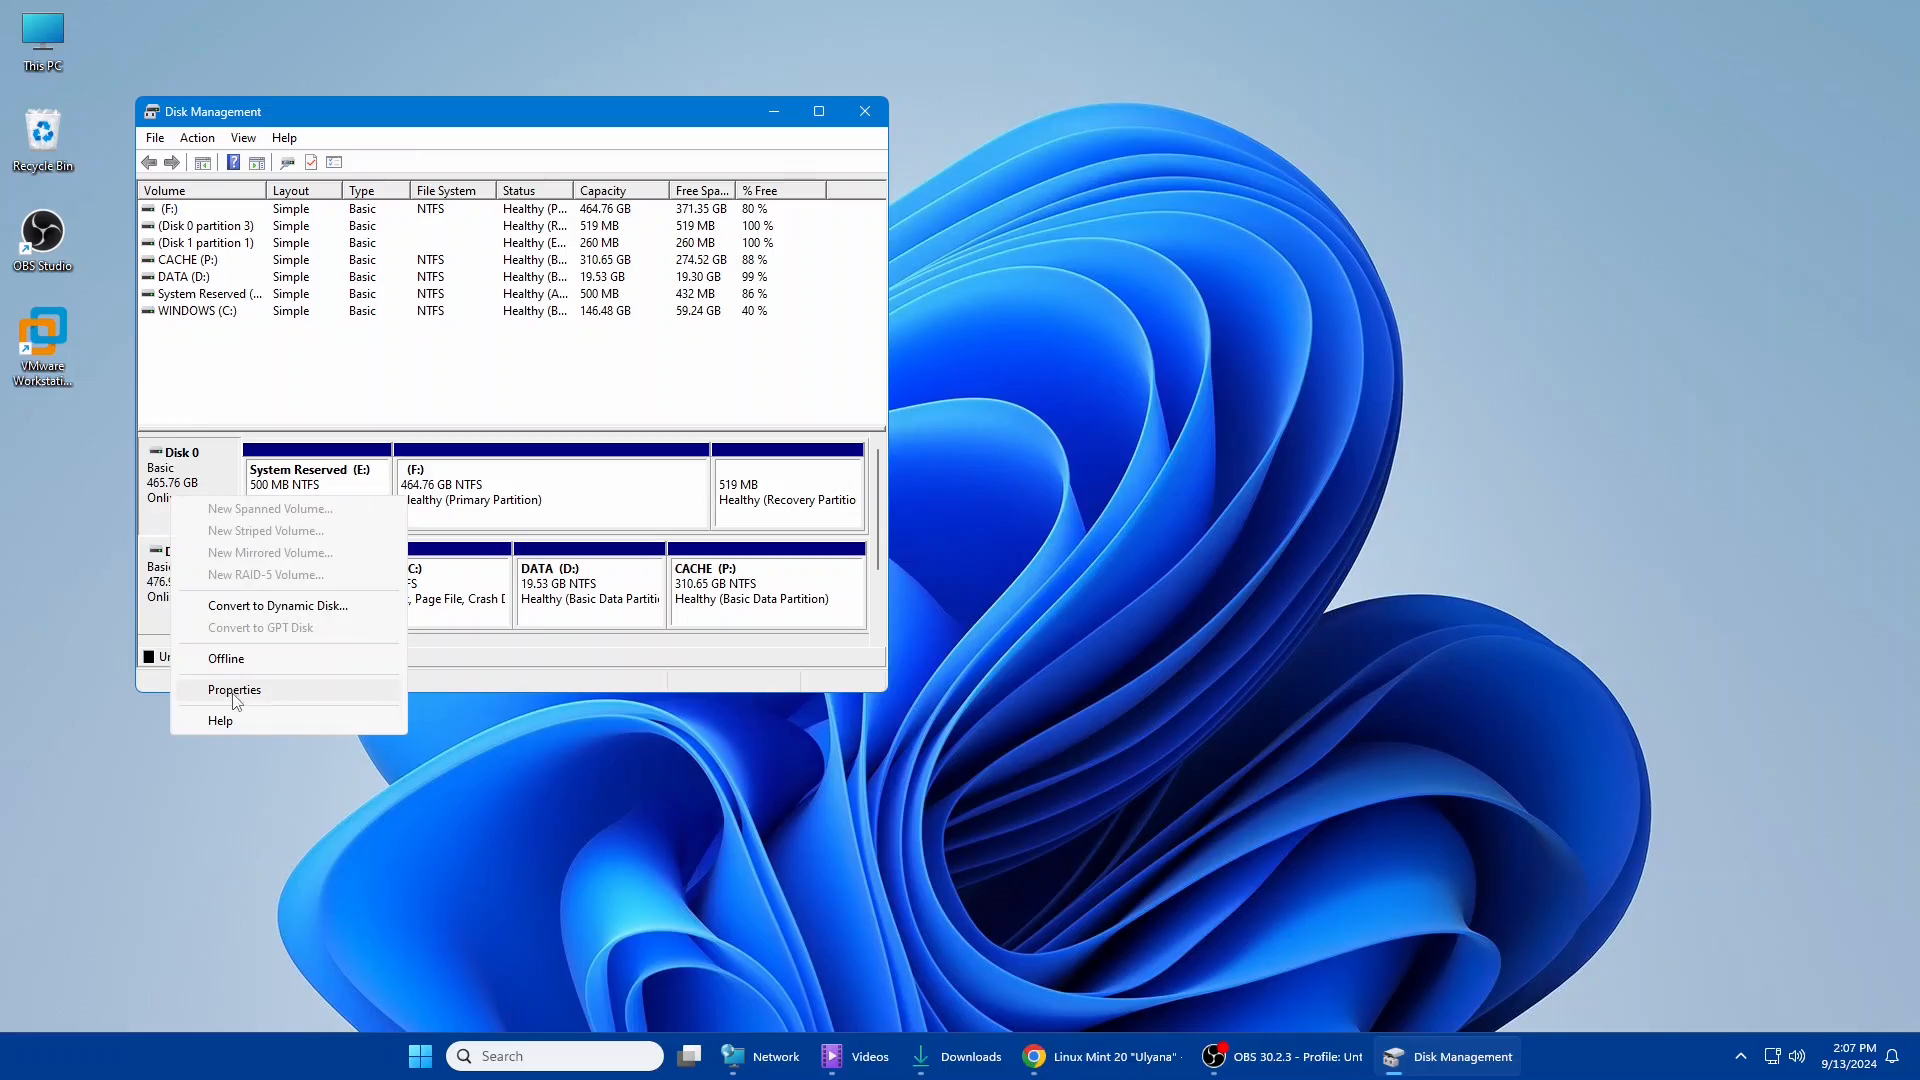
Step 1 - Open the "Disk Management Tool" in Windows
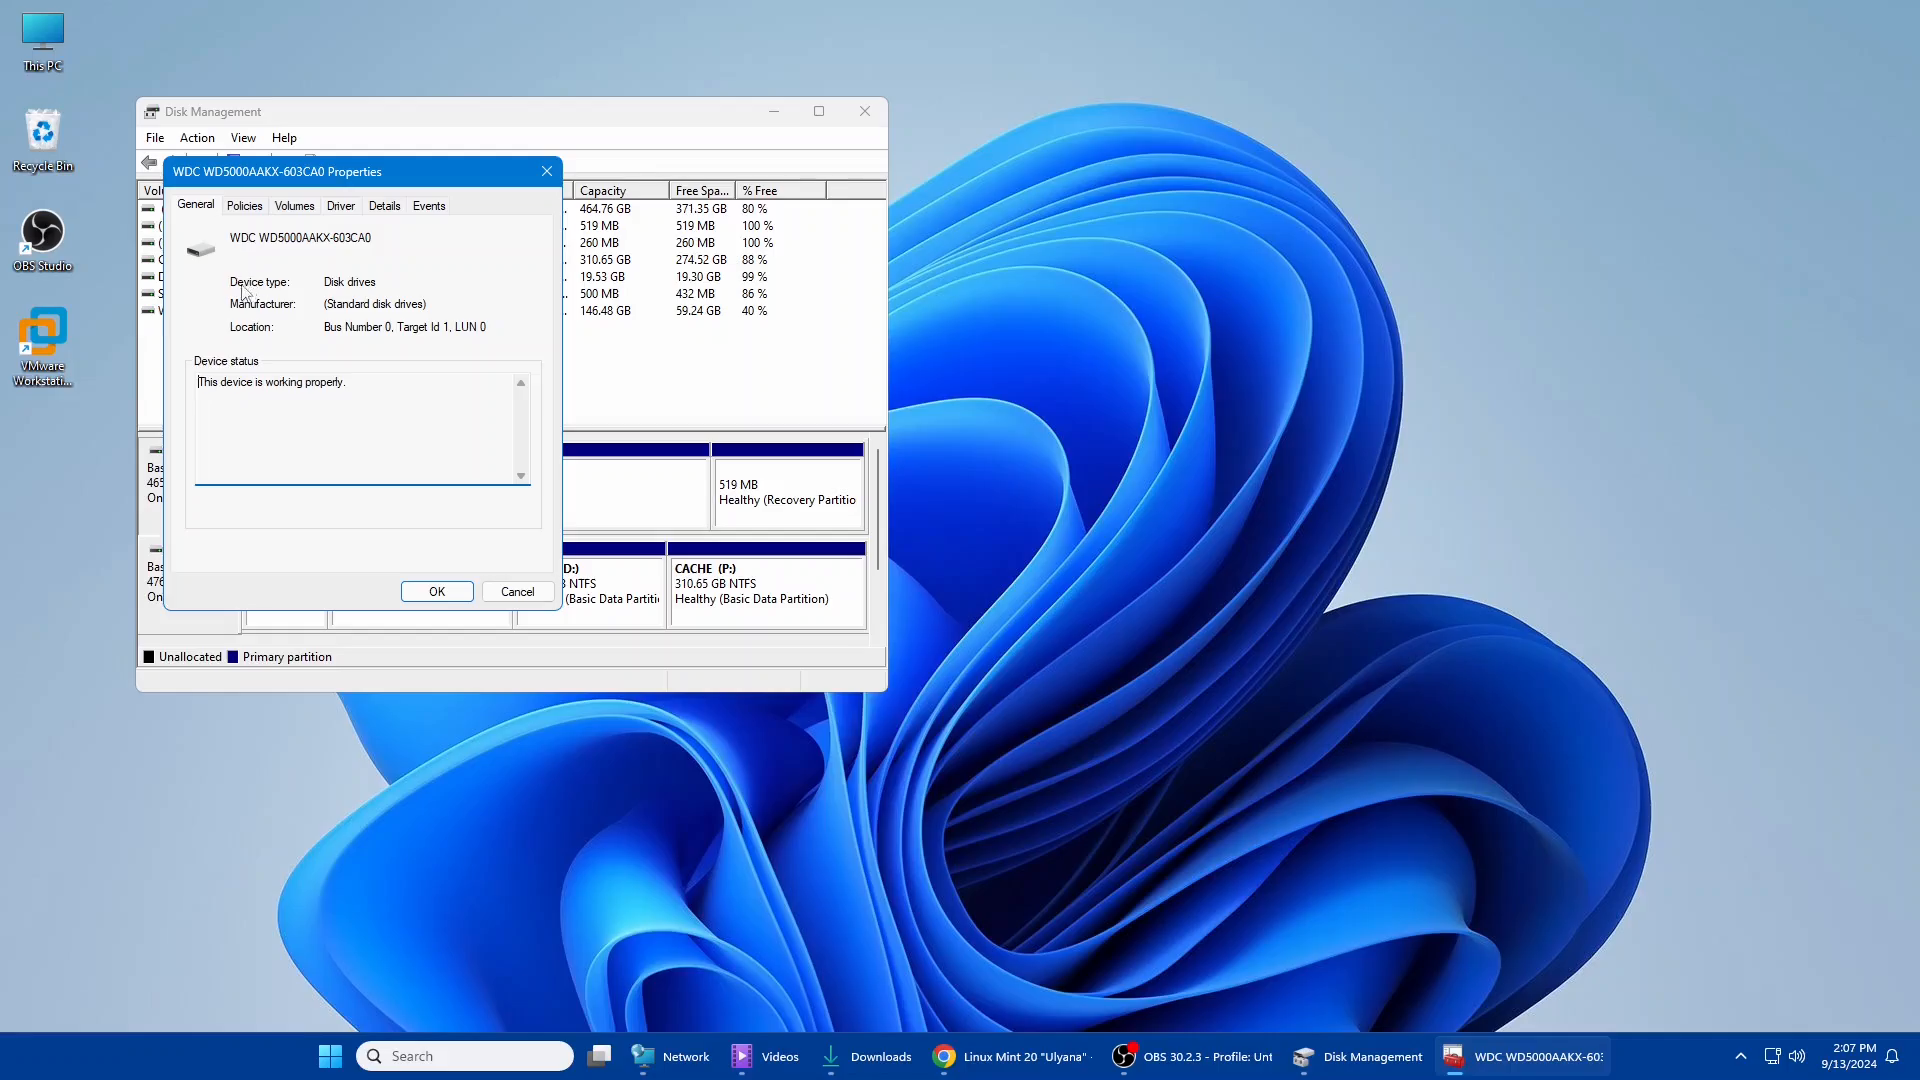
In this example there is a disk 0 and disk 1. The easiest way is to verify by size, however if both drives are similar in size then the better way is to right click on each disk and click "Properties"
As we can see below Disk 0 is a WDC drive ( Western Digital ), if we know there's no other Western Digital drive and this is the one we want to install our OS to, choose this drive.
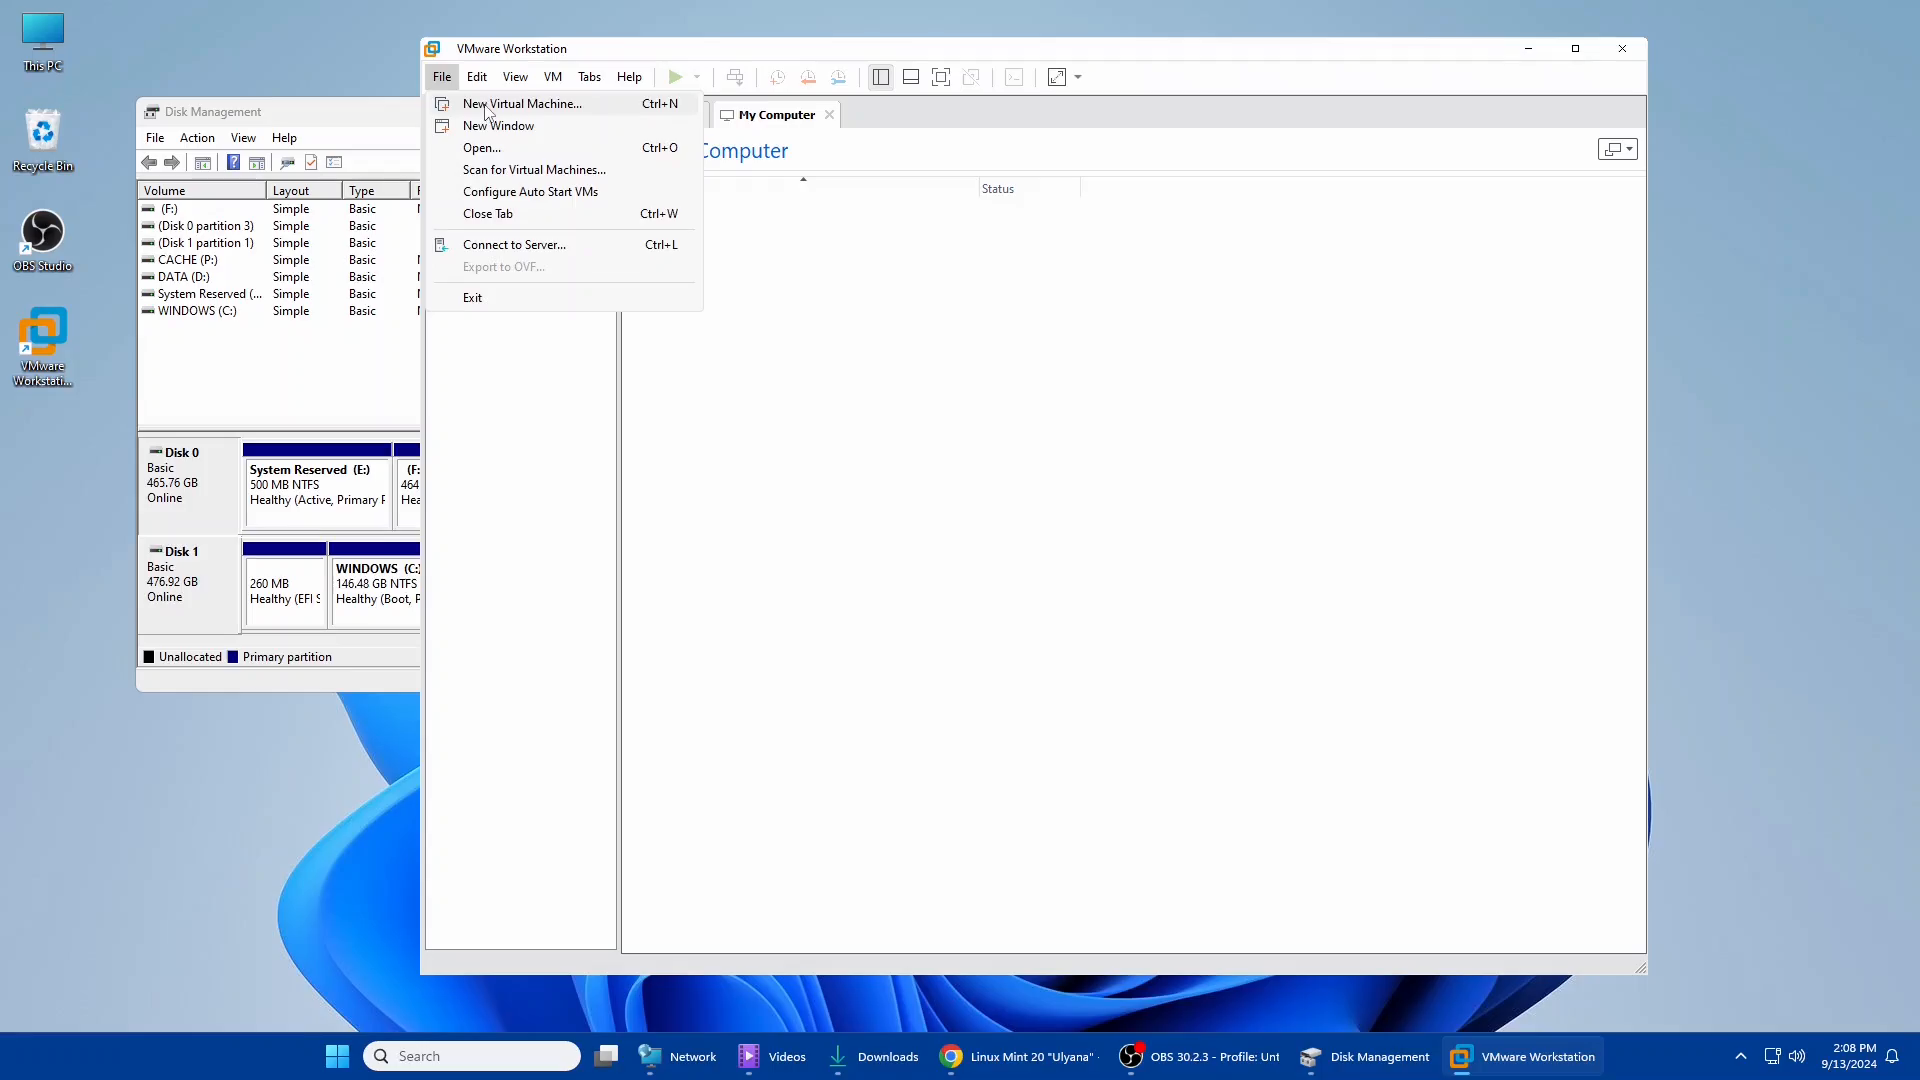
Step 2 - Create a new VM in VMWare Workstation
Open VMWare Workstation as "Administrator" and click "File -> New Virtual Machine" to create a new VM.
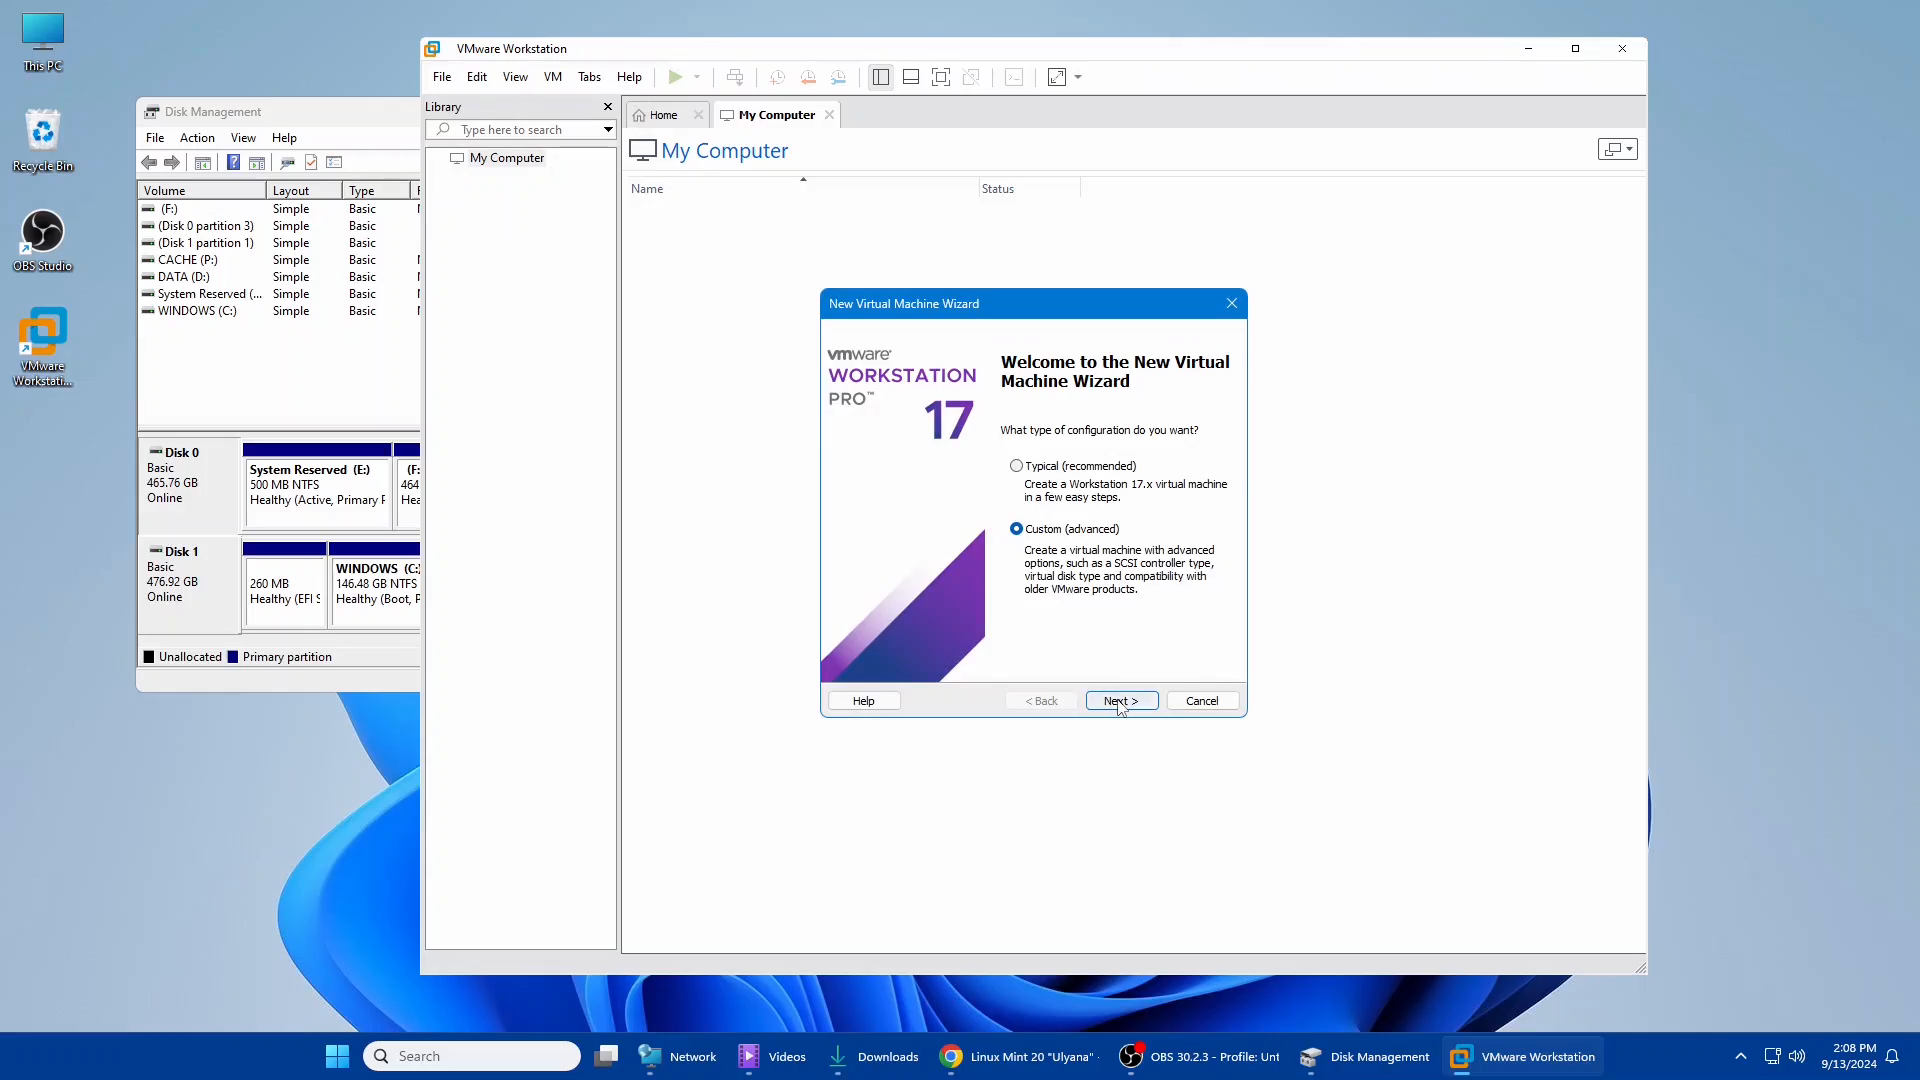
Step 3 - Create VM as "Custom (advanced)"
This just has the advantage of allowing us to have the Physical Drive attached initially as the only drive in VMWare rather than going back and modifying the storage settings/HDDs later on.
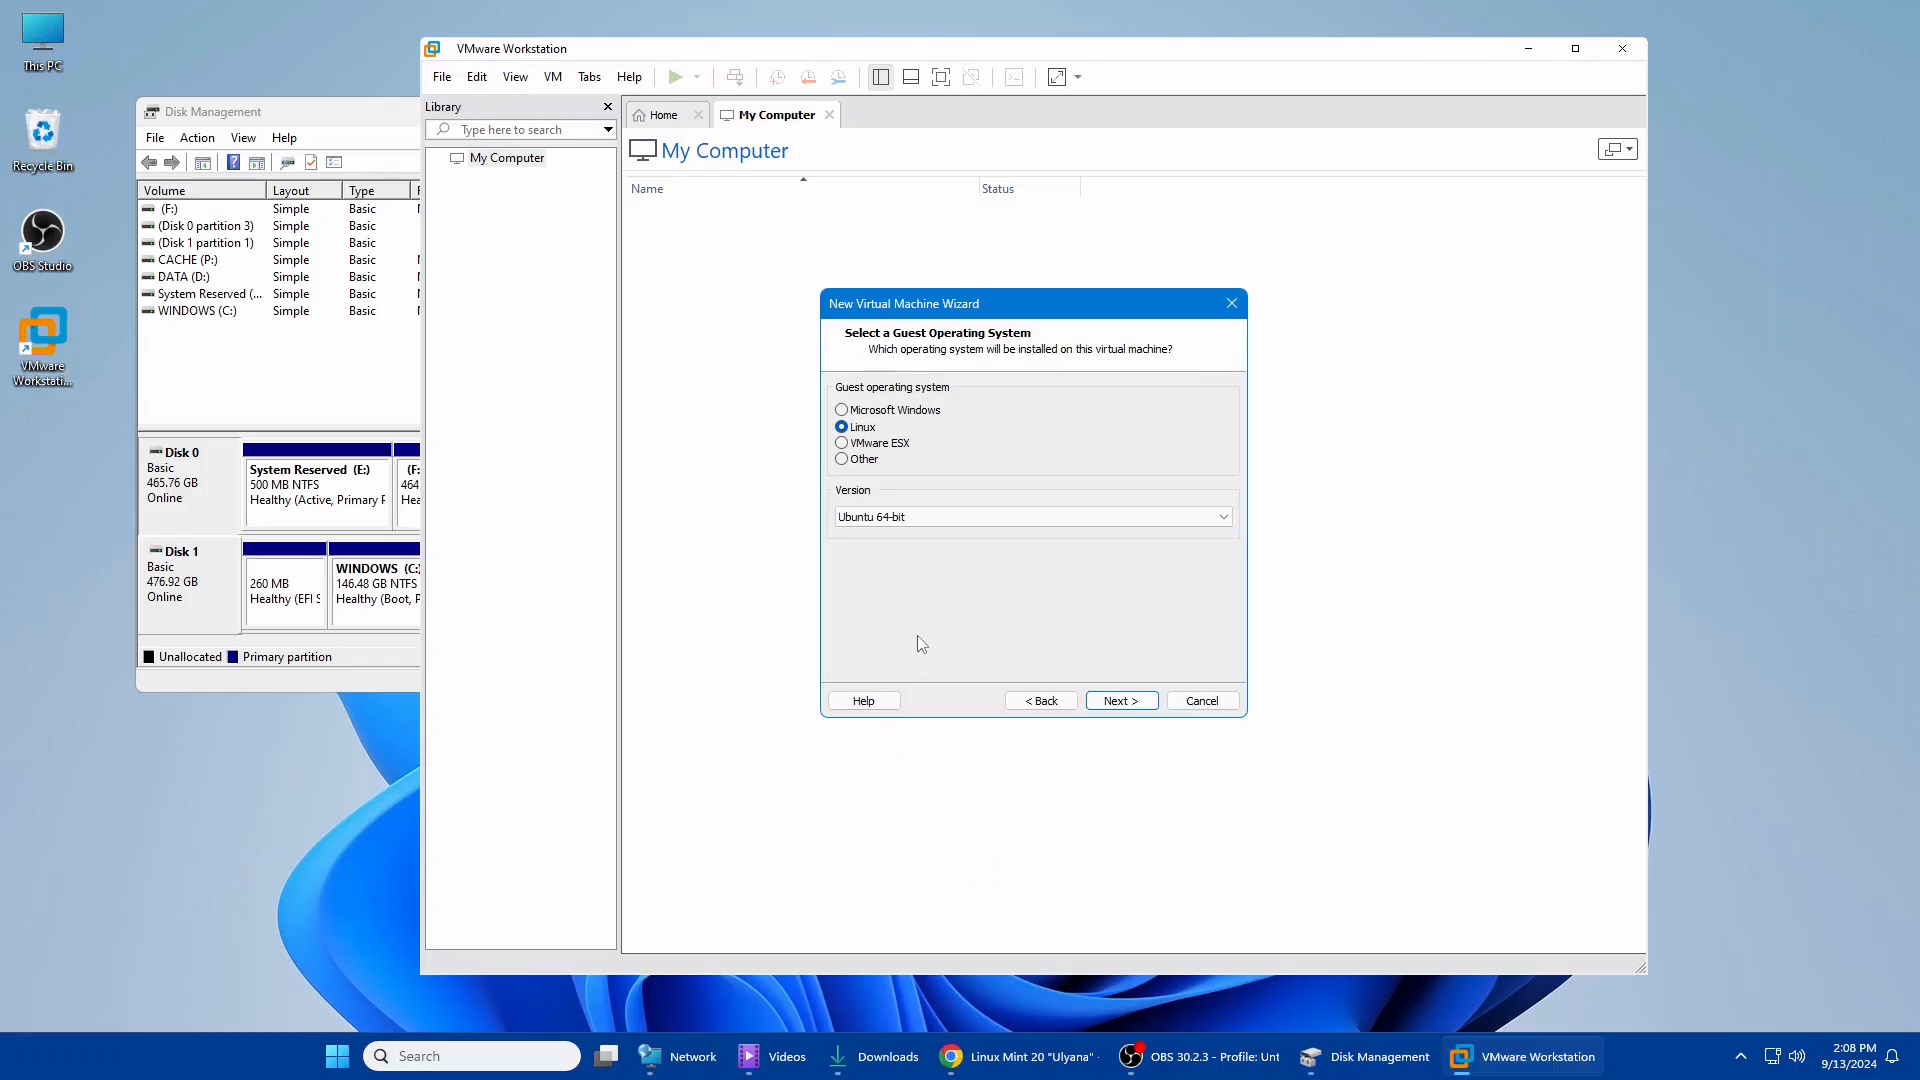
Step 4 - Choose the OS
In our example we are installing Ubuntu 64 bit, it's important to choose the correct OS type and even more important to choose the right architecture (eg 64 bit). This becomes more apparent later on if the intended computer you want to boot your installed OS on uses EFI (EFI mode can only be enabled easily when there is the 64-bit architecture selected).
Step 5 - Choose Your Physical Disk
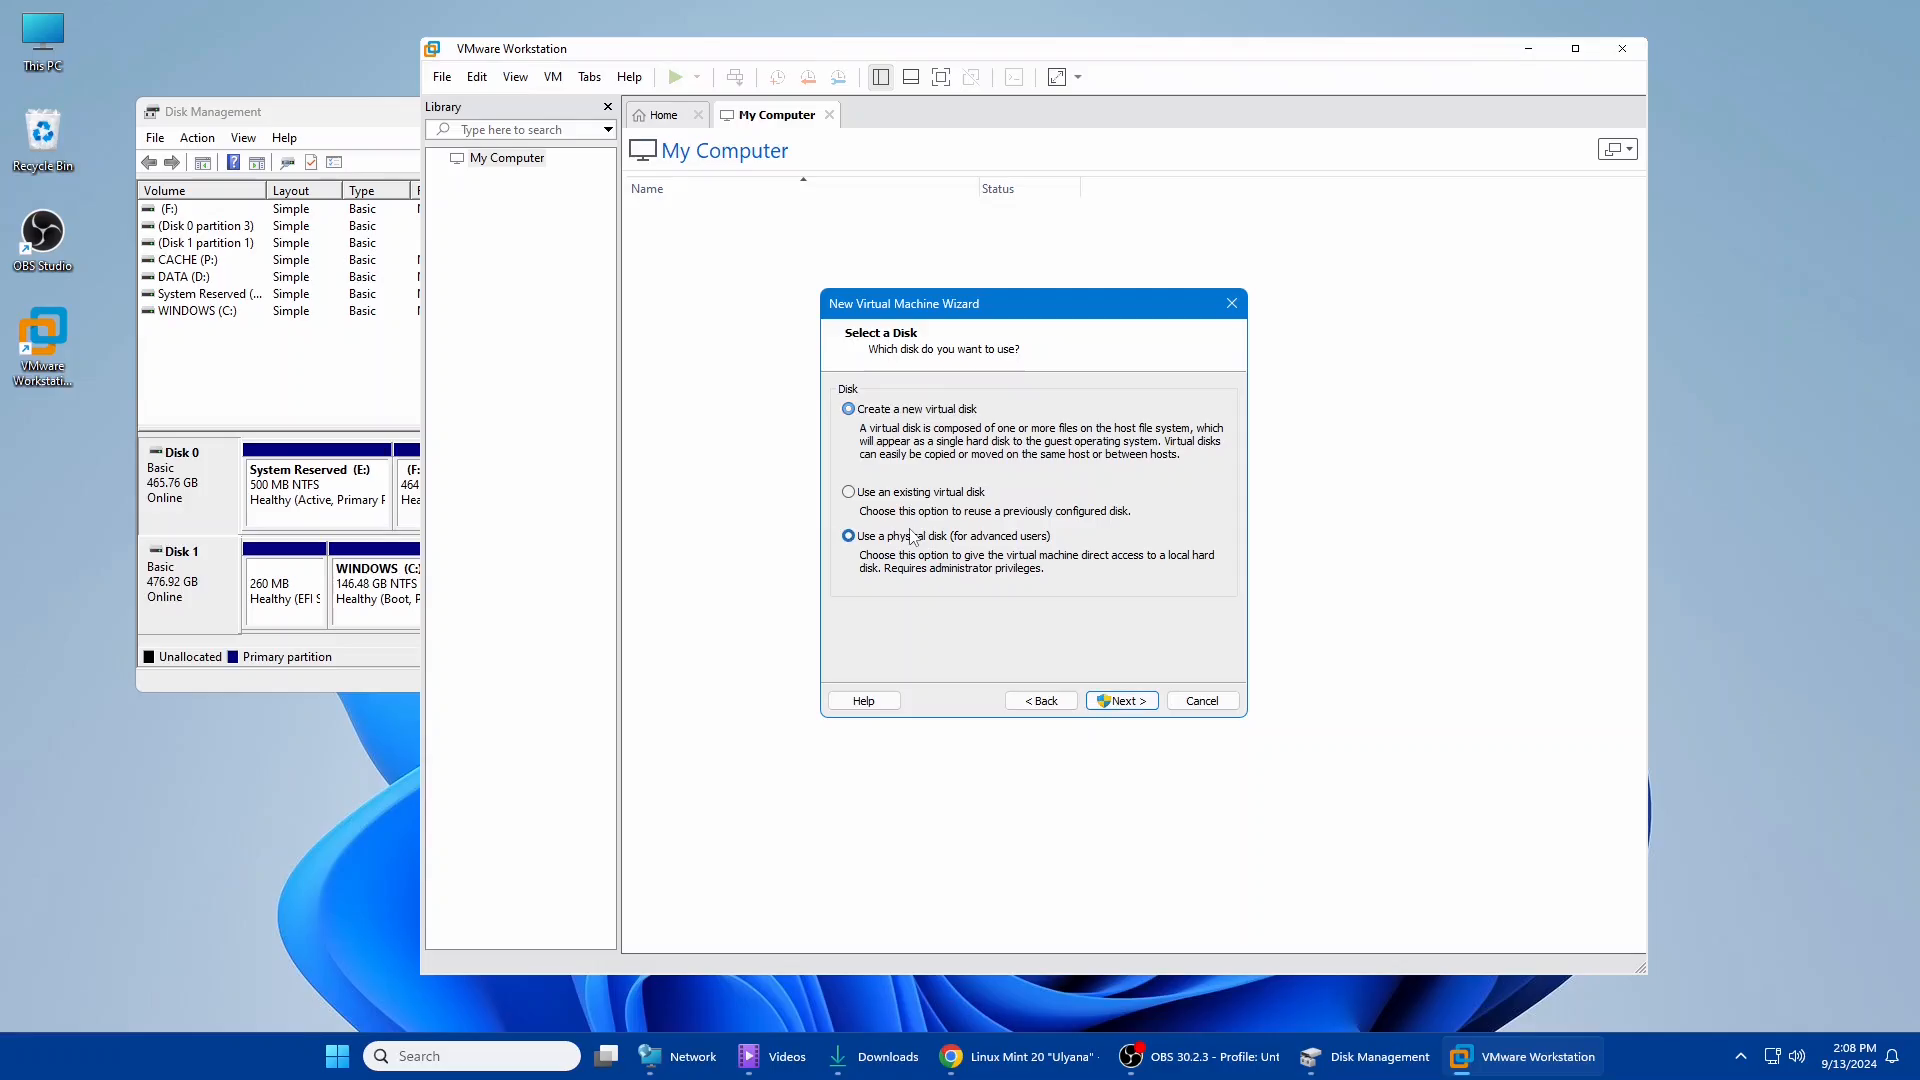
This part is crucial and critical, if you mess this up you could delete your crypto keys or family photos by accident! If possible make sure all other drives/storage devices are disconnected or disabled by this time.
- Click "Use physical disk (for advanced users)" and then we'll select the physical drive#
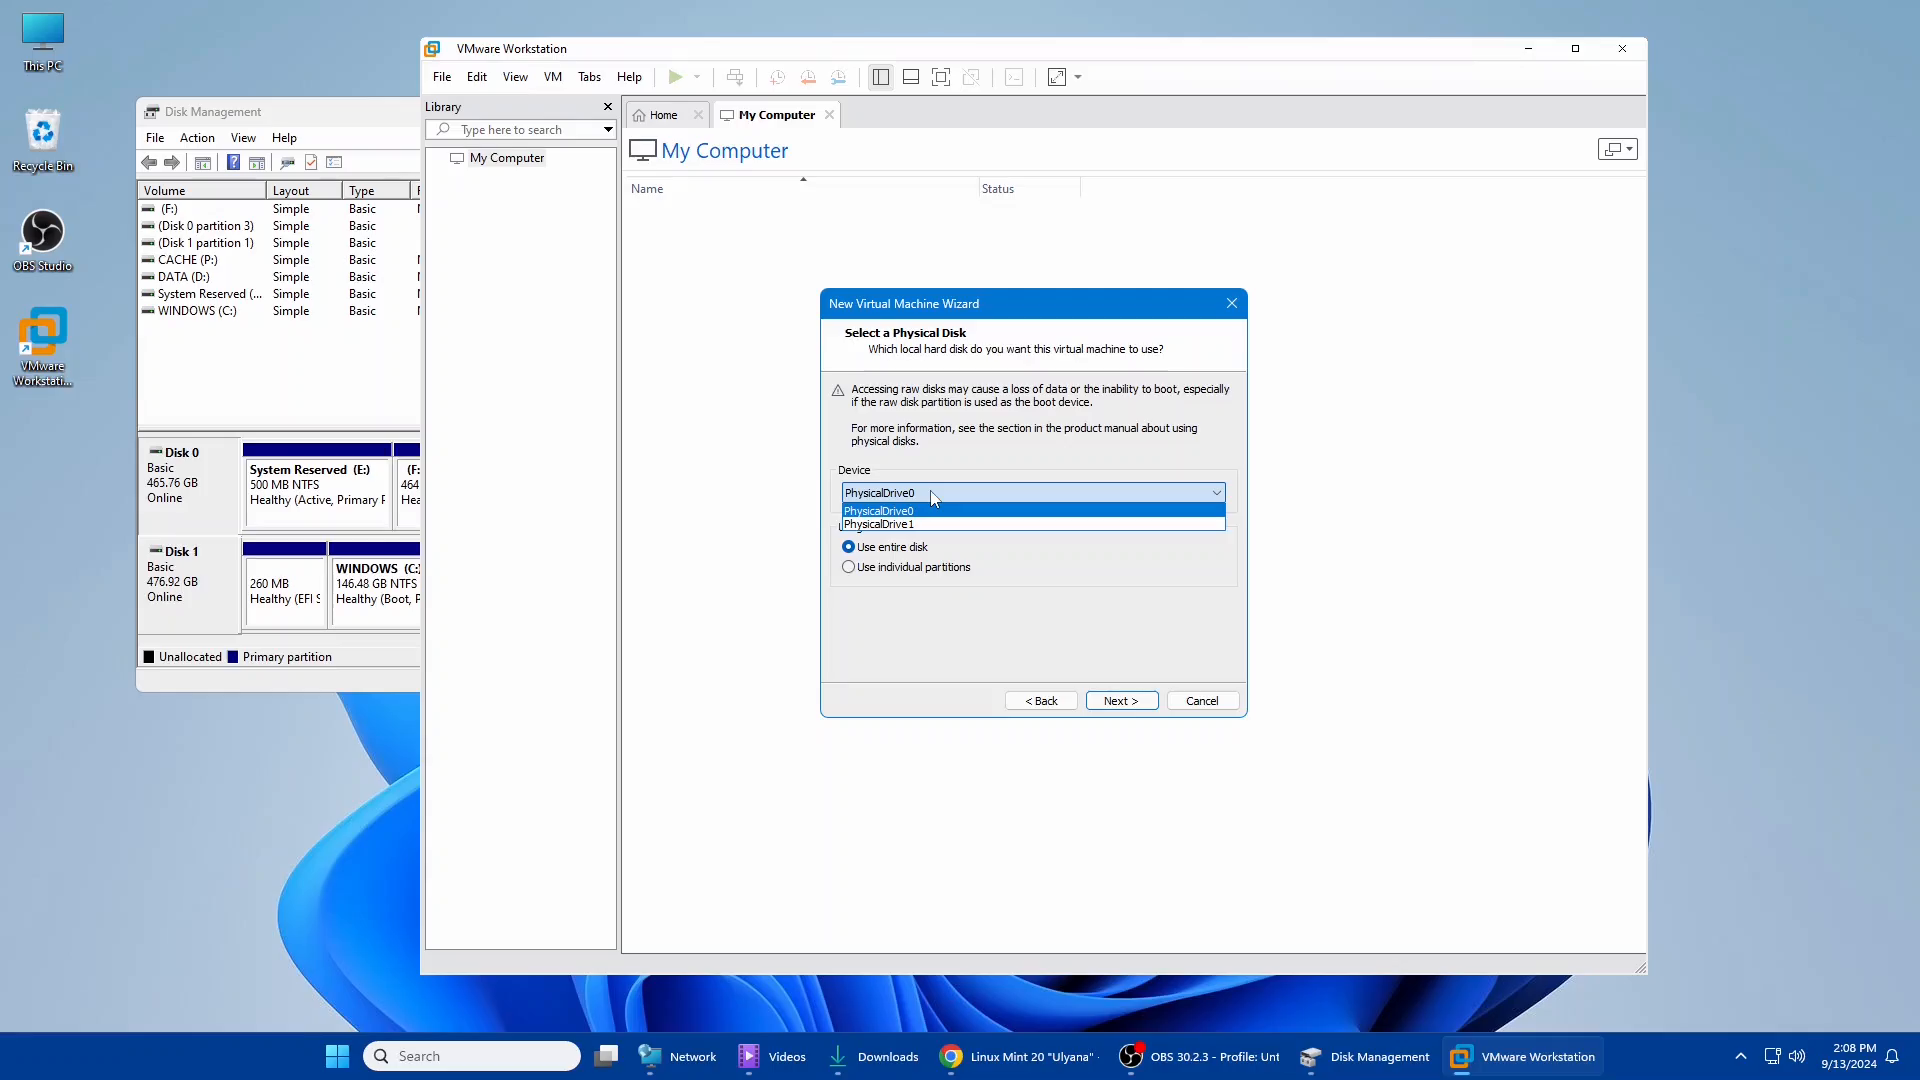
- Remember that the drive number corresponds to the drive we identify in Disk Management (in our case we want to install to Drive 0 which we showed earlier is our WDC drive).
Make sure that you make proper note of the physical drive so you don't wipe the wrong drive and lose data!
Once again we choose PhysicalDrive0 because it corresponds to the identified "Disk 0" in Disk Management. You need to verify your physical drive number or you may wipe your data on an unintended drive.
After this point all the defaults are normally fine (continue to click next through the menu to create the VM).
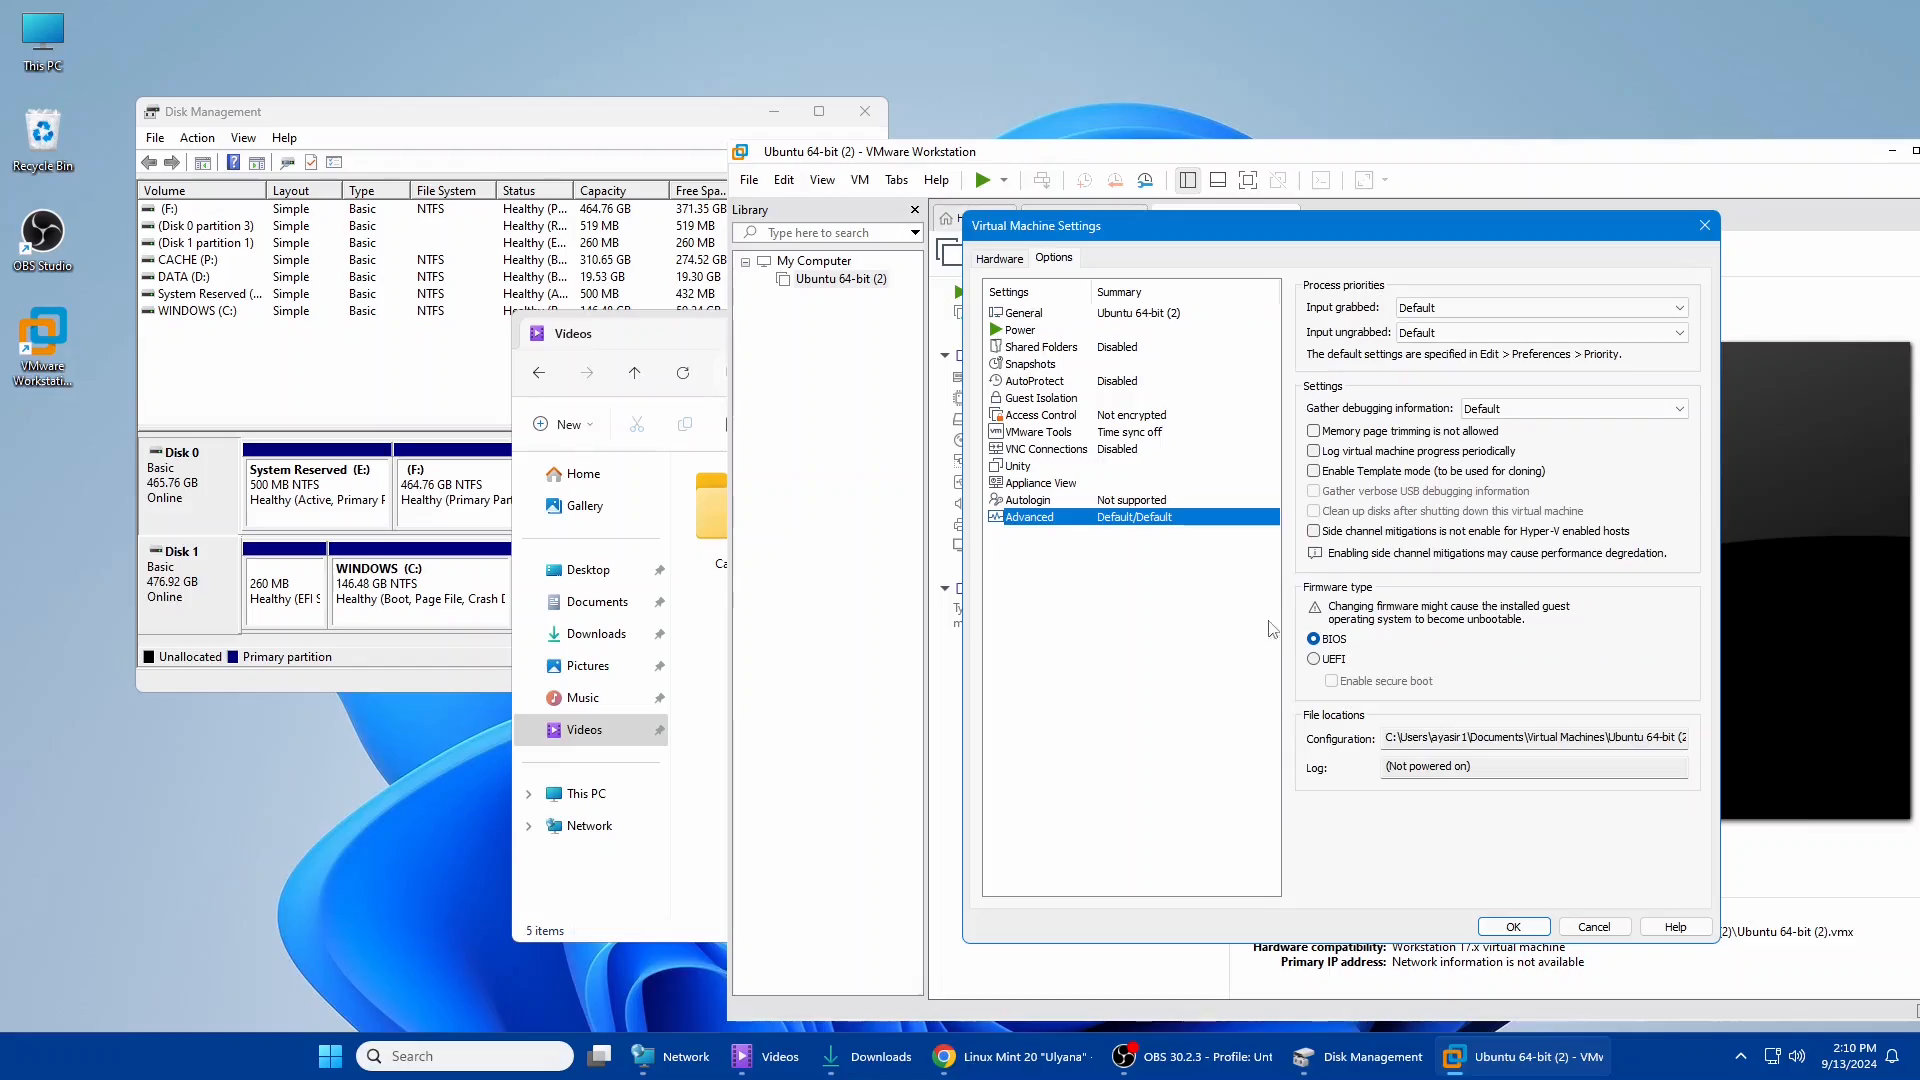
Step 6 - Set EFI boot mode if you need
If your target device will be booting by EFI you need to edit your VM by going to Settings and then "Options" and "Advanced" and choose UEFI as the boot mode. This is not necessary if you will be booting by MBR (however many newer systems will only boot EFI)
Step 7 - Boot your .iso and install to your physical drive.
Install your OS like it's a normal physical machine, once the install is completed, power off the VM and you can now boot the drive you installed to on the same or other computer.
Tags:
install, os, vmware, workstation, linux, bsd, installation, tutorial, virtual, disk, migration, dual, external, ssd, bootable, quot, operating, mdash, migrate, rsquo, usb, ll, installing, etc, creating, troubleshooting, iso, hdd, easiest, verify, properties, wdc, western, digital, vm, administrator, custom, advanced, allowing, initially, modifying, settings, hdds, ubuntu, architecture, eg, apparent, installed, efi, mode, enabled, selected, crucial, delete, crypto, devices, disconnected, disabled, users, select, corresponds, physicaldrive, identified, unintended, defaults, booting, edit, uefi, mbr, newer, completed,