
Virtualbox Best Networking Mode In Lab/Work Environment without using NAT Network or Bridged
Virtualbox is a very powerful tool, but for some use cases it is less than optimal.
Say you are in a work, lab or other environment where you are not alone on the physical network and there could be overlap of IPs, but you need all of your VMs to be contactable from your host, VMs need to communicate with each other, and VMs need internet.
NAT Network will give you VM to VM communication and internet, however, it is buggy and unstable. It also doesn't allow host to VM communication without manual port forwarding.
NAT will give you internet only but no internet VM communication and the host cannot access these VMs without port forwarding
Bridged mode is the natural solution but this is undesirable in a shared environment, eg at work, in the class or anywhere you are testing or developing since this puts the VMs directly on the LAN with an IP from the LAN and becomes accessible by other machines/users on the LAN.
The Host Only Networking Solution
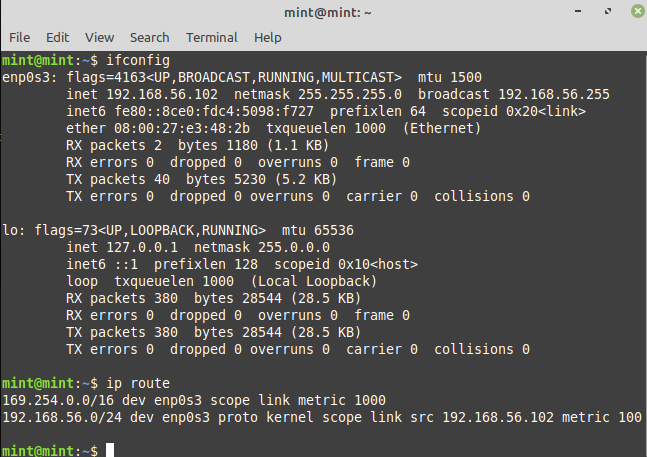
Host only networking is exactly as it sounds, however, we can do a few quick hacks on our host system to make this work perfectly for us. By default you should have a vboxnet0 device adapter which will probably be assigned 192.168.56.1
As it is now, vboxnet0 allows VMs to communicate and your host to communicate with them but they have no internet at all because there is no gateway or DNS provided by the DHCP and your host does not route IPs in that range. This is probably undesirable unless it is for security or forensics.
All we need to do is get our own DNS running on vboxnet0 and route the 192.168.56.0/24 range through our host machine's internet connection via NAT.
Step 1 - Enable IP Forwarding + Routing
Disable systemd-resolved
This is a local listener on port 53 that will break DNSMasq.
systemctl disable systemd-resolved
#remember to stop it too!
systemctl stop systemd-resolved
You should manually enter your DNS into /etc/resolv.conf at this point.
#delete /etc/resolv.conf to be sure
rm /etc/resolv.conf
echo "nameserver 208.67.222.222" > /etc/resolv.conf
echo "nameserver 8.8.8.8" >> /etc/resolv.conf
**If you are using NetworkManager you need to disable DNS or it will break your /etc/resolv.conf on each restart
sed -i s/'\[main\]'/'\[main\]\ndns=none'/ /etc/NetworkManager/NetworkManager.conf
Install iptables if you don't have it already:
iptables-persistent will make sure the rules load on each reboot
sudo apt-get install iptables-persistent
Edit /etc/sysctl.conf
net.ipv4.ip_forward=1
Enable the change
sysctl -p
Install iptables if you don't already have it and add these rules:
iptables -I INPUT -i vboxnet0 -j ACCEPT

iptables -t nat -A POSTROUTING -s 192.168.56.0/24 -j MASQUERADE
#save the iptables rules
iptables-save > /etc/iptables/rules.v4
Step 2 - Delete the hostonly DHCP server
The host only DHCP server has no possibility of being modified to provide a gateway or DNS which is what we probably want. If you don't want that then you can skip the next steps. Eg. if you want to statically assign your IP, gateway and DNS then you can stop here actually.
List the DHCP servers (find the name of our DHCP server for the host only)
VBoxManage list dhcpservers

NetworkName:    HostInterfaceNetworking-vboxnet0

Dhcpd IP:       192.168.56.100

LowerIPAddress: 192.168.56.101

UpperIPAddress: 192.168.56.254

NetworkMask:    255.255.255.0

Enabled:        Yes

Global Configuration:

    minLeaseTime:     default

    defaultLeaseTime: default

    maxLeaseTime:     default

    Forced options:   None

    Suppressed opts.: None

        1/legacy: 255.255.255.0

Groups:               None

Individual Configs:   None
Setup Our Host-Only Network
You could also just use the GUI under File -> Host Network Manager to do this. Make sure that "Enable" under DHCP Server is unchecked.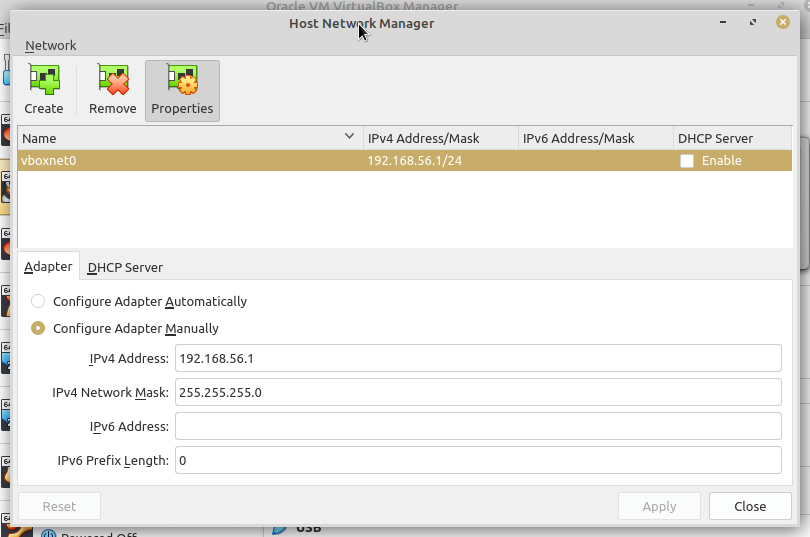
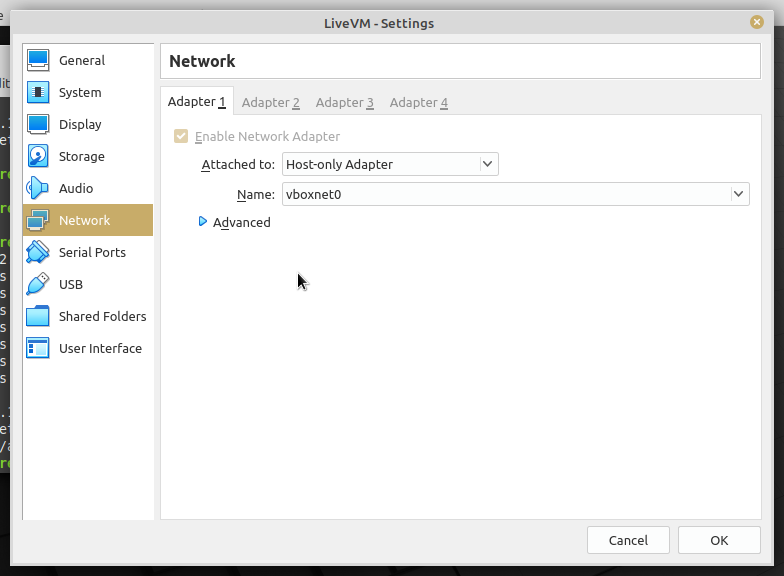
If you don't have one then create one by clicking "Create". Then assign the Host-only network to a VM.
#I don't recommend trying to remove it, all that seemed to happen is it stopped showing any of the DHCP servers but they kept working and were re-enabled and recreated after a restart of vbox
VBoxManage dhcpserver remove --network=HostInterfaceNetworking-vboxnet0
Step 3 - Enable DNS
apt install dnsmasq
Reading package lists... Done
Building dependency tree
Reading state information... Done
Suggested packages:
resolvconf
The following NEW packages will be installed:
dnsmasq
0 upgraded, 1 newly installed, 0 to remove and 587 not upgraded.
Need to get 16.5 kB of archives.
After this operation, 75.8 kB of additional disk space will be used.
Get:1 http://archive.ubuntu.com/ubuntu focal-updates/universe amd64 dnsmasq all 2.80-1.1ubuntu1.6 [16.5 kB]
Fetched 16.5 kB in 0s (44.9 kB/s)
Selecting previously unselected package dnsmasq.
(Reading database ... 467267 files and directories currently installed.)
Preparing to unpack .../dnsmasq_2.80-1.1ubuntu1.6_all.deb ...
Unpacking dnsmasq (2.80-1.1ubuntu1.6) ...
Setting up dnsmasq (2.80-1.1ubuntu1.6) ...
Created symlink /etc/systemd/system/multi-user.target.wants/dnsmasq.service → /lib/systemd/system/dnsmasq.service.
Processing triggers for systemd (245.4-4ubuntu3.19) ...
Set the relevant options
#We set the gateway as being our vboxnet0 IP of 192.168.56.1
echo "dhcp-option=option:router,192.168.56.1" >> /etc/dnsmasq.conf
echo "dhcp-option=option:dns-server,192.168.56.1" >> /etc/dnsmasq.conf
#We set the range of .2 to .150 (change as you need). It is nice to have some unused IPs in case you want to set your own static IPs
echo "dhcp-range=192.168.56.2,192.168.56.150,12h" >> /etc/dnsmasq.conf
# Set the interface to be vboxnet0 as we don't want this to be giving out IPs on the LAN!
echo "interface=vboxnet0" >> /etc/dnsmasq.conf
Restart dnsmasq to enable the changes above
systemctl restart dnsmasq
#enable dnsmasq on start otherwise DNS and DHCP won't work
systemctl enable dnsmasq
Restart virtualbox to apply our DNS server changes
#this normally won't work so it is best to reboot the machine or you'll probably still find that the vbox DHCP server is being used despite us having disabled it
systemctl restart virtualbox
Final Setup Steps
One issue in all of this is the fact that DNSMasq will not start when it tries to bind to interface vboxnet0 because it isn't created by VBox until a VM with the host-only network starts.
You will want a script that does this when you login or when the system boots:
#this command will create the hostonly interface vboxnet0 and then assign the proper IP to it and put it up
VBoxManage hostonlyif create
ifconfig vboxnet0 192.168.56.1 netmask 255.255.255.0 up
# this command restarts dnsmasq as it will initially fail without vboxnet0 being present
systemctl restart dnsmasq
One other lazy thing you could do is put this in a cronjob that runs each minute (as root).
*/1 * * * * /usr/bin/systemctl restart dnsmasq
Tags:
virtualbox, networking, mode, nat, bridgedvirtualbox, optimal, overlap, ips, vms, contactable, communicate, vm, communication, buggy, unstable, doesn, manual, forwarding, bridged, undesirable, eg, developing, lan, ip, accessible, users, hacks, default, vboxnet, adapter, assigned, allows, gateway, dns, provided, dhcp, forensics, via, enable, routing, edit, etc, sysctl, conf, ip_forwarding, reboot, ipv, ip_forward, instantly, echo, proc, sys, install, iptables, input, acccept, postrouting, masquerade, delete, hostonly, server, modified, statically, assign, servers, vboxmanage, dhcpservers, networkname, hostinterfacenetworking, dhcpd, loweripaddress, upperipaddress, networkmask, enabled, global, configuration, minleasetime, defaultleasetime, maxleasetime, suppressed, opts, legacy, groups, individual, configs, gui, disable, recreated, restart, vbox, dhcpserver, apt, dnsmasq, lists, dependency, packages, resolvconf, installed, upgraded, newly, kb, archives, additional, disk, http, archive, ubuntu, focal, updates, amd, fetched, selecting, previously, unselected, database, directories, currently, preparing, unpack, dnsmasq_, _all, deb, unpacking, symlink, systemd, multi, user, rarr, lib, processing, triggers, relevant, quot, router, unused, static, interface, systemctl, https, superuser, offers, addresses,