
RealTechTalk (RTT) - Linux/Server Administration/Related
We have years of knowledge with technology, especially in the IT (Information Technology) industry.
realtechtalk.com will always have fresh and useful information on a variety of subjects from Graphic Design, Server Administration, Web Hosting Industry and much more.
This site will specialize in unique topics and problems faced by web hosts, Unix/Linux administrators, web developers, computer technicians, hardware, networking, scripting, web design and much more. The aim of this site is to explain common problems and solutions in a simple way. Forums are ineffective because they have a lot of talk, but it's hard to find the answer you're looking for, and as we know, the answer is usually not there. No one has time to scour the net for forums and read pages of irrelevant information on different forums/threads. RTT just gives you what you're looking for.Top Posts
Virtualbox VBox Guest-utils drag and drop files stops working with Windows VMs
With a Linux host, sometimes for some reason, Windows drag and drop randomly stops working, even though the drag and drop is enabled in the VM, and even though the guest-utils are still installed and running in the VM.
I find this usually fixes it:
Reinstall or update the guest-utils driver within Windows and restart. Usually/hopefully that fixes it.
After that stop your VM and start it again and hopefully drag and drop works without aborting the VM.
How To Remove Ubuntu Netplan and Go Back to /etc/network/interfaces
You can just do this to get rid of netplan so you can keep the normal Debian /etc/network/interfaces
apt remove netplan.io
apt install -y ifupdown
Don't forget to actually populate /etc/network/interfaces now.
How To Force Flash an AMD Instinct GPU To Another Model Using Debian Ubuntu Mint Linux
Be careful with this and make sure you know what you're doing. In this example we took an Old AMD Instinct Mi25 GPU and flashed to WX9100, because both cards are essentially the same hardware (gfx900) but the WX9100 firmware will enable the miniDP port and also higher power and performance (Mi25 is capped at 110W vs WX9100 170W and of course makes use of the display).
Most guides on the internet for some reason have people using a physical ROM programmer, which works but is a lot more work and more finicky.
You can just use AMD's VBFlash tool like below:
./amdvbflash -f -fs -fa -fv -p 0 AMD.WX9100.16384.171219.rom
The -f -fs -fa and -fv are necessary in this case and does the following:
-f              Force flashing regardless of security checkings (e.g. AsicID &

                BIOS file info check OR boot-up card).

-fs             Force flashing bypassing BIOS SSID check.

-fa             Force flashing bypassing already-programmed check.

-fv             Force flashing bypassing newer BIOS version check.
Basically if you don't do the above, you will get complainst about the ROM being flashed already, or being newer or that the SSID does not match etc.. and it will then refuse to flash.
AMDVBFLASH version 4.71, Copyright (c) 2020 Advanced Micro Devices, Inc.


Old SSID: 0C35

New SSID: 0B0F

Old P/N: 113-D0513500-S00

New P/N: 113-D0510300-100

The result of RSA signature verify is PASS.

Old DeviceID: 6860

New DeviceID: 6861

Old Product Name: Vega10 D05133_110W 64Mx128 852e/945m

New Product Name: Vega10 D05103 64Mx128 16GB 852e/945m 1.00V

Old BIOS Version: 016.001.001.000.247666

New BIOS Version: 016.001.001.000.009259

Flash type: M25P80

Burst size is 256

40000/40000h bytes programmed

40000/40000h bytes verified


Restart System To Complete VBIOS Update.
After this reboot and you should find everything is good, that you have the 170W power cap and the GPU reports as WX9100.
How To compile ollama from source to use unsupported AMD GPU with rocm in Ubuntu Debian
compiling ollama from source by using a docker container with a prebuilt rocm 6.1 dev environment:
rocm/dev-ubuntu-22.04:6.1-complete
Install these packages first
apt install cmake git

apt install software-properties-common

add-apt-repository ppa:longsleep/golang-backports

apt install golang-go
Clone the repo
git clone https://github.com/ollama/ollama /rtt/ollamabuild
cd /rtt/ollamabuild
#set version we want eg v0.23.0
git checkout v0.23.0
Export these ENVs to make sure the compiler uses rocm and the right clang
export CC=/opt/rocm/bin/hipcc

export CXX=/opt/rocm/bin/hipcc

export ROCM_PATH=/opt/rocm

export HIP_PATH=/opt/rocm

export PATH=$PATH:/opt/rocm/bin:/opt/rocm/llvm/bin
Generate
go generate ./...
Build
go build .
If you get an error like below you didn't follow the packages install section at the beginning.
#go build .
go: errors parsing go.mod:
/src/ollama/go.mod:3: invalid go version '1.22.0': must match format 1.23
QEMU KVM Virtio GPU Windows Cannot Select 1080P
The latest Virtio drivers virtio-win-0.1.285-1 seem to have a bug where you can select several resolutions but not 1080P (1920x1080).

If you need 1080P go back to an earlier one from about 2023 such as virtio-win-0.1.240-1 and remember to uninstall the newer version first.
After this should you be able to see 1080P again.
Linux MInt users report the same issue with 1080P missing in newer Virtio.
Linux Gnome Desktop Ubuntu Mint Debian Gets Slower After Weeks
This has been an ongoing issue with X11 compositers like marco, unity and cinnamon etc... I find especially with an Nvidia GPU that as the system runs longer after a number of weeks or a number of months the GUI just gets slower and slower. It's not something you'll instantly notice but just a hint of lag here or there that gets worse.
One hint you'll find is by watching nvidia-smi and checking the utilization you will start seeing random spikes of 80-100% even without maxing out GPU RAM and with litle or not actual activity that should cause that usage. During this phase even swiching browser tabs might cause 80-100% spikes which is not normal. The usual suspects may be to close your browsers but that still won't fix it.
Use this guide here to reload your GUI without losing any existing windows.
After resetting the compositer utilization and GUI responsiveness should feel that same as restarting Xorg or the whole computer.
Firefox How to Save Full Page As Screenshot/PDF
Many people will say Ctrl + S or Ctrl + P and print as PDF but that won't allow you to share the page as it looks.
Just hit this on your keyboard to save the full page as a screenshot:
Ctrl + Shift + S
You will then see a popup on your top right that let's you save the visible portion or full page.
.png)
Nvidia Datacenter Driver Tesla Slow nvidia-smi response and high utilization with 0 usage
nvidia-smi

Tue Apr  7 15:48:11 2026

+-----------------------------------------------------------------------------------------+

| NVIDIA-SMI 570.211.01             Driver Version: 570.211.01     CUDA Version: 12.8     |

|-----------------------------------------+------------------------+----------------------+

| GPU  Name                 Persistence-M | Bus-Id          Disp.A | Volatile Uncorr. ECC |

| Fan  Temp   Perf          Pwr:Usage/Cap |           Memory-Usage | GPU-Util  Compute M. |

|                                         |                        |               MIG M. |

|=========================================+========================+======================|

|   0  Tesla M40 24GB                 Off |   00000000:05:00.0 Off |                    0 |

| N/A   29C    P0             56W /  250W |       0MiB /  23040MiB |     57%      Default |

|                                         |                        |                  N/A |

+-----------------------------------------+------------------------+----------------------+


+-----------------------------------------------------------------------------------------+

| Processes:                                                                              |

|  GPU   GI   CI              PID   Type   Process name                        GPU Memory |

|        ID   ID                                                               Usage      |

|=========================================================================================|

|  No running processes found                                                             |

+-----------------------------------------------------------------------------------------+
There are 0 processes using the GPU but it says 57% usage and nvidia-smi loads very slow. Here is the fix, just set power management like this:
nvidia-smi -pm 1
Enabled Legacy persistence mode for GPU 00000000:05:00.0.
All done.
Tue Apr  7 15:50:46 2026

+-----------------------------------------------------------------------------------------+

| NVIDIA-SMI 570.211.01             Driver Version: 570.211.01     CUDA Version: 12.8     |

|-----------------------------------------+------------------------+----------------------+

| GPU  Name                 Persistence-M | Bus-Id          Disp.A | Volatile Uncorr. ECC |

| Fan  Temp   Perf          Pwr:Usage/Cap |           Memory-Usage | GPU-Util  Compute M. |

|                                         |                        |               MIG M. |

|=========================================+========================+======================|

|   0  Tesla M40 24GB                 On  |   00000000:05:00.0 Off |                    0 |

| N/A   30C    P0             60W /  250W |       0MiB /  23040MiB |      0%      Default |

|                                         |                        |                  N/A |

+-----------------------------------------+------------------------+----------------------+


+-----------------------------------------------------------------------------------------+

| Processes:                                                                              |

|  GPU   GI   CI              PID   Type   Process name                        GPU Memory |

|        ID   ID                                                               Usage      |

|=========================================================================================|

|  No running processes found                                                             |

+-----------------------------------------------------------------------------------------+
ffmpeg how to normalize / increase the volume of your audio
It's very convenient that ffmpeg can also handle audio manipulation too.
Just modify the command below, We set the volume to 18.64db, so you can adjust to whatever you need.
ffmpeg -i input.mp4 -filter:a "loudnorm=I=-18.64:TP=-1.5:LRA=11" -c:v copy output.mp4
output.mp4 will now be normalized to whatever do you specified above.
kdenlive audio blips pops cracks artifacts solution fix
This usually happens because kdenlive is not smart enough to deal with multiple types of files, especially different frequency.
If you take a 44.1khz audio track and then add a 48khz track, you will definitely get the pops and clicks.
Use a tool like audacity or similar to do two things, flatten the audio tracks to mono and at least make sure both tracks have the same frequency.
I recommend changing both to 44.1khz.
After I did this and reimported the tracks back to kdenlive, I had no more popping.
haproxy / nginx certbot SSL issues
A lot of times I've seen questions about how this works when you have multiple nodes or a CDN, it can be quite tricky in theory if you have random IPs or several IPs.
The way certbot works at least for non-DNS challenges is that it will hit a random server that it resolves to, you have no control over which one it hits.
If certbot hits node 1 at first to tell it to create the well-known file, then checks node 2 or any other node, you will find auhorization fails.
Here is an example of this happening:
Saving debug log to /var/log/letsencrypt/letsencrypt.log

Plugins selected: Authenticator webroot, Installer None

Requesting a certificate for yourdomain.com

Performing the following challenges:

http-01 challenge for yourdomain.com

Using the webroot path /var/www/haproxy for all unmatched domains.

Waiting for verification...

Challenge failed for domain yourdomain.com

http-01 challenge for yourdomain.com

Cleaning up challenges

Some challenges have failed.


IMPORTANT NOTES:

 - The following errors were reported by the server:


   Domain: yourdomain.com

   Type:   connection

   Detail: During secondary validation: 192.168.80.166: Fetching

   http://yourdomain.com/.well-known/acme-challenge/nUKlCCEWf-HzUgrnLvPXZLQjmXUCOi4gC74jtRYbqp4:

   Connection refused


   To fix these errors, please make sure that your domain name was

   entered correctly and the DNS A/AAAA record(s) for that domain

   contain(s) the right IP address. Additionally, please check that

   your computer has a publicly routable IP address and that no

   firewalls are preventing the server from communicating with the

   client. If you're using the webroot plugin, you should also verify

   that you are serving files from the webroot path you provided.
Solution
The simplest solution is to just redirect ALL requests to a single node IP. That means all node IPs but the "main IP" let's call it 1.2.3.4, it means all other node IPs that get an .acme-challenge/well-known need to be redirected to 1.2.3.4 and then your problem is solved.
Eg. in haproxy do this on all but the node with the 1.2.3.4 IP.
backend letsencrypt

    server letsencrypt 1.2.3.4:80
If you do something like above, then it now means all requests will work because they are transparently redirected to a single server.
Other solutions that may be more practical could be DNS if you control it, or if you really want to be fancy, you could use shared storage for the challenges that exist on all proxy/CDN nodes.
nginx how to see the real IP when behind a CDN
If you run nginx behind a CDN, you will by default see the proxy/CDN IP instead of the real client.
Edit the global http { part of nginx.conf and add this:
# 1. Specify the IP address of your trusted proxy/load balancer

set_real_ip_from  1.2.3.4;
set_real_ip_from 5.2.3.4;
# 2. Specify which header contains the real client IP

real_ip_header    X-Forwarded-For;


# 3. Optional: Use 'real_ip_recursive' if you have multiple proxies

real_ip_recursive on;
In #1 you can of course specify multiple IP lines and even ranges.
Now you'll see in access.log that you get the real client IPs.
Docker how to find real container child process ID
If you do a top on your Docker host, you may find a process for apache2 is PID 1234 but that is not the same as ID as in your container due to separation of processes and memory from the main host.
Here is how you find the real PID within the docker container.
On your host do this where 1234 is your PID.
 cat /proc/1234/status|grep NSpid

NSpid:    1234
125172
The first ID we already know, it is 1234 the parentID but the second ID is the ID of the process as seen inside the actual docker container.
Alibaba Aliyun how to reset password solution 'Setup does not meet the requirements, please resetting'
Yes, it's real and it is not easy to reset the password. You will find conflicting information on the password requirements even with the same page it implies you need 2 examples of uppercase, lowercase, punctuation/symbols and numbers but that is false.
It is compounded worse that it never gives you the correct information below unless you are in private mode in your browser.
Here is what you really need for a working and insecure Alibaba password:
- 3 Uppercase Characters
- 3 lowercase characters
- 3 numbers
- length between 7-20 characters.
Do not use spaces, do not use special symbols or it will reject the password as: Setup does not meet the requirements, please resetting
Why is this confusing?
See what Alibaba's help page says/completely wrong:
If you can not sign in, please go to the Sign In page and click "Forgot Password?" to reset password.
When creating your new password, please ensure it is 6-20 characters long and contains at least two types from uppercase letters, lowercase letters, numbers, and punctuation.
RTL88X Series 80Mhz hostapd mode for Linux Debian Kali
Usually 80mhz for faster speed in 5G is not enabled in these drivers by default, so your speeds are about half of what they should or could be on 802.11ac.
If you try to enable 80mhz you will get errors like this from hostapd:
hostapd[2889289]: Configured VHT capability [VHT_CAP_SUPP_CHAN_WIDTH_MASK] exceeds max value supported by the driver (2 > 0)
This is an example of the 8821 driver (edit your relevant file based on driver):
edit this file: /etc/modprobe.d/8821au.conf
The default in most 88XX drivers is something like below:
options 8821au rtw_drv_log_level=1 rtw_led_ctrl=1 rtw_vht_enable=1 rtw_power_mgnt=1
Change rtw_vht_enable=1 to 2 to enable 80MHz
options 8821au rtw_drv_log_level=1 rtw_led_ctrl=1 rtw_vht_enable=2 rtw_power_mgnt=1
Once you change the above you should be able to enable 80mhz mode in hostapd. See some example configs here:
After doing this I was able to get up to 866mbit connectivity and real throughput of 500mbit.
How To Deploy Your Own Mastodon Server in Docker
This is based off the LinuxServer Mastodon Image and I believe this simplifies the bare basics of get things going because Mastodon is fairly complex but well worth the effort.
Why Mastodon?
For me, it's about having social freedom, when you use big tech there are MANY negative things that happen.
1.) They tap and mine all of your data for profit.
2.) You have 0 privacy and 0 benefits (no possible profits).
3.) 0 control over your social future, they can shadow ban you, content strike you, or directly ban or delete you at any point for any reason with 0 recourse.
4.) If you get hacked there is 0 recourse or at least not timely recovery. Some argue that some of the "big tech" platforms are made to be exploited and some report never getting back in.
With Mastodon you are now in control of your own social future, if you get hacked just redeploy your Mastodon server, no worrying about Zombie account run by hackers/state actors is being used to target and hack your contacts.
And finally no one can really censor you, perhaps some of the Mastodon servers could try to blacklist you but your contacts can always connect to you and see your posts no matter what happens.
Prerequisites
https://docs.joinmastodon.org/user/run-your-own/
1.) Docker
If you need to learn about Docker follow our tutorial here.
2.) A domain name. Buy one if you don't have one already.
3.) A public IP that your domain points to with a DNS A Record.
4.) A server to run Docker on, many will start by using a VPS.
Technical Prequisities:
- Redis DB
- PostgreSQL DB
- Separate Network in Docker
RAM: 4GB minimum (8G+ recommended and scale as your server grows)
Disk Space: 60G (scale as you grow)
Here are the stats on my single user Mastodon server with several posts:
We can see it uses about 1.2G of RAM.
CONTAINER ID   NAME                 CPU %     MEM USAGE / LIMIT     MEM %     NET I/O           BLOCK I/O        PIDS

123   mymasto   0.75%     1.203GiB / 488.7GiB   0.64%     13.1MB / 6.99MB   3.76MB / 235MB   89
Getting Started
Step 1.) Create Private Mastodon Docker Network
docker network create testnet
Of course change "testnet" to whatever you want to call your docker network. Adjust later in the mastodon docker command.
Step 2.) Setup our Redis and PostgreSQL Docker Containers
PostgreSQL Setup:
docker run -d

  --name=db

  --network=testnet

  -e POSTGRES_DB=mastodon

  -e POSTGRES_USER=mastodon

  -e POSTGRES_PASSWORD=mastodon

  -v $(pwd)/postgres-data:/var/lib/postgresql/data

  --restart unless-stopped

  postgres:15-alpine
Redis container Setup:
docker run -d --name=redis --network=testnet redis:7-alpine
Step 3.) Create Keys!
A series of keys are required for Mastodon to function which are:
- secret key base
- otp secret
- VAPID Private Key
- VAPID Public Key
- ACTIVE Record Deterministic Key
- ACTIVE Record Key Derivation Salt
- ACTIVE Record Primary Key
What we will do is create those keys and then assign them as variables in our shell/terminal so the command I provide "just works".
Create secret key base and otp secret:
secretkeybase=`openssl rand -hex 32`

otpsecret=`openssl rand -base64 24 | tr -d '+/=' | cut -c1-32`
Create VAPID Keys
docker run --rm -it --entrypoint /bin/bash lscr.io/linuxserver/mastodon:latest generate-vapid
VAPID_PRIVATE_KEY=L0NFoPp88NF1Bztfm6oB5av8CCxRTdtC0TotPq2l0sM=
VAPID_PUBLIC_KEY=BCpd6zkBm2vAlYOcLLm3xDh0Nwoqn1-iFHk4Ga2_MbKOuPg4qu9oMaYB11AEFjIYwMO9unHuweexmn5-_Qt3mek=
Copy and paste your output/those variables above to your shell or the next steps will not work. Do not copy our example above!
Create Active Record Keys
docker run --rm -it --entrypoint /bin/bash lscr.io/linuxserver/mastodon:latest generate-active-record
Add the following secret environment variables to your Mastodon environment (e.g. .env.production), ensure they are shared across all your nodes and do not change them after they are set:
# Do NOT change these variables once they are set

ACTIVE_RECORD_ENCRYPTION_DETERMINISTIC_KEY=d32iIjMgcSeePIwKGTHo699SO6VZE1br

ACTIVE_RECORD_ENCRYPTION_KEY_DERIVATION_SALT=7C1l6CGfAF5phaHZ1xeMP9DY5UN9VyOm

ACTIVE_RECORD_ENCRYPTION_PRIMARY_KEY=ey66K7Rpz40iMXdTqkn3DWGOxf62wEvX
Copy and paste your output/those variables above to your shell or the next steps will not work. Do not copy our example above!
Let's start Mastodon!
Remember to update --network=testnet if your network is not "testnet".
Update local_domain and web_domain to "thedomain.com" that you bought and pointed to your server.
docker run -d

  --network=testnet

  --name=mastodon

  -e PUID=1000

  -e PGID=1000

  -e TZ=Etc/UTC

  -e LOCAL_DOMAIN=example.com

  -e REDIS_HOST=redis

  -e REDIS_PORT=6379

  -e DB_HOST=db

  -e DB_USER=mastodon

  -e DB_NAME=mastodon

  -e DB_PASS=mastodon

  -e DB_PORT=5432

  -e ES_ENABLED=false

  -e ACTIVE_RECORD_ENCRYPTION_PRIMARY_KEY="$ACTIVE_RECORD_ENCRYPTION_PRIMARY_KEY"

  -e ACTIVE_RECORD_ENCRYPTION_DETERMINISTIC_KEY="$ACTIVE_RECORD_ENCRYPTION_DETERMINISTIC_KEY"

  -e ACTIVE_RECORD_ENCRYPTION_KEY_DERIVATION_SALT="$ACTIVE_RECORD_ENCRYPTION_KEY_DERIVATION_SALT"

  -e SECRET_KEY_BASE="$secretkeybase"

  -e OTP_SECRET="$otpsecret"

  -e VAPID_PRIVATE_KEY="$VAPID_PRIVATE_KEY"

  -e VAPID_PUBLIC_KEY="$VAPID_PUBLIC_KEY"

  -e SMTP_SERVER=mail.example.com

  -e SMTP_PORT=25

  -e SMTP_LOGIN=

  -e SMTP_PASSWORD=

  -e SMTP_FROM_ADDRESS=notifications@example.com

  -e S3_ENABLED=false

  -e WEB_DOMAIN=mastodon.example.com `#optional`

  -p 80:80

  -p 443:443

  -p 9394:9394 `#optional`

  -v /path/to/mastodon/config:/config

  --restart unless-stopped

  lscr.io/linuxserver/mastodon:latest
If this Mastodon is ONLY for you, then I recommend setting this environment variable too:
-e SINGLE_USER_MODE=true
That makes it so the server is in single user mode, so when you visit mastodon.example.com your main Mastodon/root page it will show all of your posts, otherwise users will see nothing unless they know your explicit account name/handle.
If all went well, you should be able to browse to "yourdomain.com" and see something like below:

Configure Your Mastodon Account
First create your admin user account and change "yourusername" to the username you want and of course "you@mail.com" to your e-mail address.
docker exec -it mastodon /tootctl accounts create yourusername --email you@mail.com --confirmed --role Owner
INFO 2026-02-09T07:16:55.002Z pid=759 tid=1xj: Sidekiq 8.0.9 connecting to Redis with options {size: 10, pool_name: "internal", url: "redis://redis:6379/0", driver: :hiredis}
OK
New password: yourautocreatedpass
The account won't work until you set it to "approved":
docker exec -it mastodon /tootctl accounts modify youruser --approve

OK
After that go to your mastodon domain and click login, use the e-mail address you set and the autogenerated password from earlier.
Example of my Mastodon home page with single user mode enabled.

What Next?
Aside from posting, you may want to join some relays to help blast out your posts to other Mastodon servers. Visibility will mainly be determined by hashtag #s.
How to add a relay
First find a relay you want at a place like relaylist.com
Copy and paste the URL that says "Mastodon Endpoint" eg. below you would use "https://relay.toot.io/inbox" don't just use the raw relay.toot.io as that is not the right URL and you will not get added if you use that wrong non Mastodon endpoint URL.

Go to your admin panel, then click "Administration" and then "Relays" and click the "Add new relay" button.

Now click "Add new relay"

Paste the URL of the relay endpoint and click "Save and Enable"

Now you can see your relay status and which ones are approved/active.

More Servers
You can search content aggregators like https://joinmastodon.org/servers to find other servers of like minded people and then follow them and start commenting to get found. You can still comment and follow users from other servers even though you are not part of their server since "Mastodon's talk to each other".
Of course use any legacy/censored social media platforms to let all of your friends know about your Mastodon and encourage them to get their own. Even without your own server, such as joining mastodon.social is much better because you can at least save and export your account at any point which means you have full control over your content and can restore at will on your own Mastodon or another Mastodon server.
ffmpeg burning subtitles in non-English errors [Parsed_subtitles_0 @ 0x561d3a0b3b80] Glyph 0x6709 not found, selecting one more font for (Sans, 700, 0)
Getting errors like this when burning non-English subtitles?
[Parsed_subtitles_0 @ 0x561d3a0b3b80] Glyph 0x6709 not found, selecting one more font for (Sans, 700, 0)

[Parsed_subtitles_0 @ 0x561d3a0b3b80] Glyph 0x4E9B not found, selecting one more font for (Sans, 700, 0)

[Parsed_subtitles_0 @ 0x561d3a0b3b80] Glyph 0x4EBA not found, selecting one more font for (Sans, 700, 0)

[Parsed_subtitles_0 @ 0x561d3a0b3b80] Glyph 0x505A not found, selecting one more font for (Sans, 700, 0)

[Parsed_subtitles_0 @ 0x561d3a0b3b80] Glyph 0x5BF9 not found, selecting one more font for (Sans, 700, 0)

[Parsed_subtitles_0 @ 0x561d3a0b3b80] Glyph 0x4E86 not found, selecting one more font for (Sans, 700, 0)

[Parsed_subtitles_0 @ 0x561d3a0b3b80] Glyph 0x6211 not found, selecting one more font for (Sans, 700, 0)
You may assume you don't have the Sans font or something is wrong with that, but it is usually you don't have the fonts package for the language you need. For example for Mandarin/Asian language install below.
apt install fonts-noto-cjk fonts-wqy-microhei
If in production and you are lazy just do this and install all possible font languages:
apt install fonts-*
Currently you are looking at about 4G of space but this is worth it if you will be using several different languages.
apt install fonts-*

Get:1 http://deb.debian.org/debian bullseye InRelease [75.1 kB]

Get:2 http://deb.debian.org/debian-security bullseye-security InRelease [27.2 kB]

Get:3 http://deb.debian.org/debian bullseye-updates InRelease [44.0 kB]

Get:4 http://deb.debian.org/debian bullseye/main amd64 Packages [8066 kB]

Get:5 http://deb.debian.org/debian-security bullseye-security/main amd64 Packages [444 kB]

Get:6 http://deb.debian.org/debian bullseye-updates/main amd64 Packages [18.8 kB]

Fetched 8675 kB in 2s (3618 kB/s)

Reading package lists... Done

Building dependency tree... Done

Reading state information... Done

18 packages can be upgraded. Run 'apt list --upgradable' to see them.

Reading package lists... Done

Building dependency tree... Done

Reading state information... Done

Note, selecting 'fonts-cantarell' for glob 'fonts-*'

Note, selecting 'fonts-hack-web' for glob 'fonts-*'

Note, selecting 'fonts-ipaexfont-gothic' for glob 'fonts-*'

Note, selecting 'fonts-sil-andika' for glob 'fonts-*'

Note, selecting 'fonts-tlwg-purisa-ttf' for glob 'fonts-*'

Note, selecting 'fonts-tibetan-machine' for glob 'fonts-*'

Note, selecting 'fonts-quattrocento' for glob 'fonts-*'

Note, selecting 'fonts-kacst-one' for glob 'fonts-*'

Note, selecting 'fonts-adf-berenis' for glob 'fonts-*'

Note, selecting 'fonts-jura' for glob 'fonts-*'

Note, selecting 'fonts-tlwg-waree-otf' for glob 'fonts-*'

Note, selecting 'fonts-lohit-beng-bengali' for glob 'fonts-*'

Note, selecting 'fonts-eurofurence' for glob 'fonts-*'

Note, selecting 'fonts-thai-tlwg-otf' for glob 'fonts-*'

Note, selecting 'fonts-cwtex-yen' for glob 'fonts-*'

Note, selecting 'fonts-tlwg-mono' for glob 'fonts-*'

Note, selecting 'fonts-gfs-complutum' for glob 'fonts-*'

Note, selecting 'fonts-train' for glob 'fonts-*'

Note, selecting 'fonts-sil-gentium' for glob 'fonts-*'

Note, selecting 'fonts-smc-dyuthi' for glob 'fonts-*'

Note, selecting 'fonts-apropal' for glob 'fonts-*'

Note, selecting 'fonts-thai-tlwg' for glob 'fonts-*'

Note, selecting 'fonts-tlwg-sawasdee-otf' for glob 'fonts-*'

Note, selecting 'fonts-oxygen' for glob 'fonts-*'

Note, selecting 'fonts-kiloji' for glob 'fonts-*'

Note, selecting 'fonts-tlwg-waree-ttf' for glob 'fonts-*'

Note, selecting 'fonts-cmu' for glob 'fonts-*'

Note, selecting 'fonts-thai-tlwg-ttf' for glob 'fonts-*'

Note, selecting 'fonts-sil-gentiumplus-compact' for glob 'fonts-*'

Note, selecting 'fonts-courier-prime' for glob 'fonts-*'

Note, selecting 'fonts-okolaks' for glob 'fonts-*'

Note, selecting 'fonts-adf-tribun' for glob 'fonts-*'

Note, selecting 'fonts-smc-meera' for glob 'fonts-*'

Note, selecting 'fonts-anonymous-pro' for glob 'fonts-*'

Note, selecting 'fonts-play' for glob 'fonts-*'

Note, selecting 'fonts-thai-tlwg-web' for glob 'fonts-*'

Note, selecting 'fonts-tlwg-kinnari' for glob 'fonts-*'

Note, selecting 'fonts-femkeklaver' for glob 'fonts-*'

Note, selecting 'fonts-sil-harmattan' for glob 'fonts-*'

Note, selecting 'fonts-teluguvijayam' for glob 'fonts-*'

Note, selecting 'fonts-tlwg-sawasdee' for glob 'fonts-*'

Note, selecting 'fonts-dosis' for glob 'fonts-*'

Note, selecting 'fonts-tlwg-sawasdee-ttf' for glob 'fonts-*'

Note, selecting 'fonts-dkg-handwriting' for glob 'fonts-*'

Note, selecting 'fonts-proggy' for glob 'fonts-*'

Note, selecting 'fonts-ipaexfont' for glob 'fonts-*'

Note, selecting 'fonts-gfs-solomos' for glob 'fonts-*'

Note, selecting 'fonts-yozvox-yozfont-new-kana' for glob 'fonts-*'

Note, selecting 'fonts-smc-suruma' for glob 'fonts-*'

Note, selecting 'fonts-umeplus-cl' for glob 'fonts-*'

Note, selecting 'fonts-terminus' for glob 'fonts-*'

Note, selecting 'fonts-komatuna' for glob 'fonts-*'

Note, selecting 'fonts-mononoki' for glob 'fonts-*'

Note, selecting 'fonts-orya-extra' for glob 'fonts-*'

Note, selecting 'fonts-ubuntu-title' for glob 'fonts-*'

Note, selecting 'fonts-lao' for glob 'fonts-*'

Note, selecting 'fonts-adf-mekanus' for glob 'fonts-*'

Note, selecting 'fonts-lyx' for glob 'fonts-*'

Note, selecting 'fonts-gfs-theokritos' for glob 'fonts-*'

Note, selecting 'fonts-wqy-zenhei' for glob 'fonts-*'

Note, selecting 'fonts-sil-shimenkan-taogu' for glob 'fonts-*'

Note, selecting 'fonts-noto-unhinted' for glob 'fonts-*'

Note, selecting 'fonts-hosny-thabit' for glob 'fonts-*'

Note, selecting 'fonts-sil-gentiumplus' for glob 'fonts-*'

Note, selecting 'fonts-adf-irianis' for glob 'fonts-*'

Note, selecting 'fonts-cwtex-docs' for glob 'fonts-*'

Note, selecting 'fonts-tlwg-typist' for glob 'fonts-*'

Note, selecting 'fonts-khmeros' for glob 'fonts-*'

Note, selecting 'fonts-smc' for glob 'fonts-*'

Note, selecting 'fonts-oradano-mincho-gsrr' for glob 'fonts-*'

Note, selecting 'fonts-sil-shimenkan' for glob 'fonts-*'

Note, selecting 'fonts-unikurdweb' for glob 'fonts-*'

Note, selecting 'fonts-monoid-loose' for glob 'fonts-*'

Note, selecting 'fonts-dejavu' for glob 'fonts-*'

Note, selecting 'fonts-cegui' for glob 'fonts-*'

Note, selecting 'fonts-gfs-neohellenic' for glob 'fonts-*'

Note, selecting 'fonts-klee' for glob 'fonts-*'

Note, selecting 'fonts-smc-karumbi' for glob 'fonts-*'

Note, selecting 'fonts-atarismall' for glob 'fonts-*'

Note, selecting 'fonts-gfs-baskerville' for glob 'fonts-*'

Note, selecting 'fonts-knda' for glob 'fonts-*'

Note, selecting 'fonts-tiresias' for glob 'fonts-*'

Note, selecting 'fonts-humor-sans' for glob 'fonts-*'

Note, selecting 'fonts-elstob' for glob 'fonts-*'

Note, selecting 'fonts-noto-cjk-extra' for glob 'fonts-*'

Note, selecting 'fonts-gubbi' for glob 'fonts-*'

Note, selecting 'fonts-dzongkha' for glob 'fonts-*'

Note, selecting 'fonts-tlwg-garuda' for glob 'fonts-*'

Note, selecting 'fonts-tlwg-purisa' for glob 'fonts-*'

Note, selecting 'fonts-fork-awesome' for glob 'fonts-*'

Note, selecting 'fonts-lemonada' for glob 'fonts-*'

Note, selecting 'fonts-averia-sans-gwf' for glob 'fonts-*'

Note, selecting 'fonts-sil-andikanewbasic' for glob 'fonts-*'

Note, selecting 'fonts-b612' for glob 'fonts-*'

Note, selecting 'fonts-linex' for glob 'fonts-*'

Note, selecting 'fonts-millimetre' for glob 'fonts-*'

Note, selecting 'fonts-rampart' for glob 'fonts-*'

Note, selecting 'fonts-tlwg-norasi-otf' for glob 'fonts-*'

Note, selecting 'fonts-ocr-a' for glob 'fonts-*'

Note, selecting 'fonts-ocr-b' for glob 'fonts-*'

Note, selecting 'fonts-ancient-scripts' for glob 'fonts-*'

Note, selecting 'fonts-tlwg-typo-otf' for glob 'fonts-*'

Note, selecting 'fonts-staypuft' for glob 'fonts-*'

Note, selecting 'fonts-migmix' for glob 'fonts-*'

Note, selecting 'fonts-vollkorn' for glob 'fonts-*'

Note, selecting 'fonts-croscore' for glob 'fonts-*'

Note, selecting 'fonts-osifont' for glob 'fonts-*'

Note, selecting 'fonts-aenigma' for glob 'fonts-*'

Note, selecting 'fonts-ricty-diminished' for glob 'fonts-*'

Note, selecting 'fonts-lohit-gujr' for glob 'fonts-*'

Note, selecting 'fonts-lohit-guru' for glob 'fonts-*'

Note, selecting 'fonts-rocknroll' for glob 'fonts-*'

Note, selecting 'fonts-tlwg-norasi-ttf' for glob 'fonts-*'

Note, selecting 'fonts-tlwg-typo-ttf' for glob 'fonts-*'

Note, selecting 'fonts-sil-lateef' for glob 'fonts-*'

Note, selecting 'fonts-roboto-fontface' for glob 'fonts-*'

Note, selecting 'fonts-lindenhill' for glob 'fonts-*'

Note, selecting 'fonts-monoid-tight' for glob 'fonts-*'

Note, selecting 'fonts-material-design-icons-iconfont' for glob 'fonts-*'

Note, selecting 'fonts-lobster' for glob 'fonts-*'

Note, selecting 'fonts-jetbrains-mono' for glob 'fonts-*'

Note, selecting 'fonts-beteckna' for glob 'fonts-*'

Note, selecting 'fonts-lato' for glob 'fonts-*'

Note, selecting 'fonts-yozvox-yozfont' for glob 'fonts-*'

Note, selecting 'fonts-averia-serif-gwf' for glob 'fonts-*'

Note, selecting 'fonts-opendyslexic' for glob 'fonts-*'

Note, selecting 'fonts-fantasque-sans' for glob 'fonts-*'

Note, selecting 'fonts-le-murmure' for glob 'fonts-*'

Note, selecting 'fonts-lohit-mlym' for glob 'fonts-*'

Note, selecting 'fonts-ldco' for glob 'fonts-*'

Note, selecting 'fonts-sil-annapurnasil' for glob 'fonts-*'

Note, selecting 'fonts-reggae' for glob 'fonts-*'

Note, selecting 'fonts-takao-mincho' for glob 'fonts-*'

Note, selecting 'fonts-meera-taml' for glob 'fonts-*'

Note, selecting 'fonts-sil-taiheritagepro' for glob 'fonts-*'

Note, selecting 'fonts-sil-doulos' for glob 'fonts-*'

Note, selecting 'fonts-eeyek' for glob 'fonts-*'

Note, selecting 'fonts-gnutypewriter' for glob 'fonts-*'

Note, selecting 'fonts-yanone-kaffeesatz' for glob 'fonts-*'

Note, selecting 'fonts-sil-ezra' for glob 'fonts-*'

Note, selecting 'fonts-nanum-extra' for glob 'fonts-*'

Note, selecting 'fonts-arphic-gkai00mp' for glob 'fonts-*'

Note, selecting 'fonts-kouzan-mouhitsu' for glob 'fonts-*'

Note, selecting 'fonts-povray' for glob 'fonts-*'

Note, selecting 'fonts-lohit-devanagari' for glob 'fonts-*'

Note, selecting 'fonts-alee' for glob 'fonts-*'

Note, selecting 'fonts-takao-gothic' for glob 'fonts-*'

Note, selecting 'fonts-wine' for glob 'fonts-*'

Note, selecting 'fonts-terminus-otb' for glob 'fonts-*'

Note, selecting 'fonts-smc-manjari' for glob 'fonts-*'

Note, selecting 'fonts-oflb-asana-math' for glob 'fonts-*'

Note, selecting 'fonts-sil-doulos-compact' for glob 'fonts-*'

Note, selecting 'fonts-telu-extra' for glob 'fonts-*'

Note, selecting 'fonts-lohit-deva-nepali' for glob 'fonts-*'

Note, selecting 'fonts-motoya-l-cedar' for glob 'fonts-*'

Note, selecting 'fonts-summersby' for glob 'fonts-*'

Note, selecting 'fonts-ddc-uchen' for glob 'fonts-*'

Note, selecting 'fonts-misaki' for glob 'fonts-*'

Note, selecting 'fonts-motoya-l-maruberi' for glob 'fonts-*'

Note, selecting 'fonts-ebgaramond' for glob 'fonts-*'

Note, selecting 'fonts-mmcedar' for glob 'fonts-*'

Note, selecting 'fonts-tlwg-typist-otf' for glob 'fonts-*'

Note, selecting 'fonts-samyak-gujr' for glob 'fonts-*'

Note, selecting 'fonts-sil-gentium-plus' for glob 'fonts-*'

Note, selecting 'fonts-sil-shimenkan-zonghe' for glob 'fonts-*'

Note, selecting 'fonts-yozvox-yozfont-antique' for glob 'fonts-*'

Note, selecting 'fonts-materialdesignicons-webfont' for glob 'fonts-*'

Note, selecting 'fonts-sil-galatia' for glob 'fonts-*'

Note, selecting 'fonts-aoyagi-soseki' for glob 'fonts-*'

Note, selecting 'fonts-hosny-amiri' for glob 'fonts-*'

Note, selecting 'fonts-tlwg-typo' for glob 'fonts-*'

Note, selecting 'fonts-opendin' for glob 'fonts-*'

Note, selecting 'fonts-tlwg-garuda-otf' for glob 'fonts-*'

Note, selecting 'fonts-adf-oldania' for glob 'fonts-*'

Note, selecting 'fonts-noto-hinted' for glob 'fonts-*'

Note, selecting 'fonts-comic-neue' for glob 'fonts-*'

Note, selecting 'fonts-aksharyogini2' for glob 'fonts-*'

Note, selecting 'fonts-noto-mono' for glob 'fonts-*'

Note, selecting 'fonts-roadgeek' for glob 'fonts-*'

Note, selecting 'fonts-tlwg-typist-ttf' for glob 'fonts-*'

Note, selecting 'fonts-adf-verana' for glob 'fonts-*'

Note, selecting 'fonts-ferrite-core' for glob 'fonts-*'

Note, selecting 'fonts-cabin' for glob 'fonts-*'

Note, selecting 'fonts-adf-gillius' for glob 'fonts-*'

Note, selecting 'fonts-dclfonts' for glob 'fonts-*'

Note, selecting 'fonts-tlwg-garuda-ttf' for glob 'fonts-*'

Note, selecting 'fonts-dotgothic16' for glob 'fonts-*'

Note, selecting 'fonts-sil-annapurna' for glob 'fonts-*'

Note, selecting 'fonts-dustin' for glob 'fonts-*'

Note, selecting 'fonts-havana' for glob 'fonts-*'

Note, selecting 'fonts-glyphicons-halflings' for glob 'fonts-*'

Note, selecting 'fonts-sahadeva' for glob 'fonts-*'

Note, selecting 'fonts-samyak-mlym' for glob 'fonts-*'

Note, selecting 'fonts-stick' for glob 'fonts-*'

Note, selecting 'fonts-ebgaramond-extra' for glob 'fonts-*'

Note, selecting 'fonts-sambhota-tsugring' for glob 'fonts-*'

Note, selecting 'fonts-opensymbol' for glob 'fonts-*'

Note, selecting 'fonts-sil-charis' for glob 'fonts-*'

Note, selecting 'fonts-samyak' for glob 'fonts-*'

Note, selecting 'fonts-lexi-saebom' for glob 'fonts-*'

Note, selecting 'fonts-elusive-icons' for glob 'fonts-*'

Note, selecting 'fonts-agave' for glob 'fonts-*'

Note, selecting 'fonts-sil-gentiumpluscompact' for glob 'fonts-*'

Note, selecting 'fonts-sil-akatab' for glob 'fonts-*'

Note, selecting 'fonts-jsmath' for glob 'fonts-*'

Note, selecting 'fonts-arphic-uming' for glob 'fonts-*'

Note, selecting 'fonts-recommended' for glob 'fonts-*'

Note, selecting 'fonts-ipamj-mincho' for glob 'fonts-*'

Note, selecting 'fonts-entypo' for glob 'fonts-*'

Note, selecting 'fonts-clear-sans' for glob 'fonts-*'

Note, selecting 'fonts-inconsolata' for glob 'fonts-*'

Note, selecting 'fonts-sil-alkalami' for glob 'fonts-*'

Note, selecting 'fonts-symbola' for glob 'fonts-*'

Note, selecting 'fonts-bajaderka' for glob 'fonts-*'

Note, selecting 'fonts-yusei-magic' for glob 'fonts-*'

Note, selecting 'fonts-yozvox-yozfont-standard-kana' for glob 'fonts-*'

Note, selecting 'fonts-hanazono' for glob 'fonts-*'

Note, selecting 'fonts-beng' for glob 'fonts-*'

Note, selecting 'fonts-gujr' for glob 'fonts-*'

Note, selecting 'fonts-guru' for glob 'fonts-*'

Note, selecting 'fonts-gfs-bodoni-classic' for glob 'fonts-*'

Note, selecting 'fonts-cardo' for glob 'fonts-*'

Note, selecting 'fonts-sil-shimenkan-salaowu' for glob 'fonts-*'

Note, selecting 'fonts-smc-chilanka' for glob 'fonts-*'

Note, selecting 'fonts-breip' for glob 'fonts-*'

Note, selecting 'fonts-babelstone-han' for glob 'fonts-*'

Note, selecting 'fonts-oflb-euterpe' for glob 'fonts-*'

Note, selecting 'fonts-babelstone-modern' for glob 'fonts-*'

Note, selecting 'fonts-sil-padauk' for glob 'fonts-*'

Note, selecting 'fonts-sil-shimenkan-guifan' for glob 'fonts-*'

Note, selecting 'fonts-naver-d2coding' for glob 'fonts-*'

Note, selecting 'fonts-cns11643-pixmaps' for glob 'fonts-*'

Note, selecting 'fonts-lohit-taml' for glob 'fonts-*'

Note, selecting 'fonts-roboto-hinted' for glob 'fonts-*'

Note, selecting 'fonts-mplus' for glob 'fonts-*'

Note, selecting 'fonts-urw-base35' for glob 'fonts-*'

Note, selecting 'fonts-gamaliel' for glob 'fonts-*'

Note, selecting 'fonts-manchufont' for glob 'fonts-*'

Note, selecting 'fonts-beng-extra' for glob 'fonts-*'

Note, selecting 'fonts-engadget' for glob 'fonts-*'

Note, selecting 'fonts-mlym' for glob 'fonts-*'

Note, selecting 'fonts-johnsmith-induni' for glob 'fonts-*'

Note, selecting 'fonts-lohit-telu' for glob 'fonts-*'

Note, selecting 'fonts-farsiweb' for glob 'fonts-*'

Note, selecting 'fonts-powerline-extra' for glob 'fonts-*'

Note, selecting 'fonts-konatu' for glob 'fonts-*'

Note, selecting 'fonts-league-mono' for glob 'fonts-*'

Note, selecting 'fonts-mikachan' for glob 'fonts-*'

Note, selecting 'fonts-compagnon' for glob 'fonts-*'

Note, selecting 'fonts-senamirmir-washra' for glob 'fonts-*'

Note, selecting 'fonts-georgewilliams' for glob 'fonts-*'

Note, selecting 'fonts-mona' for glob 'fonts-*'

Note, selecting 'fonts-klaudia-berenika' for glob 'fonts-*'

Note, selecting 'fonts-sil-mondulkiri' for glob 'fonts-*'

Note, selecting 'fonts-comfortaa' for glob 'fonts-*'

Note, selecting 'fonts-hack' for glob 'fonts-*'

Note, selecting 'fonts-gfs-porson' for glob 'fonts-*'

Note, selecting 'fonts-gfs-gazis' for glob 'fonts-*'

Note, selecting 'fonts-joscelyn' for glob 'fonts-*'

Note, selecting 'fonts-umeplus' for glob 'fonts-*'

Note, selecting 'fonts-noto-core' for glob 'fonts-*'

Note, selecting 'fonts-lobstertwo' for glob 'fonts-*'

Note, selecting 'fonts-levien-typoscript' for glob 'fonts-*'

Note, selecting 'fonts-kanjistrokeorders' for glob 'fonts-*'

Note, selecting 'fonts-bwht' for glob 'fonts-*'

Note, selecting 'fonts-essays1743' for glob 'fonts-*'

Note, selecting 'fonts-seto' for glob 'fonts-*'

Note, selecting 'fonts-arphic-uming-mbe' for glob 'fonts-*'

Note, selecting 'fonts-woowa-hanna' for glob 'fonts-*'

Note, selecting 'fonts-quicksand' for glob 'fonts-*'

Note, selecting 'fonts-tlwg-umpush-otf' for glob 'fonts-*'

Note, selecting 'fonts-circos-symbols' for glob 'fonts-*'

Note, selecting 'fonts-3270' for glob 'fonts-*'

Note, selecting 'fonts-tlwg-laksaman' for glob 'fonts-*'

Note, selecting 'fonts-gujr-extra' for glob 'fonts-*'

Note, selecting 'fonts-arphic-bsmi00lp' for glob 'fonts-*'

Note, selecting 'fonts-sawarabi-mincho' for glob 'fonts-*'

Note, selecting 'fonts-dejima-mincho' for glob 'fonts-*'

Note, selecting 'fonts-gemunu-libre' for glob 'fonts-*'

Note, selecting 'fonts-spleen' for glob 'fonts-*'

Note, selecting 'fonts-droid' for glob 'fonts-*'

Note, selecting 'fonts-lohit-deva' for glob 'fonts-*'

Note, selecting 'fonts-rit-sundar' for glob 'fonts-*'

Note, selecting 'fonts-gargi' for glob 'fonts-*'

Note, selecting 'fonts-tuffy' for glob 'fonts-*'

Note, selecting 'fonts-sipa-arundina' for glob 'fonts-*'

Note, selecting 'fonts-go' for glob 'fonts-*'

Note, selecting 'fonts-pc' for glob 'fonts-*'

Note, selecting 'fonts-wqy-microhei' for glob 'fonts-*'

Note, selecting 'fonts-cns11643-kai' for glob 'fonts-*'

Note, selecting 'fonts-evertype-conakry' for glob 'fonts-*'

Note, selecting 'fonts-adf-ikarius' for glob 'fonts-*'

Note, selecting 'fonts-liberation' for glob 'fonts-*'

Note, selecting 'fonts-tlwg-umpush-ttf' for glob 'fonts-*'

Note, selecting 'fonts-texgyre' for glob 'fonts-*'

Note, selecting 'fonts-samyak-taml' for glob 'fonts-*'

Note, selecting 'fonts-sawarabi-gothic' for glob 'fonts-*'

Note, selecting 'fonts-monapo' for glob 'fonts-*'

Note, selecting 'fonts-paktype' for glob 'fonts-*'

Note, selecting 'fonts-league-spartan' for glob 'fonts-*'

Note, selecting 'fonts-kaushanscript' for glob 'fonts-*'

Note, selecting 'fonts-ecolier-lignes-court' for glob 'fonts-*'

Note, selecting 'fonts-sil-dai-banna' for glob 'fonts-*'

Note, selecting 'fonts-monofur' for glob 'fonts-*'

Note, selecting 'fonts-pc-extra' for glob 'fonts-*'

Note, selecting 'fonts-tlwg-mono-otf' for glob 'fonts-*'

Note, selecting 'fonts-kacst' for glob 'fonts-*'

Note, selecting 'fonts-noto-ui-extra' for glob 'fonts-*'

Note, selecting 'fonts-karmilla' for glob 'fonts-*'

Note, selecting 'fonts-yrsa-rasa' for glob 'fonts-*'

Note, selecting 'fonts-stix' for glob 'fonts-*'

Note, selecting 'fonts-monoid-halfloose' for glob 'fonts-*'

Note, selecting 'fonts-adf-accanthis' for glob 'fonts-*'

Note, selecting 'fonts-unfonts-core' for glob 'fonts-*'

Note, selecting 'fonts-smc-keraleeyam' for glob 'fonts-*'

Note, selecting 'fonts-tlwg-mono-ttf' for glob 'fonts-*'

Note, selecting 'fonts-mathjax' for glob 'fonts-*'

Note, selecting 'fonts-crosextra-caladea' for glob 'fonts-*'

Note, selecting 'fonts-monlam' for glob 'fonts-*'

Note, selecting 'fonts-lohit-orya' for glob 'fonts-*'

Note, selecting 'fonts-adf-switzera' for glob 'fonts-*'

Note, selecting 'fonts-arphic-gbsn00lp' for glob 'fonts-*'

Note, selecting 'fonts-nanum-coding' for glob 'fonts-*'

Note, selecting 'fonts-japanese-mincho' for glob 'fonts-*'

Note, selecting 'fonts-monoid' for glob 'fonts-*'

Note, selecting 'fonts-tomsontalks' for glob 'fonts-*'

Note, selecting 'fonts-yozvox-yozfont-cute' for glob 'fonts-*'

Note, selecting 'fonts-noto-color-emoji' for glob 'fonts-*'

Note, selecting 'fonts-tlwg-typewriter' for glob 'fonts-*'

Note, selecting 'fonts-triod-postnaja' for glob 'fonts-*'

Note, selecting 'fonts-taml-tamu' for glob 'fonts-*'

Note, selecting 'fonts-kalapi' for glob 'fonts-*'

Note, selecting 'fonts-noto' for glob 'fonts-*'

Note, selecting 'fonts-campania' for glob 'fonts-*'

Note, selecting 'fonts-samyak-deva' for glob 'fonts-*'

Note, selecting 'fonts-horai-umefont' for glob 'fonts-*'

Note, selecting 'fonts-japanese-gothic' for glob 'fonts-*'

Note, selecting 'fonts-aoyagi-kouzan-t' for glob 'fonts-*'

Note, selecting 'fonts-junction' for glob 'fonts-*'

Note, selecting 'fonts-noto-extra' for glob 'fonts-*'

Note, selecting 'fonts-meera-inimai' for glob 'fonts-*'

Note, selecting 'fonts-font-awesome' for glob 'fonts-*'

Note, selecting 'fonts-karla' for glob 'fonts-*'

Note, selecting 'fonts-vlgothic' for glob 'fonts-*'

Note, selecting 'fonts-smc-rachana' for glob 'fonts-*'

Note, selecting 'fonts-gotico-antiqua' for glob 'fonts-*'

Note, selecting 'fonts-navilu' for glob 'fonts-*'

Note, selecting 'fonts-sil-andika-compact' for glob 'fonts-*'

Note, selecting 'fonts-ukij-uyghur' for glob 'fonts-*'

Note, selecting 'fonts-baekmuk' for glob 'fonts-*'

Note, selecting 'fonts-taml' for glob 'fonts-*'

Note, selecting 'fonts-cwtex-ming' for glob 'fonts-*'

Note, selecting 'fonts-katex' for glob 'fonts-*'

Note, selecting 'fonts-noto-cjk' for glob 'fonts-*'

Note, selecting 'fonts-roboto' for glob 'fonts-*'

Note, selecting 'fonts-smc-uroob' for glob 'fonts-*'

Note, selecting 'fonts-cherrybomb' for glob 'fonts-*'

Note, selecting 'fonts-adf-romande' for glob 'fonts-*'

Note, selecting 'fonts-blankenburg' for glob 'fonts-*'

Note, selecting 'fonts-lmodern' for glob 'fonts-*'

Note, selecting 'fonts-prociono' for glob 'fonts-*'

Note, selecting 'fonts-telu' for glob 'fonts-*'

Note, selecting 'fonts-fanwood' for glob 'fonts-*'

Note, selecting 'fonts-liberation2' for glob 'fonts-*'

Note, selecting 'fonts-nanum-eco' for glob 'fonts-*'

Note, selecting 'fonts-sil-nuosusil' for glob 'fonts-*'

Note, selecting 'fonts-monoid-halftight' for glob 'fonts-*'

Note, selecting 'fonts-adf-solothurn' for glob 'fonts-*'

Note, selecting 'fonts-goudybookletter' for glob 'fonts-*'

Note, selecting 'fonts-noto-ui-core' for glob 'fonts-*'

Note, selecting 'fonts-smc-raghumalayalamsans' for glob 'fonts-*'

Note, selecting 'fonts-roboto-slab' for glob 'fonts-*'

Note, selecting 'fonts-gfs-artemisia' for glob 'fonts-*'

Note, selecting 'fonts-leckerli-one' for glob 'fonts-*'

Note, selecting 'fonts-sil-scheherazade' for glob 'fonts-*'

Note, selecting 'fonts-nafees' for glob 'fonts-*'

Note, selecting 'fonts-uralic' for glob 'fonts-*'

Note, selecting 'fonts-tlwg-kinnari-otf' for glob 'fonts-*'

Note, selecting 'fonts-nakula' for glob 'fonts-*'

Note, selecting 'fonts-lohit-tamil-classical' for glob 'fonts-*'

Note, selecting 'fonts-ecolier-court' for glob 'fonts-*'

Note, selecting 'fonts-gfs-didot' for glob 'fonts-*'

Note, selecting 'fonts-freefont-otf' for glob 'fonts-*'

Note, selecting 'fonts-sil-gentium-basic' for glob 'fonts-*'

Note, selecting 'fonts-arabeyes' for glob 'fonts-*'

Note, selecting 'fonts-cwtex-heib' for glob 'fonts-*'

Note, selecting 'fonts-samyak-orya' for glob 'fonts-*'

Note, selecting 'fonts-nanum' for glob 'fonts-*'

Note, selecting 'fonts-dancingscript' for glob 'fonts-*'

Note, selecting 'fonts-lohit-beng-assamese' for glob 'fonts-*'

Note, selecting 'fonts-yozvox-yozfont-edu' for glob 'fonts-*'

Note, selecting 'fonts-kristi' for glob 'fonts-*'

Note, selecting 'fonts-sil-shimenkan-gsm' for glob 'fonts-*'

Note, selecting 'fonts-lexi-gulim' for glob 'fonts-*'

Note, selecting 'fonts-taml-tscu' for glob 'fonts-*'

Note, selecting 'fonts-arphic-ukai' for glob 'fonts-*'

Note, selecting 'fonts-tlwg-kinnari-ttf' for glob 'fonts-*'

Note, selecting 'fonts-freefont' for glob 'fonts-*'

Note, selecting 'fonts-linuxlibertine' for glob 'fonts-*'

Note, selecting 'fonts-freefont-ttf' for glob 'fonts-*'

Note, selecting 'fonts-gfs-olga' for glob 'fonts-*'

Note, selecting 'fonts-smc-anjalioldlipi' for glob 'fonts-*'

Note, selecting 'fonts-dejavu-core' for glob 'fonts-*'

Note, selecting 'fonts-lklug-sinhala' for glob 'fonts-*'

Note, selecting 'fonts-pagul' for glob 'fonts-*'

Note, selecting 'fonts-tlwg-loma-otf' for glob 'fonts-*'

Note, selecting 'fonts-cwtex-fs' for glob 'fonts-*'

Note, selecting 'fonts-deva' for glob 'fonts-*'

Note, selecting 'fonts-allerta' for glob 'fonts-*'

Note, selecting 'fonts-oldstandard' for glob 'fonts-*'

Note, selecting 'fonts-mathjax-extras' for glob 'fonts-*'

Note, selecting 'fonts-sil-shimenkan-mas' for glob 'fonts-*'

Note, selecting 'fonts-junicode' for glob 'fonts-*'

Note, selecting 'fonts-sil-shimenkan-mgs' for glob 'fonts-*'

Note, selecting 'fonts-sil-zaghawa-beria' for glob 'fonts-*'

Note, selecting 'fonts-tlwg-loma' for glob 'fonts-*'

Note, selecting 'fonts-sil-shimenkan-sapushan' for glob 'fonts-*'

Note, selecting 'fonts-powerline' for glob 'fonts-*'

Note, selecting 'fonts-woowa-bm' for glob 'fonts-*'

Note, selecting 'fonts-tlwg-norasi' for glob 'fonts-*'

Note, selecting 'fonts-arapey' for glob 'fonts-*'

Note, selecting 'fonts-sil-mingzat' for glob 'fonts-*'

Note, selecting 'fonts-deva-extra' for glob 'fonts-*'

Note, selecting 'fonts-arkpandora' for glob 'fonts-*'

Note, selecting 'fonts-dejavu-extra' for glob 'fonts-*'

Note, selecting 'fonts-tlwg-laksaman-otf' for glob 'fonts-*'

Note, selecting 'fonts-sil-abyssinica' for glob 'fonts-*'

Note, selecting 'fonts-solide-mirage' for glob 'fonts-*'

Note, selecting 'fonts-tlwg-loma-ttf' for glob 'fonts-*'

Note, selecting 'fonts-tlwg-umpush' for glob 'fonts-*'

Note, selecting 'fonts-hermit' for glob 'fonts-*'

Note, selecting 'fonts-bebas-neue' for glob 'fonts-*'

Note, selecting 'fonts-unfonts-extra' for glob 'fonts-*'

Note, selecting 'fonts-bpg-georgian' for glob 'fonts-*'

Note, selecting 'fonts-arundina' for glob 'fonts-*'

Note, selecting 'fonts-isabella' for glob 'fonts-*'

Note, selecting 'fonts-sil-mondulkiri-extra' for glob 'fonts-*'

Note, selecting 'fonts-levien-museum' for glob 'fonts-*'

Note, selecting 'fonts-glasstty' for glob 'fonts-*'

Note, selecting 'fonts-sil-awami-nastaliq' for glob 'fonts-*'

Note, selecting 'fonts-freefarsi' for glob 'fonts-*'

Note, selecting 'fonts-sjfonts' for glob 'fonts-*'

Note, selecting 'fonts-gfs-didot-classic' for glob 'fonts-*'

Note, selecting 'fonts-guru-extra' for glob 'fonts-*'

Note, selecting 'fonts-firacode' for glob 'fonts-*'

Note, selecting 'fonts-tlwg-laksaman-ttf' for glob 'fonts-*'

Note, selecting 'fonts-ipafont-mincho' for glob 'fonts-*'

Note, selecting 'fonts-radisnoir' for glob 'fonts-*'

Note, selecting 'fonts-rufscript' for glob 'fonts-*'

Note, selecting 'fonts-smc-gayathri' for glob 'fonts-*'

Note, selecting 'fonts-denemo' for glob 'fonts-*'

Note, selecting 'fonts-droid-fallback' for glob 'fonts-*'

Note, selecting 'fonts-sil-charis-compact' for glob 'fonts-*'

Note, selecting 'fonts-crosextra-carlito' for glob 'fonts-*'

Note, selecting 'fonts-unifont' for glob 'fonts-*'

Note, selecting 'fonts-dseg' for glob 'fonts-*'

Note, selecting 'fonts-ipafont-gothic' for glob 'fonts-*'

Note, selecting 'fonts-ipafont' for glob 'fonts-*'

Note, selecting 'fonts-orya' for glob 'fonts-*'

Note, selecting 'fonts-sil-andika-new-basic' for glob 'fonts-*'

Note, selecting 'fonts-tlwg-waree' for glob 'fonts-*'

Note, selecting 'fonts-f500' for glob 'fonts-*'

Note, selecting 'fonts-century-catalogue' for glob 'fonts-*'

Note, selecting 'fonts-lohit-knda' for glob 'fonts-*'

Note, selecting 'fonts-lohit-taml-classical' for glob 'fonts-*'

Note, selecting 'fonts-sil-sophia-nubian' for glob 'fonts-*'

Note, selecting 'fonts-sil-tagmukay' for glob 'fonts-*'

Note, selecting 'fonts-arphic-bkai00mp' for glob 'fonts-*'

Note, selecting 'fonts-ubuntu' for glob 'fonts-*'

Note, selecting 'fonts-tlwg-typewriter-otf' for glob 'fonts-*'

Note, selecting 'fonts-cwtex-kai' for glob 'fonts-*'

Note, selecting 'fonts-cns11643-sung' for glob 'fonts-*'

Note, selecting 'fonts-roboto-unhinted' for glob 'fonts-*'

Note, selecting 'fonts-paratype' for glob 'fonts-*'

Note, selecting 'fonts-adf-universalis' for glob 'fonts-*'

Note, selecting 'fonts-lg-aboriginal' for glob 'fonts-*'

Note, selecting 'fonts-hack-otf' for glob 'fonts-*'

Note, selecting 'fonts-mph-2b-damase' for glob 'fonts-*'

Note, selecting 'fonts-indic' for glob 'fonts-*'

Note, selecting 'fonts-adf-baskervald' for glob 'fonts-*'

Note, selecting 'fonts-takao' for glob 'fonts-*'

Note, selecting 'fonts-cabinsketch' for glob 'fonts-*'

Note, selecting 'fonts-tlwg-typewriter-ttf' for glob 'fonts-*'

Note, selecting 'fonts-ipaexfont-mincho' for glob 'fonts-*'

Note, selecting 'fonts-adf-libris' for glob 'fonts-*'

Note, selecting 'fonts-tlwg-purisa-otf' for glob 'fonts-*'

Note, selecting 'fonts-sarai' for glob 'fonts-*'

Note, selecting 'fonts-averia-gwf' for glob 'fonts-*'

Note, selecting 'fonts-hack-ttf' for glob 'fonts-*'

Note, selecting 'fonts-cascadia-code' for glob 'fonts-*'

Note, selecting 'fonts-lohit-deva-marathi' for glob 'fonts-*'

Note, selecting 'fonts-sambhota-yigchung' for glob 'fonts-*'

Note, selecting 'fonts-open-sans' for glob 'fonts-*'

The following additional packages will be installed:

  fontconfig fontconfig-config libbrotli1 libexpat1 libfontconfig1 libfontenc1

  libfreetype6 libpng16-16 sensible-utils ucf x11-common xfonts-encodings

  xfonts-utils

Suggested packages:

  libgraphite3 pango-graphite fontforge fonts-lohit-devanagari libjs-mathjax

  libgraphite2-3 xserver | xfs xfonts-terminus-oblique

The following NEW packages will be installed:

  fontconfig fontconfig-config fonts-3270 fonts-adf-accanthis

  fonts-adf-baskervald fonts-adf-berenis fonts-adf-gillius fonts-adf-ikarius

  fonts-adf-irianis fonts-adf-libris fonts-adf-mekanus fonts-adf-oldania

  fonts-adf-romande fonts-adf-solothurn fonts-adf-switzera fonts-adf-tribun

  fonts-adf-universalis fonts-adf-verana fonts-aenigma fonts-agave

  fonts-aksharyogini2 fonts-alee fonts-allerta fonts-ancient-scripts

  fonts-anonymous-pro fonts-aoyagi-kouzan-t fonts-aoyagi-soseki fonts-apropal

  fonts-arabeyes fonts-arapey fonts-arkpandora fonts-arphic-bkai00mp

  fonts-arphic-bsmi00lp fonts-arphic-gbsn00lp fonts-arphic-gkai00mp

  fonts-arphic-ukai fonts-arphic-uming fonts-arundina fonts-atarismall

  fonts-averia-gwf fonts-averia-sans-gwf fonts-averia-serif-gwf fonts-b612

  fonts-babelstone-han fonts-babelstone-modern fonts-baekmuk fonts-bajaderka

  fonts-bebas-neue fonts-beng fonts-beng-extra fonts-beteckna

  fonts-blankenburg fonts-bpg-georgian fonts-breip fonts-bwht fonts-cabin

  fonts-cabinsketch fonts-campania fonts-cantarell fonts-cardo

  fonts-cascadia-code fonts-cegui fonts-century-catalogue fonts-cherrybomb

  fonts-circos-symbols fonts-clear-sans fonts-cmu fonts-cns11643-kai

  fonts-cns11643-pixmaps fonts-cns11643-sung fonts-comfortaa fonts-comic-neue

  fonts-compagnon fonts-courier-prime fonts-croscore fonts-crosextra-caladea

  fonts-crosextra-carlito fonts-cwtex-docs fonts-cwtex-fs fonts-cwtex-heib

  fonts-cwtex-kai fonts-cwtex-ming fonts-cwtex-yen fonts-dancingscript

  fonts-dclfonts fonts-ddc-uchen fonts-dejavu fonts-dejavu-core

  fonts-dejavu-extra fonts-dejima-mincho fonts-denemo fonts-deva

  fonts-deva-extra fonts-dkg-handwriting fonts-dosis fonts-dotgothic16

  fonts-droid-fallback fonts-dseg fonts-dustin fonts-dzongkha fonts-ebgaramond

  fonts-ebgaramond-extra fonts-ecolier-court fonts-ecolier-lignes-court

  fonts-eeyek fonts-elstob fonts-elusive-icons fonts-engadget fonts-entypo

  fonts-essays1743 fonts-eurofurence fonts-evertype-conakry fonts-f500

  fonts-fantasque-sans fonts-fanwood fonts-farsiweb fonts-femkeklaver

  fonts-ferrite-core fonts-firacode fonts-font-awesome fonts-fork-awesome

  fonts-freefarsi fonts-freefont-otf fonts-freefont-ttf fonts-gamaliel

  fonts-gargi fonts-gemunu-libre fonts-georgewilliams fonts-gfs-artemisia

  fonts-gfs-baskerville fonts-gfs-bodoni-classic fonts-gfs-complutum

  fonts-gfs-didot fonts-gfs-didot-classic fonts-gfs-gazis

  fonts-gfs-neohellenic fonts-gfs-olga fonts-gfs-porson fonts-gfs-solomos

  fonts-gfs-theokritos fonts-glasstty fonts-glyphicons-halflings

  fonts-gnutypewriter fonts-go fonts-gotico-antiqua fonts-goudybookletter

  fonts-gubbi fonts-gujr fonts-gujr-extra fonts-guru fonts-guru-extra

  fonts-hack fonts-hack-otf fonts-hack-ttf fonts-hack-web fonts-hanazono

  fonts-havana fonts-hermit fonts-horai-umefont fonts-hosny-amiri

  fonts-hosny-thabit fonts-humor-sans fonts-inconsolata fonts-indic

  fonts-ipaexfont fonts-ipaexfont-gothic fonts-ipaexfont-mincho fonts-ipafont

  fonts-ipafont-gothic fonts-ipafont-mincho fonts-ipamj-mincho fonts-isabella

  fonts-jetbrains-mono fonts-johnsmith-induni fonts-joscelyn fonts-jsmath

  fonts-junction fonts-junicode fonts-jura fonts-kacst fonts-kacst-one

  fonts-kalapi fonts-kanjistrokeorders fonts-karla fonts-karmilla fonts-katex

  fonts-kaushanscript fonts-khmeros fonts-kiloji fonts-klaudia-berenika

  fonts-klee fonts-knda fonts-komatuna fonts-konatu fonts-kouzan-mouhitsu

  fonts-kristi fonts-lao fonts-lato fonts-ldco fonts-le-murmure

  fonts-league-mono fonts-league-spartan fonts-leckerli-one fonts-lemonada

  fonts-levien-museum fonts-levien-typoscript fonts-lexi-gulim

  fonts-lexi-saebom fonts-lg-aboriginal fonts-liberation fonts-liberation2

  fonts-lindenhill fonts-linex fonts-linuxlibertine fonts-lklug-sinhala

  fonts-lmodern fonts-lobster fonts-lobstertwo fonts-lohit-beng-assamese

  fonts-lohit-beng-bengali fonts-lohit-deva fonts-lohit-deva-marathi

  fonts-lohit-deva-nepali fonts-lohit-gujr fonts-lohit-guru fonts-lohit-knda

  fonts-lohit-mlym fonts-lohit-orya fonts-lohit-taml

  fonts-lohit-taml-classical fonts-lohit-telu fonts-lyx fonts-manchufont

  fonts-material-design-icons-iconfont fonts-materialdesignicons-webfont

  fonts-mathjax fonts-mathjax-extras fonts-meera-inimai fonts-meera-taml

  fonts-migmix fonts-millimetre fonts-misaki fonts-mlym fonts-mmcedar

  fonts-mona fonts-monapo fonts-monlam fonts-monofur fonts-monoid

  fonts-monoid-halfloose fonts-monoid-halftight fonts-monoid-loose

  fonts-monoid-tight fonts-mononoki fonts-motoya-l-cedar

  fonts-motoya-l-maruberi fonts-mph-2b-damase fonts-mplus fonts-nafees

  fonts-nakula fonts-nanum fonts-nanum-coding fonts-nanum-eco

  fonts-nanum-extra fonts-naver-d2coding fonts-navilu fonts-noto

  fonts-noto-cjk fonts-noto-cjk-extra fonts-noto-color-emoji fonts-noto-core

  fonts-noto-extra fonts-noto-hinted fonts-noto-mono fonts-noto-ui-core

  fonts-noto-ui-extra fonts-noto-unhinted fonts-ocr-a fonts-ocr-b

  fonts-oflb-asana-math fonts-oflb-euterpe fonts-okolaks fonts-oldstandard

  fonts-open-sans fonts-opendin fonts-opendyslexic fonts-opensymbol

  fonts-oradano-mincho-gsrr fonts-orya fonts-orya-extra fonts-osifont

  fonts-oxygen fonts-pagul fonts-paktype fonts-paratype fonts-pc

  fonts-pc-extra fonts-play fonts-povray fonts-powerline fonts-prociono

  fonts-proggy fonts-quattrocento fonts-quicksand fonts-radisnoir

  fonts-rampart fonts-recommended fonts-reggae fonts-ricty-diminished

  fonts-rit-sundar fonts-roadgeek fonts-roboto fonts-roboto-fontface

  fonts-roboto-hinted fonts-roboto-slab fonts-roboto-unhinted fonts-rocknroll

  fonts-rufscript fonts-sahadeva fonts-sambhota-tsugring

  fonts-sambhota-yigchung fonts-samyak fonts-samyak-deva fonts-samyak-gujr

  fonts-samyak-mlym fonts-samyak-orya fonts-samyak-taml fonts-sarai

  fonts-sawarabi-gothic fonts-sawarabi-mincho fonts-senamirmir-washra

  fonts-seto fonts-sil-abyssinica fonts-sil-akatab fonts-sil-alkalami

  fonts-sil-andika fonts-sil-andika-compact fonts-sil-andikanewbasic

  fonts-sil-annapurna fonts-sil-awami-nastaliq fonts-sil-charis

  fonts-sil-charis-compact fonts-sil-dai-banna fonts-sil-doulos

  fonts-sil-doulos-compact fonts-sil-ezra fonts-sil-galatia fonts-sil-gentium

  fonts-sil-gentium-basic fonts-sil-gentiumplus fonts-sil-gentiumplus-compact

  fonts-sil-harmattan fonts-sil-lateef fonts-sil-mingzat fonts-sil-mondulkiri

  fonts-sil-mondulkiri-extra fonts-sil-nuosusil fonts-sil-padauk

  fonts-sil-scheherazade fonts-sil-shimenkan fonts-sil-shimenkan-gsm

  fonts-sil-shimenkan-guifan fonts-sil-shimenkan-mas fonts-sil-shimenkan-mgs

  fonts-sil-shimenkan-salaowu fonts-sil-shimenkan-sapushan

  fonts-sil-shimenkan-taogu fonts-sil-shimenkan-zonghe fonts-sil-sophia-nubian

  fonts-sil-tagmukay fonts-sil-taiheritagepro fonts-sil-zaghawa-beria

  fonts-sipa-arundina fonts-sjfonts fonts-smc fonts-smc-anjalioldlipi

  fonts-smc-chilanka fonts-smc-dyuthi fonts-smc-gayathri fonts-smc-karumbi

  fonts-smc-keraleeyam fonts-smc-manjari fonts-smc-meera fonts-smc-rachana

  fonts-smc-raghumalayalamsans fonts-smc-suruma fonts-smc-uroob

  fonts-solide-mirage fonts-spleen fonts-staypuft fonts-stick fonts-stix

  fonts-summersby fonts-symbola fonts-takao fonts-takao-gothic

  fonts-takao-mincho fonts-taml fonts-taml-tamu fonts-taml-tscu fonts-telu

  fonts-telu-extra fonts-teluguvijayam fonts-terminus fonts-terminus-otb

  fonts-texgyre fonts-thai-tlwg fonts-thai-tlwg-otf fonts-thai-tlwg-ttf

  fonts-thai-tlwg-web fonts-tibetan-machine fonts-tiresias fonts-tlwg-garuda

  fonts-tlwg-garuda-otf fonts-tlwg-garuda-ttf fonts-tlwg-kinnari

  fonts-tlwg-kinnari-otf fonts-tlwg-kinnari-ttf fonts-tlwg-laksaman

  fonts-tlwg-laksaman-otf fonts-tlwg-laksaman-ttf fonts-tlwg-loma

  fonts-tlwg-loma-otf fonts-tlwg-loma-ttf fonts-tlwg-mono fonts-tlwg-mono-otf

  fonts-tlwg-mono-ttf fonts-tlwg-norasi fonts-tlwg-norasi-otf

  fonts-tlwg-norasi-ttf fonts-tlwg-purisa fonts-tlwg-purisa-otf

  fonts-tlwg-purisa-ttf fonts-tlwg-sawasdee fonts-tlwg-sawasdee-otf

  fonts-tlwg-sawasdee-ttf fonts-tlwg-typewriter fonts-tlwg-typewriter-otf

  fonts-tlwg-typewriter-ttf fonts-tlwg-typist fonts-tlwg-typist-otf

  fonts-tlwg-typist-ttf fonts-tlwg-typo fonts-tlwg-typo-otf

  fonts-tlwg-typo-ttf fonts-tlwg-umpush fonts-tlwg-umpush-otf

  fonts-tlwg-umpush-ttf fonts-tlwg-waree fonts-tlwg-waree-otf

  fonts-tlwg-waree-ttf fonts-tomsontalks fonts-train fonts-triod-postnaja

  fonts-tuffy fonts-ubuntu-title fonts-ukij-uyghur fonts-umeplus

  fonts-umeplus-cl fonts-unfonts-core fonts-unfonts-extra fonts-unifont

  fonts-unikurdweb fonts-uralic fonts-urw-base35 fonts-vlgothic fonts-vollkorn

  fonts-wine fonts-woowa-bm fonts-wqy-microhei fonts-wqy-zenhei

  fonts-yanone-kaffeesatz fonts-yozvox-yozfont fonts-yozvox-yozfont-antique

  fonts-yozvox-yozfont-cute fonts-yozvox-yozfont-edu

  fonts-yozvox-yozfont-new-kana fonts-yozvox-yozfont-standard-kana

  fonts-yrsa-rasa libbrotli1 libexpat1 libfontconfig1 libfontenc1 libfreetype6

  libpng16-16 sensible-utils ucf x11-common xfonts-encodings xfonts-utils

0 upgraded, 490 newly installed, 0 to remove and 18 not upgraded.

Need to get 1248 MB of archives.

After this operation, 4287 MB of additional disk space will be used.

Do you want to continue? [Y/n]
rsyslog in container config
You'll need to disable imklog or rsyslogd won't start:
module(load="imklog") # provides kernel logging support
This is essential unless you give full privileges to your container.
Here is a full working rsyslog config in Ubuntu/Debian:
module(load="imuxsock") # provides support for local system logging

$ActionFileDefaultTemplate RSYSLOG_TraditionalFileFormat

$FileOwner root

$FileGroup adm

$FileCreateMode 0640

$DirCreateMode 0755

$Umask 0022

$WorkDirectory /var/spool/rsyslog

$IncludeConfig /etc/rsyslog.d/*.conf

auth,authpriv.*            /var/log/auth.log

*.*;auth,authpriv.none        -/var/log/syslog

daemon.*            -/var/log/daemon.log

kern.*                -/var/log/kern.log

lpr.*                -/var/log/lpr.log

mail.*                -/var/log/mail.log

user.*                -/var/log/user.log

mail.info            -/var/log/mail.info

mail.warn            -/var/log/mail.warn

mail.err            /var/log/mail.err

*.=debug;

    auth,authpriv.none;

    mail.none        -/var/log/debug

*.=info;*.=notice;*.=warn;

    auth,authpriv.none;

    cron,daemon.none;

    mail.none        -/var/log/messages

*.emerg                :omusrmsg:*
Interesting Whisper AI CPU vs GPU Test
This is not scientific but I took an old Xeon V4 workstation and an old Quadro GPU and compared the Whisper times for the same approximately 4 minute audio, transcribing in English.
Here are the times which is slightly surpising.
I used the small model with this command:
whisper vid.mp4 --model small --output_format srt --language en
Of course to test the GPU I added the --device cuda flag and confirmed GPU was being used as utilization on GPU was 100%
CPU Time
real 3m49.033s
GPU Time
real 3m55.140s
Conclusion
I observed it took some time to load the model into GPU memory, for shorter audio this increased the overall processing time slightly. I believe if I have time to test a longer audio that the result will be different and GPU will show a better result.
How to install pytorch with cuda capability for AI acceleration with Nvidia Tesla etc.. GPUs
The default version is CPU only, which usually is not what we want if we have a GPU:
pip3 install torch torchvision torchaudio --index-url https://download.pytorch.org/whl/cu121
Now cuda enabled pytorch apps like whisper etc... can take advantage of CUDA finally!
Check it is enabled
False means it is not working, or at least your cuda/nvidia driver setup is installed and True means good.
python3 -c "import torch; print(torch.cuda.is_available())"


True
How to Spider the web archive.org to recover your old website/webpage
There are problably a million blog posts telling you how to do it, but none of those guides worked for me. Things can often be different sites and other "unknowns", so there is no guarantee this works for you or for every site.
First we'll use curl to search for all the relevant files for the domain and based on the snapshot/timestamp in bold below.
curl -s "https://web.archive.org/cdx/search/cdx?url=yourdomain.com/*&to=20190416204741&output=txt&fl=timestamp,original" | awk '{ print "https://web.archive.org/web/" $1 "id_/" $2 }' | sort -u > urls.txt
The above gets output to urls.txt, then we'll feed urls.txt to wget to retrieve all of the URLs.
wget --input-file=urls.txt --force-directories --protocol-directories --adjust-extension --convert-links --no-clobber
What you end up with is a directory with relatively the same path and contents as the original site. It's not perfect, especially because sometimes not all pages are archived even though the hyperlink is referenced from indexed pages.
This is very helpful for businesses that had a disruption but have no saved content of their own. It's not perfect but can restore content that was there previously but don't expect 24-48 hours fresh, think in terms of weeks or months.
Debian 10 /etc/apt/sources.list
Debian 10 is now in the archive, yet you may still need to migrate and do testing.
deb http://archive.debian.org/debian buster main contrib non-free

deb-src http://archive.debian.org/debian buster main contrib non-free


deb http://archive.debian.org/debian buster-updates main contrib non-free

deb-src http://archive.debian.org/debian buster-updates main contrib non-free


deb http://archive.debian.org/debian-security/ buster/updates main contrib non-free

deb-src http://archive.debian.org/debian-security/ buster/updates main contrib non-free
If your environment does not have a text editor like vi or nano just do this/use echo:
echo "deb http://archive.debian.org/debian buster main contrib non-free

deb-src http://archive.debian.org/debian buster main contrib non-free


deb http://archive.debian.org/debian buster-updates main contrib non-free

deb-src http://archive.debian.org/debian buster-updates main contrib non-free


deb http://archive.debian.org/debian-security/ buster/updates main contrib non-free

deb-src http://archive.debian.org/debian-security/ buster/updates main contrib non-free" > /etc/apt/sources.list
Linux Debian Cannot Upgrade Kernel Headers Missing Solution
Here is an old VM example which is strange, it looks like Debian has removed this from all the repos. The easiest solution is just to upgrade to a kernel with a working/supported headers, but we don't like doing things the hard way.
In this case it's a 1 year old Debian 11 install, but this can and does happen on random Linux distros sometimes, especially Debian based.
apt-cache search `uname -r`

linux-image-amd64 - Linux for 64-bit PCs (meta-package)

linux-image-5.10.0-34-amd64 - Linux 5.10 for 64-bit PCs (signed)
Normally you should find a headers but you don't in this case, even with an apt update, it just doesn't exist. We even enabled the backports with no luck:
deb http://archive.debian.org/debian bullseye-backports main contrib non-free

deb-src http://archive.debian.org/debian bullseye-backports main contrib non-free
In this example we are using 5.10.0-34 but there's no headers for it, but if we increment and search for -35 it does exist:
apt-cache search 5.10.0-35-amd64

linux-headers-5.10.0-35-amd64 - Header files for Linux 5.10.0-35-amd64

linux-image-5.10.0-35-amd64-dbg - Debug symbols for linux-image-5.10.0-35-amd64

linux-image-5.10.0-35-amd64-unsigned - Linux 5.10 for 64-bit PCs

linux-image-5.10.0-35-amd64 - Linux 5.10 for 64-bit PCs (signed)
So no you're not crazy, 5.10.0-34-amd64 does not exist in the repos, at least not any we have.
Let's try searching directly on Debian's packages site:
https://packages.debian.org/search?keywords=linux-image-5.10.0-34-amd64
How to install ZFS on Linux Ubuntu Debian Mint
First of all make sure contrib is enabled in /etct/apt/sources.list, if not follow this guide to add "non-free contrib" to the repos.
ZFS is popular because it provides actual error checking and correction to a level that is better than most RAID arrays. The other benefit of ZFS is that in inherently acts like a ramdisk and at a minimum caches directories and file structures, so you save a lot of wear and tear on your storage. Even better, the more RAM you have the better it works, it is not uncommon for a busy server/array to use 60-90GB of RAM at a minimum and ZFS generally will not overallocate or interfere with other services.
Step 1.) Install ZFS Tools
apt install zfsutils-linux
Let's see the main binaries that come with zfs:
dpkg -L zfsutils-linux|grep bin

/sbin

/sbin/fsck.zfs

/sbin/mount.zfs

/sbin/zdb

/sbin/zfs

/sbin/zfs_ids_to_path

/sbin/zgenhostid

/sbin/zhack

/sbin/zpool

/sbin/zstream

/sbin/zstreamdump

/sbin/zvol_wait

/usr/sbin

/usr/sbin/arc_summary

/usr/sbin/arcstat

/usr/sbin/dbufstat
In most cases you will spend most of your time using the "zfs", and "zpool" commands in my experience.
Step 2.) Which type of ZFS volume should I use?
ZFS is a block device tool, so you will need extra drives that are empty or are OK to empty. Be 100% sure of the drives you need to use and that they don't have important data before proceeding.
In this case here is an example of 8 drives all of the same size.
/dev/sda
/dev/sdb
/dev/sdc
/dev/sdd
/dev/sde
/dev/sdf
/dev/sdg
/dev/sdh
Normally in typical RAID thinking some popular ways might be RAID 0 for maximum performance and storage capacity but that is normally bad since data loss is guaranteed with the failure of even one drive.
Another way could be RAID 1 which give good performance and faster read speeds but you would lose half of your capacity (eg. 4 drives total space since the other 4 are essentially mirrors).
Another way could have been RAID10 which is a decent blend of performance and redundancy but you still lose 4 drives worth of capacity. Essentially this is 2 arrays of RAID 1 stripped into a RAID 0.
With RAID 5 you would lose only 1 disk's capacity but have performance issues, plus it takes forever to build or rebuild arrays that are larger like this due to the parity calculations.
So what are some similar options in ZFS?
ZFS's advantage is that it has more flexibility compared to tradtional RAID where disks must be of the same size. It makes upgrading the array and increasing the size very difficult, whereas ZFS can handle this fairly well in most cases.
Let's talk about the main modes of ZFS
mirror: Basically this is just like RAID 1 but you have the benefit of no bitrot concerns and huge redundancy, plus the easier path of upgrading your space in the future.
The number in the name is the amount of disks you can lose before having dataloss, eg. RAIDZ1 means 1 disk can fail, Z2 means 2, and 3 means 3 can fail.
RAIDZ1: 87.5% capacity
RAIDZ2: 75.0% capacity
RAIDZ3: 62.5% capacity
As we can see, we are mainly trading a combination of disk capacity for efficiency and in generally most cases you are more efficient and redundant compared to RAID, with the benefit of easier upgrade paths if you want to upgrade your disks and array.
Step 3.) - Make It Work!
In my example we'll use the 8 disks in a RAIDZ2 configuration, giving us a decent performance and redundancy. Of course you would adjust this to the level of fault tolerance you need.
Before we do that we should be familar with the main zpool commands:
usage: zpool command args ...
where 'command' is one of the following:
version
create [-fnd] [-o property=value] ...
[-O file-system-property=value] ...
[-m mountpoint] [-R root]
destroy [-f]
add [-fgLnP] [-o property=value]
remove [-npsw]
labelclear [-f]
checkpoint [-d [-w]]
list [-gHLpPv] [-o property[,...]] [-T d|u] [pool] ...
[interval [count]]
iostat [[[-c [script1,script2,...][-lq]]|[-rw]] [-T d | u] [-ghHLpPvy]
[[pool ...]|[pool vdev ...]|[vdev ...]] [[-n] interval [count]]
status [-c [script1,script2,...]] [-igLpPstvxD] [-T d|u] [pool] ...
[interval [count]]
online [-e]
offline [-f] [-t]
clear [-nF]
reopen [-n]
attach [-fsw] [-o property=value]
detach
replace [-fsw] [-o property=value]
split [-gLnPl] [-R altroot] [-o mntopts]
[-o property=value]
initialize [-c | -s] [-w]
resilver
scrub [-s | -p] [-w]
trim [-dw] [-r
import [-d dir] [-D]
import [-o mntopts] [-o property=value] ...
[-d dir | -c cachefile] [-D] [-l] [-f] [-m] [-N] [-R root] [-F [-n]] -a
import [-o mntopts] [-o property=value] ...
[-d dir | -c cachefile] [-D] [-l] [-f] [-m] [-N] [-R root] [-F [-n]]
[--rewind-to-checkpoint]
export [-af]
upgrade
upgrade -v
upgrade [-V version] <-a | pool ...>
reguid
history [-il] [
events [-vHf [pool] | -c]
get [-Hp] [-o "all" | field[,...]] <"all" | property[,...]>
set
zpool create -f ourmirror raidz2 /dev/sdc /dev/sdd /dev/sde /dev/sdf /dev/sdg /dev/sdh /dev/sdi /dev/sdj
The above created a ZFS pool called "ourmirror" with the raidz2 format and used the devices /dev/sdc /dev/sdd /dev/sde /dev/sdf /dev/sdg /dev/sdh /dev/sdi /dev/sdj
We can now check the status:
 zpool status

  pool: ourmirror

 state: ONLINE

config:


    NAME        STATE     READ WRITE CKSUM

    ourmirror   ONLINE       0     0     0

      raidz2-0  ONLINE       0     0     0

        sdc     ONLINE       0     0     0

        sdd     ONLINE       0     0     0

        sde     ONLINE       0     0     0

        sdf     ONLINE       0     0     0

        sdg     ONLINE       0     0     0

        sdh     ONLINE       0     0     0

        sdi     ONLINE       0     0     0

        sdj     ONLINE       0     0     0


errors: No known data errors
Check iostats
zpool iostat 1
This will show the iostats of all pools every 1 second.
              capacity     operations     bandwidth

pool        alloc   free   read  write   read  write

----------  -----  -----  -----  -----  -----  -----

ourmirror   4.73T  124.4T    179    238  8.88M  35.1M
Check memory usage
You can't accurately check memory usage in top, but if you find yourself wondering why your system uses so much RAM that appears to be unaccounted for you will want to use "arc_summary".
arc_summary
We just took a snippet of the top output which basically tells you overall RAM usage.
ZFS Subsystem Report                            Tue Jun 02 19:04:43 2026

Linux

Machine: server (x86_64)                          2.0.3-9+deb11u1


ARC status:                                                      HEALTHY

        Memory throttle count:                                         0


ARC size (current):                                    64.8 %   61.2 GiB

        Target size (adaptive):                        64.9 %   61.2 GiB

        Min size (hard limit):                          6.2 %    5.9 GiB

        Max size (high water):                           16:1   94.3 GiB

        Most Frequently Used (MFU) cache size:         72.1 %   36.7 GiB

        Most Recently Used (MRU) cache size:           27.9 %   14.2 GiB

        Metadata cache size (hard limit):              75.0 %   70.7 GiB

        Metadata cache size (current):                 21.5 %   15.2 GiB

        Dnode cache size (hard limit):                 10.0 %    7.1 GiB

        Dnode cache size (current):                    78.0 %    5.5 GiB
How to Add Contrib Packages to Debian/Linux/Mint by editing /etc/apt/sources.list
Here is an example /etc/apt/sources.list after a default Debian 11 install but generally this applies to almost any Debian.
# deb cdrom:[Debian GNU/Linux 11.2.0 _Bullseye_ - Official amd64 NETINST 20211218-11:12]/ bullseye main


#deb cdrom:[Debian GNU/Linux 11.2.0 _Bullseye_ - Official amd64 NETINST 20211218-11:12]/ bullseye main


deb http://deb.debian.org/debian/ bullseye main

deb-src http://deb.debian.org/debian/ bullseye main


deb http://security.debian.org/debian-security bullseye-security main

deb-src http://security.debian.org/debian-security bullseye-security main


# bullseye-updates, to get updates before a point release is made;

# see https://www.debian.org/doc/manuals/debian-reference/ch02.en.html#_updates_and_backports

deb http://deb.debian.org/debian/ bullseye-updates main

deb-src http://deb.debian.org/debian/ bullseye-updates main


# This system was installed using small removable media

# (e.g. netinst, live or single CD). The matching "deb cdrom"

# entries were disabled at the end of the installation process.

# For information about how to configure apt package sources,

# see the sources.list(5) manual.
We'll take the first two main lines and modify them:
deb http://deb.debian.org/debian/ bullseye main

deb-src http://deb.debian.org/debian/ bullseye main
Change to:
deb http://deb.debian.org/debian/ bullseye main non-free contrib

deb-src http://deb.debian.org/debian/ bullseye main non-free contrib
Now you'll have access to additional, often missing or newer packages than the standard main Debian repos provide.
Proxmox How To Purge Ceph
Sometimes Ceph breaks if you make any errors or wrong moves while initially configuring it.
rm /var/lib/ceph/*
pveceph purge
VMWare ESXi/VSphere Disable Balloon Segfault in Services Solution
After looking at several deployments of VMWare, we had one deployment where the company enabled balloon mode which is essentially a way to overcommit memory the hostnode(s) don't have. Let's say you have put your database into memory or use a cached service in Apache or haproxy/nginx. VMWare will start taking some portions of these and at some point it corrupts things and the application running will either crash, malfunction or segfault.
Another factor is that OOM will be triggered artificially. Take say a 16G VM that runs on a VMWare ESXi/Vsphere with the EXACT same OS image/kernel, and running the same container. At some point the one with balloon will probably hit OOM and you may never be able to reproduce it on a non-Balloon VM/host.
Balloon is horrible because it feels like the old days of computing with a slow HDD where you have too little RAM and your computer is swapping.
It sounds similar to KSM in KVM but KSM is smart enough to only work with shared pages of duplicated memory. Eg. if you had 200 VMs or containers using duplicated memory (eg. using a certain binary) it will combine those into one memory space to conveniently save memory duplication.
Is my VM even using balloon?
vmware-toolbox-cmd stat balloon

0 MB
You are looking for the number to be 0 but note it doesn't mean it won't start ballooning later on. This is more likely when you have processes that use more memory 1-2G+. Another symptom is that you will likely find the process that is getting ballooned will be slow (eg. even a docker ps or kubectl will be slower than normal).
How to disable balloon in the VM
#Temporarily and instantly disable balloon:
modprobe -r vmw_balloon
# disable for next boot

echo "blacklist vmw_balloon" | tee /etc/modprobe.d/disable-balloon.conf
#update iniitramfs so it will be disabled after reboot
update-initramfs -u
Apache Linux Debian Ubuntu Container how to manually restart without killing
If you are in an environment where you cannot use systemctl or otherwise kill apache, just do a manual graceful restart which does the same thing essentially without killing the process which may impact the service or container (eg. in Docker).
apache2ctl graceful
Docker enable UTF8 in Container to stop seeing gibberish ? characters
A lot of special characters and non-English will display as gibberish if you don't enable UTF-8 locale which is not done by default.
An example of things you may see without UTF-8
??~N?~[?
You can do it this way when connecting to the console.
docker exec -it -e LANG=C.UTF-8
If you are already on the console you can do this:
export LANG=C.UTF-8
Debian 8 How To Use Apt Update Archive sources.list
We know it is deprecated but there are still systems that are running Debian 8, or at least applications that used old packages such as PHP 5 that you may need an environment to stage testing/updates for it.
Here is a working sources.list for Debian 8 Jessie:
deb http://archive.debian.org/debian/ jessie main contrib non-free

deb http://archive.debian.org/debian-security jessie/updates main contrib non-free
If you are in Docker there is no vi/nano or editor so you need to echo into it:
echo "deb http://archive.debian.org/debian/ jessie main contrib non-free

deb http://archive.debian.org/debian-security jessie/updates main contrib non-free" > /etc/apt/sources.list
If you need a basic LAMP setup then install these packages:
apt install vim php5-mysql libapache2-mod-php5 apache2 mysql-server wget
Debian Live CD Password
Their Live CD's are set to autologin, but if you go away for a bit you will find you are presented with a login prompt for the user named "user".
The password will be "live", which is not necessarily obvious when you first login to Debian.

Forbidden You don't have permission to access this resource. [authz_core:error] [pid 338:tid 338] [client 1.2.3.4:55046] AH01630: client denied by server configuration:
Forbidden
You don't have permission to access this resource.
This is what you'll see in your browser (above).
In Apache error logs you will see something like this:
[authz_core:error] [pid 338:tid 338] [client 1.2.3.4:55046] AH01630: client denied by server configuration:
This is because you need the following in your vhost config under
Require all granted
The client needs a new connection for this request as the requested host name does not match the Server Name Indication (SNI) in use for this connection.
The client needs a new connection for this request as the requested host name does not match the Server Name Indication (SNI) in use for this connection.
Before reading this, I assume you've done all the proper troubleshooting and you are 100% sure the CDN�and backend server is configured correctly.
This can often happen with load balancer's and CDNs if the CDN/balancer to backend server don't use the same ports.
Let's use this example.
On CDN Provider, you define Backend/Origin Server A for www.cooldomain.com
When a user hits CDN Provider with their request host as www.cooldomain.com,your CDN�then translates that to a backend server.
Let's say the backend server is 1.2.3.4 on port 30000.
Usually the real backend service listens on say Apache port 443 for SSL, you are getting this as an SNI�error because the port doesn't match.� Apache or whatever service wants to know the real user port is 443, but you are being redirected from port 30000 which breaks SNI essentially.� Another way of thinking of this is that NAT is involved or some port translation if you are hitting port 30000 and being redirected to port 443 on an internal/LAN IP.� This is where things are getting broken.
How do we fix this?
Make sure the SNI is sent forcefully such as in haproxy add this:
server server1 1.2.3.4:30000 ssl verify none sni req.hdr(host)
�
If that doesn't work you will need to use more public IPs but this breaks some applications as sometimes the backend server is reallly just another load balancer too unless you have multiple public facing IPs for the load balancers.
Asterisk RTP/audio not working in either direction in Docker NAT with a NAT client
Normally the first thing you would think is that you should use the host network in Docker but this loses the isolation, in that case I'd rather use LXC and a public IP or a full VM with public IP to avoid these issues.
Before you Start
I assume you have also ruled out any firewall issues on either end, that RTP or SIP signaling is not being blocked by either side.
1.) Key Settings in Docker/Ports
Before starting, I assume you have forwarded the listening IP of Asterisk into the container and the relevant rtp ports (eg. forward port 5060 to the Asterisk in Docker and ports 10000-20000 to the same.
2.) Key Asterisk Settings
I assume in sip.conf that you have set externip and localnets appropriately (eg. externip is the public IP of Docker and localnets are your local/LAN Docker subnet). More on the Docker subnet fun part later.
I also assume the peer/clients sip.conf have nat enabled.
The Issue
If we watch tcpdump we can see anything that connects from a direct public IP shows a public IP even when connecting to Asterisk on port 5060.
However, when you also take a client that is behind NAT or not and connect to your Asterisk behind Docker, you will see the connecting client as docker0 IP/gateway eg. 172.17.0.1 (sip show peers) instead of their public IP when you check your peers in Docker.
First of all, .1 should not be considered local, even though it is but remember .1 really represents the path back to the public IP of the client.
Here is the problem I encountered.
1.) The client behind NAT connects to Asterisk, SIP signaling works fine, you can get and make calls but there is 0 audio in either direction. If you run a tcpdump on the client side network, you will see it is not sending any UDP packets to the Asterisk IP. This is because if you check the SDP while debugging in Asterisk (sip set debug on) you will see it tells the client to connect to the Docker IP of Asterisk eg. 172.17.0.x, of course that is impossible since that is local to Docker.
2.) The other problem is that the SDP that Docker has for the client will tell it to connect to the client on it's LAN IP eg. 10.0.0.x which again is impossible.
In both cases we should be dealing with the public IP of the client and of Asterisk, but even with localnets and externip, that doesn't happen (although it works fine to an external SIP trunk).
Solution - the only way I could fix it was to do this:
I set localnets as the IP of the Asterisk container itself, and that forced Asterisk to understand to use it's own public IP to the client and to use the client's public IP.
localnets=172.17.0.x ;where x is the actual IP of your Asterisk container, if previously tried the whole subnet but that broke things as we can understand .1 is not really local in effect
dovecot: imap(root@localhost)<3702>: Error: Mailbox INBOX: mmap(size=352609044) failed with file /var/spool/mail/root/Maildir/dovecot.index.cache: Cannot allocate memory
If you get this error you may assume it is a lack of memory, which it could be, but more likely it is the default memory size of 256M. The file in this example was about 350M big which of course exceeds the virtual memory limits.
This makes sense in smaller mail servers but if you have large amounts of users or e-mails this limit should be bumped.
Check your default size limit:
doveconf -n | grep -E 'vsz_limit|service imap'


default_vsz_limit = 4 G

service imap-login {
#If you don't see any default size limit then it has defaulted to 256M which is not enough for larger mail servers.
The default will be something like this (even if commented it is still the default or if no default is set)
#default_vsz_limit = 256M
So the total amount of memory consumed by related proceses by dovecot cannot exceed this.
To fix it, uncomment and change 256M to a much larger number like 2048M or 20048M etc.., as long as your server has enough memory to support it.
set default_vsz_limit in dovecot.conf
default_vsz_limit = 4096MIn newer versions of Dovecot usually the /etc/dovecot/conf.d files are ignored:
/etc/dovecot/conf.d/10-master.conf
Asterisk cannot find soundfile file.c:824 ast_openstream_full: File for-tech-support does not exist in any format
In newer versions of Asterisk it seems to default to /usr/share/asterisk/sounds even with no specific setting in /etc/asterisk/asterisk.conf even though the normal default even in Asterisk documentation for Version 20 says /var/lib/asterisk/sounds
See an example here:
[Nov 3 23:46:02] WARNING[2197][C-00000016]: file.c:824 ast_openstream_full: File for-tech-support does not exist in any format
The file does exist in /var/lib/asterisk/sounds
Simple Fix:
cp -a /var/lib/asterisk/sounds/* /usr/share/asterisk/sounds/
Apache Error solution - mktemp: failed to create directory via template '/var/lock/apache2.XXXXXXXXXX': No such file or directory
Starting Apache httpd web server: apache2 failed!

The apache2 configtest failed. ... (warning).

Output of config test was:

mktemp: failed to create directory via template '/var/lock/apache2.XXXXXXXXXX': No such file or directory

chmod: missing operand after '755'

Try 'chmod --help' for more information.
If you are on a locked down environment, remember that /var/lock is a symlink to /run/lock as you can see here:
root@1c549706e153:~# ls -al /var/lock

lrwxrwxrwx 1 root root 9 Sep 29 00:00 /var/lock -> /run/lock
It could be that somehow you or something else deleted /run/lock so just recreate and chmod 755:
mkdir -p /run/lock
chmod 755 /run/lock
sysctl settings to reduce buffers and caches in Linux
vm.swappiness = 1

vm.vfs_cache_pressure = 800

vm.dirty_ratio = 5

vm.dirty_background_ratio = 2

vm.min_free_kbytes = 65536   # Reserve 64MB for emergencies
This is mainly useful for smaller systems/VMs/dev test/Raspberry Pi etc.. but even servers with huge amounts of RAM can start putting a ton of things into buffers and cache especially if you open large files constantly.
Find /dev/sd block device of ata device - ata6: SATA link up 1.5 Gbps (SStatus 113 SControl 310) ata6.00: qc timeout (cmd 0xec) ata6.00: failed to IDENTIFY (I/O error, err_mask=0x4) ata6.00: revalidation failed (errno=-5)
[1481082.784899] ata6: SATA link up 1.5 Gbps (SStatus 113 SControl 310)

[1481087.792922] ata6.00: qc timeout (cmd 0xec)

[1481087.792934] ata6.00: failed to IDENTIFY (I/O error, err_mask=0x4)

[1481087.792965] ata6.00: revalidation failed (errno=-5)

[1481088.107288] ata6: SATA link up 1.5 Gbps (SStatus 113 SControl 310)

[1481095.385983] ata6.00: configured for UDMA/133
We can clearly see from the errors above that something is going wrong with ata6 or perhaps port "SAS/SATA port 6" but which might that be?
Use this handy script to find out
ATAPORT=ata6
ls /sys/class/ata_port/$ATAPORT/../../host*/target*/*/block/
If you don't have a nice enclosure that makes it clear which bay has which drive, you'll need to physically check inside the server or chassis.
In my case it said "sdj" so the next step is something like this:
smartctl -a /dev/sdj|grep -i serial
This way we'll know we've checked/replaced the correct drive by matching the serial.
In my cases like this actual example though the problem could be a power problem, or even more likely a bad SATA/SAS cable.
Here is the full quick script to find the drive that causes the error and get its serial:
Remebmer to change ata6 to the ata# of your error.
ATAPORT=ata6

drive=`ls /sys/class/ata_port/$ATAPORT/../../host*/target*/*/block/`

smartctl -a /dev/$drive|grep -i serial
Stuttering Audio on VOIP phones when first answering a call slow and fast audio
In this case, I am assuming you have verified the firewall on either side, and the network conditions are not an issue (eg. no packet loss, no crazy jitter and normal latency).
In some phones such as Grandstream or on your PBX, make sure you do NOT use the "adaptive jitter buffer" or similar settings. If possible disable that or change it to "fixed".
If you do, you may wonder why when you first start a call the user cannot hear you or the voice seems very choppy and roboticly slow/fast, this is because of the "adaptive jitter buffer" breaking things.
If you have any such setting in your PBX, ATA or phone firmware, disable that as it is often the cause of weird voice quality issues.
How to distribute the Microsoft VC Visual Studio Redistributable Files On Your Own
Are you or your users tired of getting support requests for the missing Visual C++ Library DLL's? Some programs prompt you to install them but the easiest way is to modify your Windows image or program to just include these already.
The easiest way is to use Microsoft's guide to copy the right architecture of DLL's and include them in your software and make sure the software adds its directory to the PATH for Windows.
https://learn.microsoft.com/en-us/cpp/windows/determining-which-dlls-to-redistribute?view=msvc-160
Microsoft's Table Guide:
| Visual C++ Library | Description | Applies to |
|---|---|---|
vcruntime[version].dll |
Runtime Library for native code. | Applications that use the normal C and C++ language startup and termination services. |
vccorlib[version].dll |
Runtime Library for managed code. | Applications that use the C++ language services for managed code. |
msvcp[version].dll and msvcp[version_dotnumber].dll |
C++ Standard Library for native code. | Applications that use the C++ Standard Library. |
concrt[version].dll |
Concurrency Runtime Library for native code. | Applications that use the Concurrency Runtime. |
mfc[version].dll |
Microsoft Foundation Classes (MFC) Library. | Applications that use the MFC Library. |
mfc[version][language].dll |
Microsoft Foundation Classes (MFC) Library Resources. | Applications that use specific language resources for MFC. |
mfc[version]u.dll |
MFC Library with Unicode support. | Applications that use the MFC Library and require Unicode support. |
mfcmifc80.dll |
MFC Managed Interfaces Library. | Applications that use the MFC Library with Windows Forms Controls. |
mfcm[version].dll |
MFC Managed Library. | Applications that use the MFC Library with Windows Forms Controls. |
mfcm[version]u.dll |
MFC Managed Library with Unicode support. | Applications that use the MFC Library with Windows Forms Controls and require Unicode support. |
vcamp[version].dll |
AMP Library for native code. | Applications that use the C++ AMP library code. |
vcomp[version].dll |
OpenMP Library for native code. | Applications that use the C++ OpenMP library code |
Nvidia video resolution and codec encode decode support matrix eg. h264 4k h265 HEVC VP9 Card List from GTX, RTX, Quadro
I find this this very handy for video projects which involve nvidia cards. Imagine if you need to know if the card support a specific codec, resolution or even hardware encoding or decoding, this is a huge timesaver.
One caveat is to double check forums and other reports/driver info as sometimes support is listed but may not be present in specific driver versions or OS's (eg. sometimes h265 is supported in the Windows driver but not Linux).
This is one area that Nvidia is quite poor at whereas the amdgpu driver even with onboard GPU/APUs may often support encode or decode that some nvidia cards or driver versions do not support.
https://developer.nvidia.com/video-encode-and-decode-gpu-support-matrix-new
Japan and China ping time observations
From Shanghai/area to Japan/Tokyo area.
OCN/NTT 215-96ms 124.102.42.x
OCN/NTT was quite disappointing as ping times were drastically different, between 215 and 96ms as mentioned.
Softbank (BBTECH) 52ms 60.106.165.x 60.69.227.x 219.101.163.x
Softbank consistently performed well with China.
So-net 42.8ms 118.238.215.x
So-net was the lowest ping we've seen to Japan.
Asahi.net 91.9ms 221.113.95.x (Chiba)
Asahi was not bad, and still better than the best ping we saw with NTT
The clear winners are not surprising if you follow Japanese internet trends, Softbank and So-net are consistently ranked among the best and most consistent internet providers in Japan. It's not only to China that they are good, but a strong indication that their international routing in general is superior.
ffmpeg convert to another format eg h265 to h264
Change $file to the file you wanta to convert and $file-h264 is the name of the converted file.
ffmpeg -i $file -c:v libx264 -profile:v high -preset slow -tune -film -crf 18 $file-h264.mp4
Of course you can adapter the -c:v libx264 to any other format you might want.
Here is a handy script to mass convert to h264:
for file in `ls *.mp4`; do

 echo ffmpeg -i $file -c:v libx264 -profile:v high -preset slow -tune -film -crf 18 $file-h264.mp4

done
Apache stop bots and hackers by using forensic logging.
Add this to your Apache config:
LoadModule log_forensic_module modules/mod_log_forensic.so
Restart Apache
Set the location of the forensic log.
ForensicLog /var/log/apache2/forensic.log
Here is an example of an entry in forensic:
+16831:68ca525e:3c5|GET /some/url HTTP/1.1|sec-fetch-dest:document|user-agent:Mozilla/5.0 (Macintosh; Intel Mac OS X 10_15_7) AppleWebKit/605.1.15 (KHTML, like Gecko) Version/26.0 Safari/605.1.15|accept:text/html,application/xhtml+xml,application/xml;q=0.9,*/*;q=0.8|referer:|sec-fetch-site:same-origin|sec-fetch-mode:same-origin|accept-language:en-US,en;q=0.9|priority:u=0, i|sec-fetch-user:?1|X-Forwarded-For:1.2.3.4|host:yourdomain.com|Accept-Encoding:gzip|X-Varnish:7275706
This can be crucial for debugging CDN/Load Balancer issue but also for identifying malicious bots. Many of them have "holes" in how they operate and assume many admins and sites do not properly check or filter headers.
For example if the "host:" entry is not your host, it is probably not a valid request, so you should block it at the WAF or CDN level.
Another fun trick is that sometimes bots claim to be "Windows NT" or "Mac OS" but then other parts of the header may indicate Linux, which again is impossible.
rsync: [generator] link /slackware/slackware-10.2/slackware/l/install-packages" => slackware-10.0/extra/ham/install-packages failed: No space left on device (28)
rsync: [generator] link /slackware/slackware-10.2/slackware/l/install-packages" => slackware-10.0/extra/ham/install-packages failed: No space left on device (28)
Just a reminder that rsync may report this error "No space left on device (28)" even when it's true, meaning your array/partition has lots of space left and assuming df -i shows lots of inodes.
This can often happen on various file/fuse based distributed filesystems like gluster, especially when creating symlinks. You may have to disable symlinks and use hardlinks, or no links at all to solve this issue.
How to install sysbox alternative runtime in Docker for Debian Ubuntu Linux
nestybox is an alternative runc instead of the default containerd which is more hardened, efficient and secure. It even allows you to do a lot of things you normally couldn't without having privileged mode which is great for development and many other functions.
However, the only drawback is that you must not have any docker containers already, if so you have to back them up / delete them before proceeding.
Step 1.) Get the latest .deb / package:
wget https://downloads.nestybox.com/sysbox/releases/v0.6.7/sysbox-ce_0.6.7-0.linux_amd64.deb
sysbox github https://github.com/nestybox/sysbox
Step 2.) Install required packages
apt install rsync jq
Step 3.) Install package
dpkg -i sysbox-ce_0.6.7-0.linux_amd64.deb
Step 4.) How to use it:
docker run --runtime=sysbox-runc ubuntu:20.04
How to install wetty into Alpine Linux
apk add --no-cache python3 nodejs npm py3-setuptools g++ make

npm install -g wetty
shellinabox [ssl] Cannot read valid certificate from "/var/lib/shellinabox/certificate.pem"! Check file permissions and file format. solution
shellinabox 2.21+b1
The version above has the issue in Debian 11, after confirming that the .pem is valid and contains the private and public key, and permissions are valid, I would still get this error.
I then tried the same .pem in Debian 12 with shellinabox 2.21+b2 and didn't encounter the error.
shellinabox is either error prone or the process of packaging or compiling has broken something (I wonder if the Debian 11 maybe didn't have SSL support compiled in somehow?).
So if you get this error, perhaps try a different OS or compiling it yourself and see if the error goes away.
pyinstaller 10210 INFO: TclTkInfo: initializing cached Tcl/Tk info... 10608 WARNING: tkinter installation is broken. It will be excluded from the application solution Python Wine
I doubt many people are doing this, but if you want an all Linux dev environment for Windows apps that you have made in Python, then you're probably using Wine, Python and maybe pyinstaller.
The below error happened with pyinstaller and it has a lot to do with how Wine identifies paths/drives vs where you execute python.exe from
Long-story short solution
Never execute python commands from /root because that maps to Wine's default Z:, so any operations performed in /root such as would happen in a Docker container, make Python use Z: which of course breaks things since modules you install and other things need to go into the C: where Python is installed to.
So for example you could cd into /root/.wine/python/dir and run wine python.exe -m pip install something and that is OK but you cannot do it while being in /root/ itself
Another way to avoid this problme is to execute python.exe with the full path from anywhere but /root
Here is an example of bad stuff happening if you do that (keep in mind that in this examle TK and TCL are fully installed by the Python installer already):
10210 INFO: TclTkInfo: initializing cached Tcl/Tk info... 10608 WARNING: tkinter installation is broken. It will be excluded from the application
Digging deeper look at the beginning phase of pyinstaller in this broken example:
711 INFO: PyInstaller: 6.15.0, contrib hooks: 2025.8

712 INFO: Python: 3.8.9

713 INFO: Platform: Windows-7-6.1.7601-SP1

713 INFO: Python environment: Z:root.winedrive_cusersrootLocal SettingsApplication DataProgramsPythonPython38-32

717 INFO: wrote Z:roottkinter-final-updatePILAntialiasVersion.spec

731 INFO: Removing temporary files and cleaning cache in C:usersrootLocal SettingsApplication Datapyinstaller

736 INFO: Module search paths (PYTHONPATH):

['Z:\root\.wine\drive_c\users\root\Local Settings\Application '

 'Data\Programs\Python\Python38-32\Scripts\pyinstaller.exe',

 'Z:\root\.wine\drive_c\users\root\Local Settings\Application '

 'Data\Programs\Python\Python38-32\python38.zip',

 'Z:\root\.wine\drive_c\users\root\Local Settings\Application '

 'Data\Programs\Python\Python38-32\DLLs',

 'Z:\root\.wine\drive_c\users\root\Local Settings\Application '

 'Data\Programs\Python\Python38-32\lib',

 'Z:\root\.wine\drive_c\users\root\Local Settings\Application '

 'Data\Programs\Python\Python38-32',

 'Z:\root\.wine\drive_c\users\root\Local Settings\Application '

 'Data\Programs\Python\Python38-32\lib\site-packages',

 'Z:\root']
Compare the above with a working good example from below:
793 INFO: Python: 3.8.9

794 INFO: Platform: Windows-7-6.1.7601-SP1

794 INFO: Python environment: C:usersrootLocal SettingsApplication DataProgramsPythonPython38-32

796 INFO: wrote Z:roottkinter-final-updatePILAntialiasVersion.spec

811 INFO: Removing temporary files and cleaning cache in C:usersrootLocal SettingsApplication Datapyinstaller

826 INFO: Module search paths (PYTHONPATH):

['Z:\root\.wine\drive_c\users\root\Local Settings\Application '

 'Data\Programs\Python\Python38-32\Scripts\pyinstaller.exe',

 'C:\users\root\Local Settings\Application '

 'Data\Programs\Python\Python38-32\python38.zip',

 'C:\users\root\Local Settings\Application '

 'Data\Programs\Python\Python38-32\DLLs',

 'C:\users\root\Local Settings\Application '

 'Data\Programs\Python\Python38-32\lib',

 'C:\users\root\Local Settings\Application '

 'Data\Programs\Python\Python38-32',

 'C:\users\root\Local Settings\Application '

 'Data\Programs\Python\Python38-32\lib\site-packages',

 'Z:\root']
We can notice the drive Z: for everything, even though I never installed Python itself there (it was installed to C:)
So what created the difference that broke everything?
I didn't recall that in my original dev environment I did this when installing the pip modules
cd ~/".wine/drive_c/users/root/Local Settings/Application Data/Programs/Python/Python38-32"
wine python.exe -m pip install pyinstaller reportlab pdf2image pillow
I got more/fancy efficient after scripting everything and knowing where everything was and did this:
This way below breaks everything and causes pyinstaller especially do think everything you need should come from Z: which it then uses to look for all dependencies of Python only in Z: which breaks since they are really in C:
wine ~/".wine/drive_c/users/root/Local Settings/Application Data/Programs/Python/Python38-32/python.exe" -m pip install pyinstaller reportlab pdf2image pillow
  WARNING: The scripts pip.exe, pip3.8.exe and pip3.exe are installed in 'Z:root.winedrive_cPython38Scripts' which is not on PATH.

  Consider adding this directory to PATH or, if you prefer to suppress this warning, use --no-warn-script-location.

  WARNING: The scripts pyi-archive_viewer.exe, pyi-bindepend.exe, pyi-grab_version.exe, pyi-makespec.exe, pyi-set_version.exe and pyinstaller.exe are installed in 'Z:root.winedrive_cPython38Scripts' which is not on PATH.

  Consider adding this directory to PATH or, if you prefer to suppress this warning, use --no-warn-script-location.

  WARNING: The script normalizer.exe is installed in 'Z:root.winedrive_cPython38Scripts' which is not on PATH.

  Consider adding this directory to PATH or, if you prefer to suppress this warning, use --no-warn-script-location.

Successfully installed altgraph-0.17.4 charset-normalizer-3.4.3 importlib-metadata-8.5.0 packaging-25.0 pdf2image-1.17.0 pefile-2023.2.7 pillow-10.4.0 pip-25.0.1 pyinstaller-6.15.0 pyinstaller-hooks-contrib-2025.8 pywin32-ctypes-0.2.3 reportlab-4.4.3 zipp-3.20.2
Docker how to run GUI applications
Yes, even though Docker has no devices, we can still fool it well enough by passing through our X server info as a bind mount and setting our DISPLAY environment variable.
Step 1.) Add Permission
Grant permission to docker to use the xhost/xserver
xhost +local:docker
non-network local connections being added to access control list
If you didn't do the above you will get an error like this when trying to launch a GUI app from Docker:
Unable to init server: Could not connect: Connection refused

Error: cannot open display: :0
Step 2.) Bind Mount X server to your docker container
Here is an example of doing it to Debian 11:
The relevant portion is to add the bind mount "-v /tmp/.X11-unix/:/tmp/.X11-unix"
and set the display environment variable: "-e DISPLAY=$DISPLAY debian:11"
docker run -v /tmp/.X11-unix/:/tmp/.X11-unix -it -e DISPLAY=$DISPLAY debian:11
ksoftirqd/3 Linux high cpu usage solution
This is often related to your network traffic and that most of the time I find the kernel just uses a single core to send or receive via your NIC.
This can be adjusted like this so that multiple cores are used to send and receive data via your NIC (eth0).
multicore eth0 RX
#enable multicore
echo f > /sys/class/net/eth0/queues/rx-0/rps_cpus
# enable flow and entries count or this will not have an impact

echo 32768 > /proc/sys/net/core/rps_sock_flow_entries

echo 32768 > /sys/class/net/eth0/queues/rx-0/rps_flow_cnt
multicore eth0 TX
echo f > /sys/class/net/eth0/queues/tx-0/xps_cpus
You may not notice if you are not running servers or other high throughput machines but in all stress tests that I've done and on real life high throughput nodes, it has made a huge difference in network performance and stopped high pings due to NIC traffic being pegged to a single core.
Watch it in action:
watch -n 1 'cat /proc/interrupts | grep -E "(CPU|eth|enp|IRQ)"'
E: The repository 'http://deb.debian.org/debian buster Release' does not have a Release file. - solution Debian 10
If you find yourself updating an old Debian/need to upgrade and get this error, generally you just have to update sources.list by setting all hostname references to archive.debian.org
Backup your sources.list
cp /etc/apt/sources.list /etc/apt/sources.list-bk
Change deb.debian and snapshot.debian
sed -i s/"deb.debian"/"archive.debian"/g /etc/apt/sources.list

sed -i s/"snapshot.debian"/"archive.debian"/g /etc/apt/sources.list
root@206f261b684c:/# apt update
Ign:1 http://deb.debian.org/debian buster InRelease
Ign:2 http://deb.debian.org/debian-security buster/updates InRelease
Ign:3 http://deb.debian.org/debian buster-updates InRelease
Err:4 http://deb.debian.org/debian buster Release
404 Not Found [IP: 151.101.214.132 80]
Err:5 http://deb.debian.org/debian-security buster/updates Release
404 Not Found [IP: 151.101.214.132 80]
Err:6 http://deb.debian.org/debian buster-updates Release
404 Not Found [IP: 151.101.214.132 80]
Reading package lists... Done
E: The repository 'http://deb.debian.org/debian buster Release' does not have a Release file.
N: Updating from such a repository can't be done securely, and is therefore disabled by default.
N: See apt-secure(8) manpage for repository creation and user configuration details.
E: The repository 'http://deb.debian.org/debian-security buster/updates Release' does not have a Release file.
N: Updating from such a repository can't be done securely, and is therefore disabled by default.
N: See apt-secure(8) manpage for repository creation and user configuration details.
E: The repository 'http://deb.debian.org/debian buster-updates Release' does not have a Release file.
N: Updating from such a repository can't be done securely, and is therefore disabled by default.
N: See apt-secure(8) manpage for repository creation and user configuration details.
root@206f261b684c:/# cat /etc/apt/sources.list
# deb http://snapshot.debian.org/archive/debian/20240612T000000Z buster main
deb http://deb.debian.org/debian buster main
# deb http://snapshot.debian.org/archive/debian-security/20240612T000000Z buster/updates main
deb http://deb.debian.org/debian-security buster/updates main
# deb http://snapshot.debian.org/archive/debian/20240612T000000Z buster-updates main
deb http://deb.debian.org/debian buster-updates main
root@206f261b684c:/# sed s/"deb.debian"/"archive.debian"/g /etc/apt/sources.list
# deb http://snapshot.debian.org/archive/debian/20240612T000000Z buster main
deb http://archive.debian.org/debian buster main
# deb http://snapshot.debian.org/archive/debian-security/20240612T000000Z buster/updates main
deb http://archive.debian.org/debian-security buster/updates main
# deb http://snapshot.debian.org/archive/debian/20240612T000000Z buster-updates main
deb http://archive.debian.org/debian buster-updates main
root@206f261b684c:/# sed -i s/"deb.debian"/"archive.debian"/g /etc/apt/sources.list
root@206f261b684c:/# sed -i s/"snapshot.debian"/"archive.debian"/g /etc/apt/sources.list
Recommended SFP+ to RJ45 Adapter Module for Switch Juniper Cisco Ubiquiti TP-Link etc...
I am mainly used to the enterprise where most connections are deployed by some "normal" kind of fiber eg SFP+, QSFP+, SFP28, QSFP28 and those modules are almost fool proof, run cool and are reliable. Like most normal admin users, I like to use my own hardware for routing and switching rather than the often poor equipment provided by the ISP, especially when you have enterprise hardware that will be more reliable.
The normal path is that you would just take the fiber optic link on an SFP or SFP+ and plug it in directly into your firewall, router or switch, cutting out the extra power usage, insecure ISP devices and another point of failure.
But enter the situation with a lot of home and office connections and anything on ISPs like Telus, AT&T, most ISPs in Japan etc... that are faster than 1.5G, they no longer use the standard GPON which just registers via the serial# of the module that the ISP has on file.
Now you need a device called the NAH (Network Access Hub) which uses XGSPON which is authenticated via this extra and unnecessary device/NAH. Plugging in an XGSPON SFP+ module to your router/switch will not work like a normal GPON.
Solution 1 - buy an expensive XGSPON module and hack and modify it
After more testing, I almost think that #1 in some cases here may be more reliable, yes there is the chance of authentication parameters changing which would instantly take you offline. However, many of the SFP+ to RJ45 adapters are known to be unreliable and randomly die. In theory if your XGSPON module doesn't die, then I will predict it will probably be more reliable than the #2 adapter method.
There are some solutions which modify XGSPON modules from fs.com so you can use it as normal, but they are pricey and this can be risky if the authentication mode/details changes in the future. In plain English, you could be away from home and need access to your home network but an ISP Update could render your internet access useless. Here is the procedure on Github to hack the XGSPON SFP+ module from fs.com.
Solution 2 - Use the NAH and use an SFP+ to RJ45 module
As much as I hate the NAH, this is the most reliable way for the reasons mentioned in #1. With a caveat being that I don't trust these adapters, they can die. For example one of mine died after 3 days. They do say the 80M are more reliable.
Recommended 80M SFP+ to RJ45
The 80M or 100M units use the BCM84891L Broadcom chip which is considered more reliable in my experience.
My 80M unit has been going strong for over a month now and temps vary between 42-48C which appears to be based on usage, whereas the 30M units seem to stay at almost a static temperature.
Amazon affil Link to the 80M 10G SFP+ RJ45 adapter I use.
I don't recommend the 30M SFP+ modules anymore below.
The 30Ms almost always use the Marvell AQR113C as mentioned below which is a chip that is proven to overheat and not last (eg. mine died after just 3 days!).
One module I recently tested has an ID of "SFP+-10G-SR" and runs at a reasonable 51C which is much better than what many users report with other modules (eg. burning hot 80-90C). I cannot be certain if the unit runs cool because of the design it claims to use which minimizes heat, or if it is because my enterprise switch has active cooling.
It seems almost all 30M SFP+ modules use the Marvell AQR113C chip which no matter the brand is often not reliable.
The 80M or 100M SFP+ modules usually use Broadcom BCM84891L which is known to be a cooler running chip. It does cost more but if they last longer then it is worth it.
After testing with heavy use for 3-4 days the temperature stayed the same but the module dies/drops out which causes downtime/packetloss:
Jan 25 13:04:08 chassism[1243]: link 3 SFP receive power low warning cleared
Jan 25 13:07:31 mib2d[1262]: SNMP_TRAP_LINK_DOWN: ifIndex 561, ifAdminStatus up(1), ifOperStatus down(2), ifName xe-0/1/3
Jan 25 13:07:33 chassism[1243]: link 3 SFP receive power low alarm set
Jan 25 13:07:33 chassism[1243]: link 3 SFP receive power low warning set
Jan 25 13:07:43 chassism[1243]: link 3 SFP receive power low alarm cleared
Jan 25 13:07:43 chassism[1243]: link 3 SFP receive power low warning cleared
Here is the affiliate link to the bad/dying after 3 days SFP+ to RJ45 item I bought.

Even when pushing 10 Gigabit in both directions the module stayed at the same temp or maybe went to 52C.
Bad Power Supply Issue Story Diagnosing Troubleshooting
These are fairly classic symptoms but they may not present obviously enough early on.
I had a power supply issue with my old Corsair CX430 (430 Watt).
The build had two old 95W Xeon CPUs, 2 USB devices and a PCI-E powered Nvidia Quadro or at one point a GT710. This shouldn't have overwhelmed the PS but this power supply is known to be weak by many users.
Symptom 1. Graphics Issues
This would only present it self after coming back with the screensaver, when hitting the keyboard or mouse to stop the screensaver and get the login screen, it would just freeze for a number of seconds. I initially chalked it up to bad cooling or an old Nvidia driver.
Symptom 2. Mouse Issues
Sometimes the mouse would just freeze or not track properly, clearly in hindsight it was a power supply issue but the mouse itself also did test bad, so this was not completely obvious.
Symptom 3. USB Issues
I didn't have this particular issue but a lot of times I've seen issues with power supplies, you may notice a USB SSD does not work right or drops out. This is tricky to diagnose as it is often the USB SSD enclosure/cable itself, OR it is sometimes the internal cabling or resistance from motherboard to the front of the PC.
Symptom 4. Resetting randomly.
This one is fairly obvious but may slowly creep up. You may assume if you aren't at the PC all the time that it may be due to an update or even a bad motherboard or a watchdog service acting up.
Conclusion
If you ever have any issues like this, if practical, swap out for a known good power supply and see if any of these types of symptoms goes away.
In my example, I swapped in a known good 750W EVGA and all has been fine since (no resets, no screensaver freezing, no USB issues etc...)
Getting started with AI (Artificial Intelligence) in Linux / Ubuntu using by deploying LLM (Language Learing Models) using Ollama LLMA
In this quick tutorial we will deploy various AI models and compare the differences. We will be using smaller models so that most users should be able to follow this guide as long as they have at least 16G of memory and no other applications using much memory.
In this tutorial we recommend that you use Docker to deploy ollama. If you are not familiar with Docker, you can check our Docker Tutorial guide here.
Step 1.) Deploy
I recommend having a Ubuntu or Debian host for this, but it is supported in Windows and Mac too.
Visit the Ollama website to download it.
Step 2.) Install Ollama
Install curl if you don't have it already: apt update && apt install curl
curl -fsSL https://ollama.com/install.sh | sh
 >>> Installing ollama to /usr/local

>>> Downloading Linux amd64 bundle

######################################################################## 100.0%

WARNING: Unable to detect NVIDIA/AMD GPU. Install lspci or lshw to automatically detect and install GPU dependencies.

>>> The Ollama API is now available at 127.0.0.1:11434.

>>> Install complete. Run "ollama" from the command line.
Step 3.) Start ollama server
ollama serve&
Make sure you use the & so it puts the service in the background, yet it will still output to the console. This is very useful for debugging and troubleshooting performance issues.
2025/04/22 21:00:21 routes.go:1231: INFO server config env="map[CUDA_VISIBLE_DEVICES: GPU_DEVICE_ORDINAL: HIP_VISIBLE_DEVICES: HSA_OVERRIDE_GFX_VERSION: HTTPS_PROXY: HTTP_PROXY: NO_PROXY: OLLAMA_CONTEXT_LENGTH:2048 OLLAMA_DEBUG:false OLLAMA_FLASH_ATTENTION:false OLLAMA_GPU_OVERHEAD:0 OLLAMA_HOST:http://127.0.0.1:11434 OLLAMA_INTEL_GPU:false OLLAMA_KEEP_ALIVE:5m0s OLLAMA_KV_CACHE_TYPE: OLLAMA_LLM_LIBRARY: OLLAMA_LOAD_TIMEOUT:5m0s OLLAMA_MAX_LOADED_MODELS:0 OLLAMA_MAX_QUEUE:512 OLLAMA_MODELS:/root/.ollama/models OLLAMA_MULTIUSER_CACHE:false OLLAMA_NEW_ENGINE:false OLLAMA_NOHISTORY:false OLLAMA_NOPRUNE:false OLLAMA_NUM_PARALLEL:0 OLLAMA_ORIGINS:[http://localhost https://localhost http://localhost:* https://localhost:* http://127.0.0.1 https://127.0.0.1 http://127.0.0.1:* https://127.0.0.1:* http://0.0.0.0 https://0.0.0.0 http://0.0.0.0:* https://0.0.0.0:* app://* file://* tauri://* vscode-webview://* vscode-file://*] OLLAMA_SCHED_SPREAD:false ROCR_VISIBLE_DEVICES: http_proxy: https_proxy: no_proxy:]"

time=2025-04-22T21:00:21.697Z level=INFO source=images.go:458 msg="total blobs: 0"

time=2025-04-22T21:00:21.697Z level=INFO source=images.go:465 msg="total unused blobs removed: 0"

time=2025-04-22T21:00:21.697Z level=INFO source=routes.go:1298 msg="Listening on 127.0.0.1:11434 (version 0.6.5)"

time=2025-04-22T21:00:21.697Z level=INFO source=gpu.go:217 msg="looking for compatible GPUs"

time=2025-04-22T21:00:21.727Z level=INFO source=gpu.go:377 msg="no compatible GPUs were discovered"

time=2025-04-22T21:00:21.727Z level=INFO source=types.go:130 msg="inference compute" id=0 library=cpu variant="" compute="" driver=0.0 name="" total="267.6 GiB" available="255.5 GiB"
Step 4.) Run your first llm!
Find the LLM you want to test on the ollama website.
Keep in mind that the larger the model, the more memory and more disk space and resources it consumes when running. For this reason, our example will use a smaller model.
ollama run qwen2.5:0.5b
Note that this smaller 0.5b model uses just about 397MB
You should see similar output as below and then have a chat prompt at the end.
 ollama run qwen2.5:0.5b

[GIN] 2025/04/22 - 21:04:44 | 200 |      79.024µs |       127.0.0.1 | HEAD     "/"

[GIN] 2025/04/22 - 21:04:44 | 404 |     455.218µs |       127.0.0.1 | POST     "/api/show"

pulling manifest ⠇ time=2025-04-22T21:04:45.299Z level=INFO source=download.go:177 msg="downloading c5396e06af29 in 4 100 MB part(s)"

pulling manifest

pulling manifest

pulling c5396e06af29... 100% ▕██████████████████████████████████████████████████████████████████████████████▏ 397 MB                         tpulling manifest

pulling c5396e06af29... 100% ▕██████████████████████████████████████████████████████████████████████████████▏ 397 MB

pulling manifest

pulling c5396e06af29... 100% ▕██████████████████████████████████████████████████████████████████████████████▏ 397 MB

pulling manifest

pulling c5396e06af29... 100% ▕██████████████████████████████████████████████████████████████████████████████▏ 397 MB

pulling manifest

pulling manifest

pulling c5396e06af29... 100% ▕██████████████████████████████████████████████████████████████████████████████████████████████████████████████████████████████▏ 397 MB

pulling 66b9ea09bd5b... 100% ▕██████████████████████████████████████████████████████████████████████████████████████████████████████████████████████████████▏   68 B

pulling eb4402837c78... 100% ▕██████████████████████████████████████████████████████████████████████████████████████████████████████████████████████████████▏ 1.5 KB

pulling 832dd9e00a68... 100% ▕██████████████████████████████████████████████████████████████████████████████████████████████████████████████████████████████▏  11 KB

pulling 005f95c74751... 100% ▕██████████████████████████████████████████████████████████████████████████████████████████████████████████████████████████████▏  490 B

verifying sha256 digest

writing manifest

success

[GIN] 2025/04/22 - 21:04:57 | 200 |   66.099807ms |       127.0.0.1 | POST     "/api/show"

⠙ time=2025-04-22T21:04:57.759Z level=INFO source=server.go:105 msg="system memory" total="267.6 GiB" free="255.5 GiB" free_swap="976.0 MiB"

time=2025-04-22T21:04:57.759Z level=WARN source=ggml.go:152 msg="key not found" key=qwen2.vision.block_count default=0

time=2025-04-22T21:04:57.759Z level=WARN source=ggml.go:152 msg="key not found" key=qwen2.attention.key_length default=64

time=2025-04-22T21:04:57.759Z level=WARN source=ggml.go:152 msg="key not found" key=qwen2.attention.value_length default=64

time=2025-04-22T21:04:57.759Z level=INFO source=server.go:138 msg=offload library=cpu layers.requested=-1 layers.model=25 layers.offload=0 layers.split="" memory.available="[255.5 GiB]" memory.gpu_overhead="0 B" memory.required.full="782.6 MiB" memory.required.partial="0 B" memory.required.kv="96.0 MiB" memory.required.allocations="[782.6 MiB]" memory.weights.total="373.7 MiB" memory.weights.repeating="235.8 MiB" memory.weights.nonrepeating="137.9 MiB" memory.graph.full="298.5 MiB" memory.graph.partial="405.0 MiB"

llama_model_loader: loaded meta data with 34 key-value pairs and 290 tensors from /root/.ollama/models/blobs/sha256-c5396e06af294bd101b30dce59131a76d2b773e76950acc870eda801d3ab0515 (version GGUF V3 (latest))

llama_model_loader: Dumping metadata keys/values. Note: KV overrides do not apply in this output.

llama_model_loader: - kv   0:                       general.architecture str              = qwen2

llama_model_loader: - kv   1:                               general.type str              = model

llama_model_loader: - kv   2:                               general.name str              = Qwen2.5 0.5B Instruct

llama_model_loader: - kv   3:                           general.finetune str              = Instruct

llama_model_loader: - kv   4:                           general.basename str              = Qwen2.5

llama_model_loader: - kv   5:                         general.size_label str              = 0.5B

llama_model_loader: - kv   6:                            general.license str              = apache-2.0

llama_model_loader: - kv   7:                       general.license.link str              = https://huggingface.co/Qwen/Qwen2.5-0...

llama_model_loader: - kv   8:                   general.base_model.count u32              = 1

llama_model_loader: - kv   9:                  general.base_model.0.name str              = Qwen2.5 0.5B

llama_model_loader: - kv  10:          general.base_model.0.organization str              = Qwen

llama_model_loader: - kv  11:              general.base_model.0.repo_url str              = https://huggingface.co/Qwen/Qwen2.5-0.5B

llama_model_loader: - kv  12:                               general.tags arr[str,2]       = ["chat", "text-generation"]

llama_model_loader: - kv  13:                          general.languages arr[str,1]       = ["en"]

llama_model_loader: - kv  14:                          qwen2.block_count u32              = 24

llama_model_loader: - kv  15:                       qwen2.context_length u32              = 32768

llama_model_loader: - kv  16:                     qwen2.embedding_length u32              = 896

llama_model_loader: - kv  17:                  qwen2.feed_forward_length u32              = 4864

llama_model_loader: - kv  18:                 qwen2.attention.head_count u32              = 14

llama_model_loader: - kv  19:              qwen2.attention.head_count_kv u32              = 2

llama_model_loader: - kv  20:                       qwen2.rope.freq_base f32              = 1000000.000000

llama_model_loader: - kv  21:     qwen2.attention.layer_norm_rms_epsilon f32              = 0.000001

llama_model_loader: - kv  22:                          general.file_type u32              = 15

llama_model_loader: - kv  23:                       tokenizer.ggml.model str              = gpt2

llama_model_loader: - kv  24:                         tokenizer.ggml.pre str              = qwen2

⠹ llama_model_loader: - kv  25:                      tokenizer.ggml.tokens arr[str,151936]  = ["!", """, "#", "$", "%", "&", "'", ...

llama_model_loader: - kv  26:                  tokenizer.ggml.token_type arr[i32,151936]  = [1, 1, 1, 1, 1, 1, 1, 1, 1, 1, 1, 1, ...

llama_model_loader: - kv  27:                      tokenizer.ggml.merges arr[str,151387]  = ["Ġ Ġ", "ĠĠ ĠĠ", "i n", "Ġ t",...

llama_model_loader: - kv  28:                tokenizer.ggml.eos_token_id u32              = 151645

llama_model_loader: - kv  29:            tokenizer.ggml.padding_token_id u32              = 151643

llama_model_loader: - kv  30:                tokenizer.ggml.bos_token_id u32              = 151643

llama_model_loader: - kv  31:               tokenizer.ggml.add_bos_token bool             = false

llama_model_loader: - kv  32:                    tokenizer.chat_template str              = {%- if tools %}n    {{- '<|im_start|>...

llama_model_loader: - kv  33:               general.quantization_version u32              = 2

llama_model_loader: - type  f32:  121 tensors

llama_model_loader: - type q5_0:  132 tensors

llama_model_loader: - type q8_0:   13 tensors

llama_model_loader: - type q4_K:   12 tensors

llama_model_loader: - type q6_K:   12 tensors

print_info: file format = GGUF V3 (latest)

print_info: file type   = Q4_K - Medium

print_info: file size   = 373.71 MiB (6.35 BPW)

⠼ load: special tokens cache size = 22

⠴ load: token to piece cache size = 0.9310 MB

print_info: arch             = qwen2

print_info: vocab_only       = 1

print_info: model type       = ?B

print_info: model params     = 494.03 M

print_info: general.name     = Qwen2.5 0.5B Instruct

print_info: vocab type       = BPE

print_info: n_vocab          = 151936

print_info: n_merges         = 151387

print_info: BOS token        = 151643 '<|endoftext|>'

print_info: EOS token        = 151645 '<|im_end|>'

print_info: EOT token        = 151645 '<|im_end|>'

print_info: PAD token        = 151643 '<|endoftext|>'

print_info: LF token         = 198 'Ċ'

print_info: FIM PRE token    = 151659 '<|fim_prefix|>'

print_info: FIM SUF token    = 151661 '<|fim_suffix|>'

print_info: FIM MID token    = 151660 '<|fim_middle|>'

print_info: FIM PAD token    = 151662 '<|fim_pad|>'

print_info: FIM REP token    = 151663 '<|repo_name|>'

print_info: FIM SEP token    = 151664 '<|file_sep|>'

print_info: EOG token        = 151643 '<|endoftext|>'

print_info: EOG token        = 151645 '<|im_end|>'

print_info: EOG token        = 151662 '<|fim_pad|>'

print_info: EOG token        = 151663 '<|repo_name|>'

print_info: EOG token        = 151664 '<|file_sep|>'

print_info: max token length = 256

llama_model_load: vocab only - skipping tensors

time=2025-04-22T21:04:58.219Z level=INFO source=server.go:405 msg="starting llama server" cmd="/usr/local/bin/ollama runner --model /root/.ollama/models/blobs/sha256-c5396e06af294bd101b30dce59131a76d2b773e76950acc870eda801d3ab0515 --ctx-size 8192 --batch-size 512 --threads 12 --no-mmap --parallel 4 --port 38569"

time=2025-04-22T21:04:58.219Z level=INFO source=sched.go:451 msg="loaded runners" count=1

time=2025-04-22T21:04:58.219Z level=INFO source=server.go:580 msg="waiting for llama runner to start responding"

time=2025-04-22T21:04:58.220Z level=INFO source=server.go:614 msg="waiting for server to become available" status="llm server error"

time=2025-04-22T21:04:58.241Z level=INFO source=runner.go:853 msg="starting go runner"

time=2025-04-22T21:04:58.243Z level=INFO source=ggml.go:109 msg=system CPU.0.LLAMAFILE=1 compiler=cgo(gcc)

time=2025-04-22T21:04:58.250Z level=INFO source=runner.go:913 msg="Server listening on 127.0.0.1:38569"

⠦ llama_model_loader: loaded meta data with 34 key-value pairs and 290 tensors from /root/.ollama/models/blobs/sha256-c5396e06af294bd101b30dce59131a76d2b773e76950acc870eda801d3ab0515 (version GGUF V3 (latest))

llama_model_loader: Dumping metadata keys/values. Note: KV overrides do not apply in this output.

llama_model_loader: - kv   0:                       general.architecture str              = qwen2

llama_model_loader: - kv   1:                               general.type str              = model

llama_model_loader: - kv   2:                               general.name str              = Qwen2.5 0.5B Instruct

llama_model_loader: - kv   3:                           general.finetune str              = Instruct

llama_model_loader: - kv   4:                           general.basename str              = Qwen2.5

llama_model_loader: - kv   5:                         general.size_label str              = 0.5B

llama_model_loader: - kv   6:                            general.license str              = apache-2.0

llama_model_loader: - kv   7:                       general.license.link str              = https://huggingface.co/Qwen/Qwen2.5-0...

llama_model_loader: - kv   8:                   general.base_model.count u32              = 1

llama_model_loader: - kv   9:                  general.base_model.0.name str              = Qwen2.5 0.5B

llama_model_loader: - kv  10:          general.base_model.0.organization str              = Qwen

llama_model_loader: - kv  11:              general.base_model.0.repo_url str              = https://huggingface.co/Qwen/Qwen2.5-0.5B

llama_model_loader: - kv  12:                               general.tags arr[str,2]       = ["chat", "text-generation"]

llama_model_loader: - kv  13:                          general.languages arr[str,1]       = ["en"]

llama_model_loader: - kv  14:                          qwen2.block_count u32              = 24

llama_model_loader: - kv  15:                       qwen2.context_length u32              = 32768

llama_model_loader: - kv  16:                     qwen2.embedding_length u32              = 896

llama_model_loader: - kv  17:                  qwen2.feed_forward_length u32              = 4864

llama_model_loader: - kv  18:                 qwen2.attention.head_count u32              = 14

llama_model_loader: - kv  19:              qwen2.attention.head_count_kv u32              = 2

llama_model_loader: - kv  20:                       qwen2.rope.freq_base f32              = 1000000.000000

llama_model_loader: - kv  21:     qwen2.attention.layer_norm_rms_epsilon f32              = 0.000001

llama_model_loader: - kv  22:                          general.file_type u32              = 15

llama_model_loader: - kv  23:                       tokenizer.ggml.model str              = gpt2

llama_model_loader: - kv  24:                         tokenizer.ggml.pre str              = qwen2

llama_model_loader: - kv  25:                      tokenizer.ggml.tokens arr[str,151936]  = ["!", """, "#", "$", "%", "&", "'", ...

⠧ llama_model_loader: - kv  26:                  tokenizer.ggml.token_type arr[i32,151936]  = [1, 1, 1, 1, 1, 1, 1, 1, 1, 1, 1, 1, ...

llama_model_loader: - kv  27:                      tokenizer.ggml.merges arr[str,151387]  = ["Ġ Ġ", "ĠĠ ĠĠ", "i n", "Ġ t",...

llama_model_loader: - kv  28:                tokenizer.ggml.eos_token_id u32              = 151645

llama_model_loader: - kv  29:            tokenizer.ggml.padding_token_id u32              = 151643

llama_model_loader: - kv  30:                tokenizer.ggml.bos_token_id u32              = 151643

llama_model_loader: - kv  31:               tokenizer.ggml.add_bos_token bool             = false

llama_model_loader: - kv  32:                    tokenizer.chat_template str              = {%- if tools %}n    {{- '<|im_start|>...

llama_model_loader: - kv  33:               general.quantization_version u32              = 2

llama_model_loader: - type  f32:  121 tensors

llama_model_loader: - type q5_0:  132 tensors

llama_model_loader: - type q8_0:   13 tensors

llama_model_loader: - type q4_K:   12 tensors

llama_model_loader: - type q6_K:   12 tensors

print_info: file format = GGUF V3 (latest)

print_info: file type   = Q4_K - Medium

print_info: file size   = 373.71 MiB (6.35 BPW)

⠇ time=2025-04-22T21:04:58.472Z level=INFO source=server.go:614 msg="waiting for server to become available" status="llm server loading model"

⠏ load: special tokens cache size = 22

⠋ load: token to piece cache size = 0.9310 MB

print_info: arch             = qwen2

print_info: vocab_only       = 0

print_info: n_ctx_train      = 32768

print_info: n_embd           = 896

print_info: n_layer          = 24

print_info: n_head           = 14

print_info: n_head_kv        = 2

print_info: n_rot            = 64

print_info: n_swa            = 0

print_info: n_embd_head_k    = 64

print_info: n_embd_head_v    = 64

print_info: n_gqa            = 7

print_info: n_embd_k_gqa     = 128

print_info: n_embd_v_gqa     = 128

print_info: f_norm_eps       = 0.0e+00

print_info: f_norm_rms_eps   = 1.0e-06

print_info: f_clamp_kqv      = 0.0e+00

print_info: f_max_alibi_bias = 0.0e+00

print_info: f_logit_scale    = 0.0e+00

print_info: n_ff             = 4864

print_info: n_expert         = 0

print_info: n_expert_used    = 0

print_info: causal attn      = 1

print_info: pooling type     = 0

print_info: rope type        = 2

print_info: rope scaling     = linear

print_info: freq_base_train  = 1000000.0

print_info: freq_scale_train = 1

print_info: n_ctx_orig_yarn  = 32768

print_info: rope_finetuned   = unknown

print_info: ssm_d_conv       = 0

print_info: ssm_d_inner      = 0

print_info: ssm_d_state      = 0

print_info: ssm_dt_rank      = 0

print_info: ssm_dt_b_c_rms   = 0

print_info: model type       = 1B

print_info: model params     = 494.03 M

print_info: general.name     = Qwen2.5 0.5B Instruct

print_info: vocab type       = BPE

print_info: n_vocab          = 151936

print_info: n_merges         = 151387

print_info: BOS token        = 151643 '<|endoftext|>'

print_info: EOS token        = 151645 '<|im_end|>'

print_info: EOT token        = 151645 '<|im_end|>'

print_info: PAD token        = 151643 '<|endoftext|>'

print_info: LF token         = 198 'Ċ'

print_info: FIM PRE token    = 151659 '<|fim_prefix|>'

print_info: FIM SUF token    = 151661 '<|fim_suffix|>'

print_info: FIM MID token    = 151660 '<|fim_middle|>'

print_info: FIM PAD token    = 151662 '<|fim_pad|>'

print_info: FIM REP token    = 151663 '<|repo_name|>'

print_info: FIM SEP token    = 151664 '<|file_sep|>'

print_info: EOG token        = 151643 '<|endoftext|>'

print_info: EOG token        = 151645 '<|im_end|>'

print_info: EOG token        = 151662 '<|fim_pad|>'

print_info: EOG token        = 151663 '<|repo_name|>'

print_info: EOG token        = 151664 '<|file_sep|>'

print_info: max token length = 256

load_tensors: loading model tensors, this can take a while... (mmap = false)

load_tensors:          CPU model buffer size =   373.71 MiB

⠹ llama_init_from_model: n_seq_max     = 4

llama_init_from_model: n_ctx         = 8192

llama_init_from_model: n_ctx_per_seq = 2048

llama_init_from_model: n_batch       = 2048

llama_init_from_model: n_ubatch      = 512

llama_init_from_model: flash_attn    = 0

llama_init_from_model: freq_base     = 1000000.0

llama_init_from_model: freq_scale    = 1

llama_init_from_model: n_ctx_per_seq (2048) < n_ctx_train (32768) -- the full capacity of the model will not be utilized

llama_kv_cache_init: kv_size = 8192, offload = 1, type_k = 'f16', type_v = 'f16', n_layer = 24, can_shift = 1

llama_kv_cache_init:        CPU KV buffer size =    96.00 MiB

llama_init_from_model: KV self size  =   96.00 MiB, K (f16):   48.00 MiB, V (f16):   48.00 MiB

llama_init_from_model:        CPU  output buffer size =     2.33 MiB

⠸ llama_init_from_model:        CPU compute buffer size =   300.25 MiB

llama_init_from_model: graph nodes  = 846

llama_init_from_model: graph splits = 1

time=2025-04-22T21:04:58.973Z level=INFO source=server.go:619 msg="llama runner started in 0.75 seconds"

[GIN] 2025/04/22 - 21:04:58 | 200 |  1.319178734s |       127.0.0.1 | POST     "/api/generate"
>>> Send a message (/? for help)
Checking the ollama process we can see it uses about
1589132 root 20 0 2874.7m 553.7m 21.5m S 1140 0.2 3:03.60 ollama
553.7MB of RAM
Tuning from the console/terminal of ollama
Set verbose mode when running or in console:
ollama run qwen3.5:0.8b --verbose
The --verbose gives you stats like tokens/s , execution time etc..
You can also set it within the console with:
/set verbose
total duration: 6m5.220417685s
load duration: 424.255399ms
prompt eval count: 694 token(s)
prompt eval duration: 3.385588148s
prompt eval rate: 204.99 tokens/s
eval count: 4070 token(s)
eval duration: 5m41.167479047s
eval rate: 11.93 tokens/s
Here are some of the default parameters set:
>>> /show parameters

Model defined parameters:

  presence_penalty               1.5

  temperature                    1

  top_k                          20

  top_p                          0.95
We can set the context size to the largest the model supports eg. some models are ok for 256K context.
Remember high context uses more resources and generally reduces performance tokens/s
>>> /set parameter num_ctx 256000

Set parameter 'num_ctx' to '256000'
Set generation limit
The default setting cuts output off pretty fast which is not desirable for coding and other long output operations.
/set parameter num_predict 4096
microk8s kubernetes how to install OpenEBS
This is the official guide here from OpenEBS.
Step 1.) Make sure you have the right version.
As of this time 2025-04, we need Kubernetes/Microk8s version 1.23 or higher (note this will continue to increment higher).
Usually a good sign of having the wrong/old version is that you will encounter namespace and other errors:
error: unknown flag: --namespace
Step 2.) Enable Helm
microk8s enable helm
Step 3.) Get OpenEBS repo & update
microk8s helm repo add openebs https://openebs.github.io/openebs
microk8s helm repo update
Hang tight while we grab the latest from your chart repositories...

...Successfully got an update from the "openebs" chart repository

Update Complete. ⎈Happy Helming!⎈
Step 4.) Install OpenEBS
microk8s helm install openebs --namespace openebs openebs/openebs --create-namespace
NAME: openebs
LAST DEPLOYED: Thu Apr 17 17:38:46 2025
NAMESPACE: openebs
STATUS: deployed
REVISION: 1
NOTES:
Successfully installed OpenEBS.
Check the status by running: kubectl get pods -n openebs
The default values will install both Local PV and Replicated PV. However,
the Replicated PV will require additional configuration to be fuctional.
The Local PV offers non-replicated local storage using 3 different storage
backends i.e Hostpath, LVM and ZFS, while the Replicated PV provides one replicated highly-available
storage backend i.e Mayastor.
For more information,
- view the online documentation at https://openebs.io/docs
- connect with an active community on our Kubernetes slack channel.
- Sign up to Kubernetes slack: https://slack.k8s.io
- #openebs channel: https://kubernetes.slack.com/messages/openebs
Flash LSI MegaRAID 2208 to IT mode in Linux Mint/Debian/Ubuntu
03:00.0 RAID bus controller: Broadcom / LSI MegaRAID SAS 2208 [Thunderbolt] (rev 05)
This is risky but if you have an extra RAID/SAS card to replace it then you can try this to get IT mode.
https://docs.broadcom.com/docs-and-downloads/host-bus-adapters/host-bus-adapters-common-files/sas_sata_6g_p14/9207_8e_Package_P14_IT_Firmware_BIOS_for_MSDOS_Windows.zip
https://docs.broadcom.com/docs/12350477
Get the sas2flash for Linux:
https://docs.broadcom.com/docs-and-downloads/host-bus-adapters/host-bus-adapters-common-files/sas_sata_6g_p20/Installer_P20_for_Linux.zip
unzip Installer_P20_for_Linux.zip
Archive: Installer_P20_for_Linux.zip
inflating: Installer_P20_for_Linux/README_Installer_P20_Linux.txt
creating: Installer_P20_for_Linux/sas2flash_linux_i686_x86-64_rel/
inflating: Installer_P20_for_Linux/sas2flash_linux_i686_x86-64_rel/sas2flash
creating: Installer_P20_for_Linux/sas2flash_linux_ppc64_rel/
inflating: Installer_P20_for_Linux/sas2flash_linux_ppc64_rel/sas2flash
inflating: Installer_P20_for_Linux/SAS2FLASH_Phase20.0-20.00.00.00.pdf
inflating: Installer_P20_for_Linux/SAS2Flash_ReferenceGuide.pdf
chmod +x Installer_P20_for_Linux/sas2flash_linux_i686_x86-64_rel/sas2flash
Save Your Card Details:
Installer_P20_for_Linux/sas2flash_linux_i686_x86-64_rel/sas2flash -list -c 0
LSI Corporation SAS2 Flash Utility
Version 20.00.00.00 (2014.09.18)
Copyright (c) 2008-2014 LSI Corporation. All rights reserved
No LSI SAS adapters found! Limited Command Set Available!
ERROR: Command Not allowed without an adapter!
ERROR: Couldn't Create Command -list
Exiting Program.
P14 sas2flash won't run on Ubuntu 20 or similar/newer:
sas2flash: sas2flash: cannot execute binary file
LSI MegaRAID in Linux Ubuntu / Centos Tutorial Setup Guide megacli
Usually when I come across a system like this, I just flash the firmware to an IT mode so we get just an AHCI system with JBOD, but sometimes it is not practical for remote systems or if we fear that flashing is too risky if something goes wrong.
In this case, we unfortunately have to use LSI/Broadcom proprietary CLI tools (megacli) to even make the drives visible.
Step 1 - Download MegaCLI
The official broadcom packages lack .deb packages and only have .rpm for Linux
At this time the latest MegaCLI 5.5 P2 can be downloaded from here.
Step 2 - Extract MegaCLI
unzip 8-07-14_MegaCLI.zip
Archive:  8-07-14_MegaCLI.zip

  inflating: 8.07.14_MegaCLI.txt

  inflating: DOS/MegaCLI.exe

 extracting: FreeBSD/MegaCLI.zip

 extracting: FreeBSD/MegaCli64.zip

  inflating: Linux/MegaCli-8.07.14-1.noarch.rpm

  inflating: Solaris/MegaCli.pkg

  inflating: Windows/MegaCli.exe

  inflating: Windows/MegaCli64.exe
Step 3 - Convert to .deb using alien
apt install libncurses5 alien
alien MegaCli-8.07.06-1.noarch.rpm
Warning: Skipping conversion of scripts in package MegaCli: postinst postrm

Warning: Use the --scripts parameter to include the scripts.

megacli_8.07.06-2_all.deb generated
Step 4 - Install .deb
dpkg -i megacli_8.07.06-2_all.deb
Selecting previously unselected package megacli.

(Reading database ... 295031 files and directories currently installed.)

Preparing to unpack megacli_8.07.06-2_all.deb ...

Unpacking megacli (8.07.06-2) ...

Setting up megacli (8.07.06-2) ...

Processing triggers for libc-bin (2.31-0ubuntu9) ...
/opt/MegaRAID/MegaCli/MegaCli64: error while loading shared libraries: libncurses.so.5: cannot open shared object file: No such file or directory
If you get the above: apt install libncurses5
Step 5 - Run megacli
root@mint:~/Linux# /opt/MegaRAID/MegaCli/MegaCli64 -h
MegaCLI SAS RAID Management Tool Ver 8.07.06 Nov 13, 2012
(c)Copyright 2011, LSI Corporation, All Rights Reserved.
NOTE: The following options may be given at the end of any command below:
[-Silent] [-AppLogFile filename] [-NoLog] [-page[N]]
[-] is optional.
N - Number of lines per page.
MegaCli -v
MegaCli -help|-h|?
MegaCli -adpCount
MegaCli -AdpSetProp {CacheFlushInterval -val} | { RebuildRate -val}
| {PatrolReadRate -val} | {BgiRate -val} | {CCRate -val} | {ForceSGPIO -val}
| {ReconRate -val} | {SpinupDriveCount -val} | {SpinupDelay -val}
| {CoercionMode -val} | {ClusterEnable -val} | {PredFailPollInterval -val}
| {BatWarnDsbl -val} | {EccBucketSize -val} | {EccBucketLeakRate -val}
| {AbortCCOnError -val} | AlarmEnbl | AlarmDsbl | AlarmSilence
| {SMARTCpyBkEnbl -val} | {SSDSMARTCpyBkEnbl -val} | NCQEnbl | NCQDsbl
| {MaintainPdFailHistoryEnbl -val} | {RstrHotSpareOnInsert -val}
| {DisableOCR -val} | {BootWithPinnedCache -val} | {enblPI -val} |{PreventPIImport -val}
| AutoEnhancedImportEnbl | AutoEnhancedImportDsbl
| {EnblSpinDownUnConfigDrvs -val}|{UseDiskActivityforLocate -val} -aN|-a0,1,2|-aALL
| {ExposeEnclDevicesEnbl -val} | {SpinDownTime -val}
| {SpinUpEncDrvCnt -val} | {SpinUpEncDelay -val} | {Perfmode -val} -aN|-a0,1,2|-aALL
| {PerfMode -val �MaxFlushLines -val �MaxPDLatencyMS -val} -aN|-a0,1,2|-aALL
MegaCli -AdpSetProp -AutoDetectBackPlaneDsbl -val -aN|-a0,1,2|-aALL
val - 0=Enable Auto Detect of SGPIO and i2c SEP.
1=Disable Auto Detect of SGPIO.
2=Disable Auto Detect of i2c SEP.
3=Disable Auto Detect of SGPIO and i2c SEP.
MegaCli -AdpSetProp -CopyBackDsbl -val -aN|-a0,1,2|-aALL
val - 0=Enable Copyback.
1=Disable Copyback.
MegaCli -AdpSetProp -EnableJBOD -val -aN|-a0,1,2|-aALL
val - 0=Disable JBOD mode.
1=Enable JBOD mode.
MegaCli -AdpSetProp -DsblCacheBypass -val -aN|-a0,1,2|-aALL
val - 0=Enable Cache Bypass.
1=Disable Cache Bypass.
MegaCli -AdpSetProp -LoadBalanceMode -val -aN|-a0,1,2|-aALL
val - 0=Auto Load balance mode.
1=Disable Load balance mode.
MegaCli -AdpSetProp -UseFDEOnlyEncrypt -val -aN|-a0,1,2|-aALL
val - 0=FDE and controller encryption (if HW supports) is allowed.
1=Only support FDE encryption, disallow controller encryption.
MegaCli -AdpSetProp -PrCorrectUncfgdAreas -val -aN|-a0,1,2|-aALL
val - 0= Correcting Media error during PR is disabled.
1=Correcting Media error during PR is allowed.
MegaCli -AdpSetProp -DsblSpinDownHSP -val -aN|-a0,1,2|-aALL
val - 0= Spinning down the Hot Spare is enabled.
1=Spinning down the Hot Spare is disabled.
MegaCli -AdpSetProp -DefaultLdPSPolicy -Automatic| -None | -Maximum| -MaximumWithoutCaching -aN|-a0,1,2|-aALL
MegaCli -AdpSetProp -DisableLdPS -interval n1 -time n2 -aN|-a0,1,2|-aALL
where n1 is the number of hours beginning at time n2
where n2 is the number of minutes from 12:00am
MegaCli -AdpSetProp -ENABLEEGHSP -val -aN|-a0,1,2|-aALL
val - 0= Disabled Emergency GHSP.
1= Enabled Emergency GHSP.
MegaCli -AdpSetProp -ENABLEEUG -val -aN|-a0,1,2|-aALL
val - 0= Disabled Emergency UG as Spare.
1= Enabled Emergency UG as Spare.
MegaCli -AdpSetProp -ENABLEESMARTER -val -aN|-a0,1,2|-aALL
val - 0= Disabled Emergency Spare as Smarter.
1= Enabled Emergency Spare as Smarter.
MegaCli -AdpSetProp -DPMenable -val -aN|-a0,1,2|-aALL
val - 0=Disable Drive Performance Monitoring .
1=Enable Drive Performance Monitoring.
MegaCli -AdpSetProp -SupportSSDPatrolRead -val -aN|-a0,1,2|-aALL
val - 0=Disable Patrol read for SSD drives .
1=Enable Patrol read for SSD drives.
MegaCli -AdpGetProp CacheFlushInterval | RebuildRate | PatrolReadRate | ForceSGPIO
| BgiRate | CCRate | ReconRate | SpinupDriveCount | SpinupDelay
| CoercionMode | ClusterEnable | PredFailPollInterval | BatWarnDsbl
| EccBucketSize | EccBucketLeakRate | EccBucketCount | AbortCCOnError
| AlarmDsply | SMARTCpyBkEnbl | SSDSMARTCpyBkEnbl | NCQDsply
| MaintainPdFailHistoryEnbl | RstrHotSpareOnInsert
| EnblSpinDownUnConfigDrvs | DisableOCR
| BootWithPinnedCache | enblPI |PreventPIImport | AutoEnhancedImportDsply | AutoDetectBackPlaneDsbl
| CopyBackDsbl | LoadBalanceMode | UseFDEOnlyEncrypt | WBSupport | EnableJBOD
| DsblCacheBypass | ExposeEnclDevicesEnbl | SpinDownTime | PrCorrectUncfgdAreas
| UseDiskActivityforLocate | ENABLEEGHSP | ENABLEEUG | ENABLEESMARTER | Perfmode | PerfModeValues
| -DPMenable -aN|-a0,1,2|-aALL
| DefaultLdPSPolicy | DisableLdPsInterval | DisableLdPsTime | SpinUpEncDrvCnt
| SpinUpEncDelay | PrCorrectUncfgdAreas
| DsblSpinDownHSP | SupportSSDPatrolRead -aN|-a0,1,2|-aALL
MegaCli -AdpAllInfo -aN|-a0,1,2|-aALL
MegaCli -AdpGetTime -aN|-a0,1,2|-aALL
MegaCli -AdpSetTime yyyymmdd hh:mm:ss -aN
MegaCli -AdpSetVerify -f fileName -aN|-a0,1,2|-aALL
MegaCli -AdpBIOS -Enbl |-Dsbl | -SOE | -BE | -HCOE | - HSM | EnblAutoSelectBootLd | DsblAutoSelectBootLd | -Dsply -aN|-a0,1,2|-aALL
MegaCli -AdpBootDrive {-Set {-Lx | -physdrv[E0:S0]}} | {-Unset {-Lx | -physdrv[E0:S0]}} |-Get -aN|-a0,1,2|-aALL
MegaCli -AdpAutoRbld -Enbl|-Dsbl|-Dsply -aN|-a0,1,2|-aALL
MegaCli -AdpCacheFlush -aN|-a0,1,2|-aALL
MegaCli -AdpPR -Dsbl|EnblAuto|EnblMan|Start|Suspend|Resume|Stop|Info|SSDPatrolReadEnbl |SSDPatrolReadDsbl
|{SetDelay Val}|{-SetStartTime yyyymmdd hh}|{maxConcurrentPD Val} -aN|-a0,1,2|-aALL
MegaCli -AdpCcSched -Dsbl|-Info|{-ModeConc | -ModeSeq [-ExcludeLD -LN|-L0,1,2]
[-SetStartTime yyyymmdd hh ] [-SetDelay val ] } -aN|-a0,1,2|-aALL
MegaCli -AdpCcSched -SetStartTime yyyymmdd hh -aN|-a0,1,2|-aALL
MegaCli -AdpCcSched -SetDelay val -aN|-a0,1,2|-aALL
MegaCli -FwTermLog -BBUoff|BBUoffTemp|BBUon|BBUGet|Dsply|Clear -aN|-a0,1,2|-aALL
MegaCli -AdpAlILog -aN|-a0,1,2|-aALL
MegaCli -AdpDiag [val] -aN|-a0,1,2|-aALL
val - Time in second.
MegaCli -AdpGetPciInfo -aN|-a0,1,2|-aALL
MegaCli -AdpShutDown -aN|-a0,1,2|-aALL
MegaCli -AdpDowngrade -aN|-a0,1,2|-aALL
MegaCli -PDList -aN|-a0,1,2|-aALL
MegaCli -PDGetNum -aN|-a0,1,2|-aALL
MegaCli -pdInfo -PhysDrv[E0:S0,E1:S1,...] -aN|-a0,1,2|-aALL
MegaCli -PDOnline -PhysDrv[E0:S0,E1:S1,...] -aN|-a0,1,2|-aALL
MegaCli -PDOffline -PhysDrv[E0:S0,E1:S1,...] -aN|-a0,1,2|-aALL
MegaCli -PDMakeGood -PhysDrv[E0:S0,E1:S1,...] | [-Force] -aN|-a0,1,2|-aALL
MegaCli -PDMakeJBOD -PhysDrv[E0:S0,E1:S1,...] -aN|-a0,1,2|-aALL
MegaCli -PDHSP {-Set [-Dedicated [-ArrayN|-Array0,1,2...]] [-EnclAffinity] [-nonRevertible]}
|-Rmv -PhysDrv[E0:S0,E1:S1,...] -aN|-a0,1,2|-aALL
MegaCli -PDRbld -Start|-Stop|-Suspend|-Resume|-ShowProg |-ProgDsply
-PhysDrv [E0:S0,E1:S1,...] -aN|-a0,1,2|-aALL
MegaCli -PDClear -Start|-Stop|-ShowProg |-ProgDsply
-PhysDrv [E0:S0,E1:S1,...] -aN|-a0,1,2|-aALL
MegaCli -PdLocate {[-start] | -stop} -physdrv[E0:S0,E1:S1,...] -aN|-a0,1,2|-aALL
MegaCli -PdMarkMissing -physdrv[E0:S0,E1:S1,...] -aN|-a0,1,2|-aALL
MegaCli -PdGetMissing -aN|-a0,1,2|-aALL
MegaCli -PdReplaceMissing -physdrv[E0:S0] -arrayA, -rowB -aN
MegaCli -PdPrpRmv [-UnDo] -physdrv[E0:S0] -aN|-a0,1,2|-aALL
MegaCli -EncInfo -aN|-a0,1,2|-aALL
MegaCli -EncStatus -aN|-a0,1,2|-aALL
MegaCli -PhyInfo -phyM -aN|-a0,1,2|-aALL
MegaCli -PhySetLinkSpeed -phyM -speed -aN|-a0,1,2|-aALL
MegaCli -PdFwDownload [offline][ForceActivate] {[-SataBridge] -PhysDrv[0:1] }|{-EncdevId[devId1]} -f
MegaCli -LDInfo -Lx|-L0,1,2|-Lall -aN|-a0,1,2|-aALL
MegaCli -LDSetProp {-Name LdNamestring} | -RW|RO|Blocked|RemoveBlocked | WT|WB|ForcedWB [-Immediate] |RA|NORA|ADRA | DsblPI
| Cached|Direct | -EnDskCache|DisDskCache | CachedBadBBU|NoCachedBadBBU
-Lx|-L0,1,2|-Lall -aN|-a0,1,2|-aALL
MegaCli -LDSetPowerPolicy -Default| -Automatic| -None| -Maximum| -MaximumWithoutCaching
-Lx|-L0,1,2|-Lall -aN|-a0,1,2|-aALL
MegaCli -LDGetProp -Cache | -Access | -Name | -DskCache | -PSPolicy | Consistency -Lx|-L0,1,2|-LALL
-aN|-a0,1,2|-aALL
MegaCli -LDInit {-Start [-full]}|-Abort|-ShowProg|-ProgDsply -Lx|-L0,1,2|-LALL -aN|-a0,1,2|-aALL
MegaCli -LDCC {-Start [-force]}|-Abort|-Suspend|-Resume|-ShowProg|-ProgDsply -Lx|-L0,1,2|-LALL -aN|-a0,1,2|-aALL
MegaCli -LDBI -Enbl|-Dsbl|-getSetting|-Abort|-Suspend|-Resume|-ShowProg|-ProgDsply -Lx|-L0,1,2|-LALL -aN|-a0,1,2|-aALL
MegaCli -LDRecon {-Start -rX [{-Add | -Rmv} -Physdrv[E0:S0,...]]}|-ShowProg|-ProgDsply
-Lx -aN
MegaCli -LdPdInfo -aN|-a0,1,2|-aALL
MegaCli -LDGetNum -aN|-a0,1,2|-aALL
MegaCli -LDBBMClr -Lx|-L0,1,2,...|-Lall -aN|-a0,1,2|-aALL
MegaCli -getLdExpansionInfo -Lx|-L0,1,2|-Lall -aN|-a0,1,2|-aALL
MegaCli -LdExpansion -pN -dontExpandArray -Lx|-L0,1,2|-Lall -aN|-a0,1,2|-aALL
MegaCli -GetBbtEntries -Lx|-L0,1,2|-Lall -aN|-a0,1,2|-aALL
MegaCli -Cachecade -assign|-remove -Lx|-L0,1,2|-LALL -aN|-a0,1,2|-aALL
MegaCli -CfgLdAdd -rX[E0:S0,E1:S1,...] [WT|WB] [NORA|RA|ADRA] [Direct|Cached]
[CachedBadBBU|NoCachedBadBBU] [-szXXX [-szYYY ...]]
[-strpszM] [-Hsp[E0:S0,...]] [-AfterLdX] | [Secure]
[-Default| -Automatic| -None| -Maximum| -MaximumWithoutCaching] [-Cache] [-enblPI] [-Force]-aN
MegaCli -CfgCacheCadeAdd [-rX] -Physdrv[E0:S0,...] {-Name LdNamestring} [WT|WB|ForcedWB] [-assign -LX|L0,2,5..|LALL] -aN|-a0,1,2|-aALL
MegaCli -CfgEachDskRaid0 [WT|WB] [NORA|RA|ADRA] [Direct|Cached] [-enblPI]
[CachedBadBBU|NoCachedBadBBU] [-strpszM]|[Secure] [-Default| -Automatic| -None| -Maximum| -MaximumWithoutCaching] [-Cache] -aN|-a0,1,2|-aALL
MegaCli -CfgClr [-Force] -aN|-a0,1,2|-aALL
MegaCli -CfgDsply -aN|-a0,1,2|-aALL
MegaCli -CfgCacheCadeDsply -aN|-a0,1,2|-aALL
MegaCli -CfgLdDel -LX|-L0,2,5...|-LALL [-Force] -aN|-a0,1,2|-aALL
MegaCli -CfgCacheCadeDel -LX|-L0,2,5...|-LALL -aN|-a0,1,2|-aALL
MegaCli -CfgFreeSpaceinfo -aN|-a0,1,2|-aALL
MegaCli -CfgSpanAdd -r10 -Array0[E0:S0,E1:S1] -Array1[E0:S0,E1:S1] [-ArrayX[E0:S0,E1:S1] ...]
[WT|WB] [NORA|RA|ADRA] [Direct|Cached] [CachedBadBBU|NoCachedBadBBU]
[-szXXX[-szYYY ...]][-strpszM][-AfterLdX]| [Secure]
[-Default| -Automatic| -None| -Maximum| -MaximumWithoutCaching] [-Cache] [-enblPI] [-Force] -aN
MegaCli -CfgSpanAdd -r50 -Array0[E0:S0,E1:S1,E2:S2,...] -Array1[E0:S0,E1:S1,E2:S2,...]
[-ArrayX[E0:S0,E1:S1,E2:S2,...] ...] [WT|WB] [NORA|RA|ADRA] [Direct|Cached]
[CachedBadBBU|NoCachedBadBBU][-szXXX[-szYYY ...]][-strpszM][-AfterLdX]
[Secure] [-Default| -Automatic| -None| -Maximum| -MaximumWithoutCaching] [-Cache] [-enblPI] [-Force] -aN
MegaCli -CfgSpanAdd -r60 -Array0[E0:S0,E1:S1,E2:S2,E3,S3...] -Array1[E0:S0,E1:S1,E2:S2,E3,S3...]
[-ArrayX[E0:S0,E1:S1,E2:S2,E3,S3...] ...] [WT|WB] [NORA|RA|ADRA] [Direct|Cached]
[CachedBadBBU|NoCachedBadBBU][-szXXX[-szYYY ...]][-strpszM][-AfterLdX]|
[Secure] [-Default| -Automatic| -None| -Maximum| -MaximumWithoutCaching] [-Cache] [-enblPI] [-Force]-aN
MegaCli -CfgAllFreeDrv -rX [-SATAOnly] [-SpanCount XXX] [WT|WB] [NORA|RA|ADRA]
[Direct|Cached] [CachedBadBBU|NoCachedBadBBU] [-strpszM]
[-HspCount XX [-HspType -Dedicated|-EnclAffinity|-nonRevertible]]|
[Secure] [-Default| -Automatic| -None| -Maximum| -MaximumWithoutCaching] [-Cache] [-enblPI] -aN
MegaCli -CfgSave -f filename -aN
MegaCli -CfgRestore -f filename -aN
MegaCli -CfgForeign -Scan | [-Passphrase sssssssssss] -aN|-a0,1,2|-aALL
MegaCli -CfgForeign -Dsply [x] | [-Passphrase sssssssssss] -aN|-a0,1,2|-aALL
MegaCli -CfgForeign -Preview [x] | [-Passphrase sssssssssss] -aN|-a0,1,2|-aALL
MegaCli -CfgForeign -Import [x] | [-Passphrase sssssssssss] -aN|-a0,1,2|-aALL
MegaCli -CfgForeign -Clear [x]|[-Passphrase sssssssssss] -aN|-a0,1,2|-aALL
x - index of foreign configurations. Optional. All by default.
MegaCli -AdpEventLog -GetEventLogInfo -aN|-a0,1,2|-aALL
MegaCli -AdpEventLog -GetEvents {-info -warning -critical -fatal} {-f
MegaCli -AdpEventLog -GetSinceShutdown {-info -warning -critical -fatal} {-f
MegaCli -AdpEventLog -GetSinceReboot {-info -warning -critical -fatal} {-f
MegaCli -AdpEventLog -IncludeDeleted {-info -warning -critical -fatal} {-f
MegaCli -AdpEventLog -GetLatest n {-info -warning -critical -fatal} {-f
MegaCli -AdpEventLog -GetCCIncon -f
MegaCli -AdpEventLog -Clear -aN|-a0,1,2|-aALL
MegaCli -AdpBbuCmd -aN|-a0,1,2|-aALL
MegaCli -AdpBbuCmd -GetBbuStatus -aN|-a0,1,2|-aALL
MegaCli -AdpBbuCmd -GetBbuCapacityInfo -aN|-a0,1,2|-aALL
MegaCli -AdpBbuCmd -GetBbuDesignInfo -aN|-a0,1,2|-aALL
MegaCli -AdpBbuCmd -GetBbuProperties -aN|-a0,1,2|-aALL
MegaCli -AdpBbuCmd -BbuLearn -aN|-a0,1,2|-aALL
MegaCli -AdpBbuCmd -BbuMfgSleep -aN|-a0,1,2|-aALL
MegaCli -AdpBbuCmd -BbuMfgSeal -aN|-a0,1,2|-aALL
MegaCli -AdpBbuCmd -getBbumodes -aN|-a0,1,2|-aALL
MegaCli -AdpBbuCmd -SetBbuProperties -f
MegaCli -AdpBbuCmd -GetGGEEPData offset [Hexaddress] NumBytes n -aN|-a0,1,2|-aALL
MegaCli -AdpBbuCmd -ScheduleLearn -Dsbl|-Info|[-STARTTIME DDD hh] -aN|-a0,1,2|-aALL
MegaCli -AdpFacDefSet -aN
MegaCli -AdpFwFlash -f filename [-ResetNow] [-NoSigChk] [-NoVerChk] [-FWTYPE n] -aN|-a0,1,2|-aALL
MegaCli -AdpGetConnectorMode -ConnectorN|-Connector0,1|-ConnectorAll -aN|-a0,1,2|-aALL
MegaCli -AdpSetConnectorMode -Internal|-External|-Auto -ConnectorN|-Connector0,1|-ConnectorAll -aN|-a0,1,2|-aALL
MegaCli -PhyErrorCounters -aN|-a0,1,2|-aALL
MegaCli -DirectPdMapping -Enbl|-Dsbl|-Dsply -aN|-a0,1,2|-aALL
MegaCli -PDCpyBk -Start -PhysDrv[E0:S0,E1:S1] -aN|-a0,1,2|-aALL
MegaCli -PDCpyBk -Stop|-Suspend|-Resume|-ShowProg|-ProgDsply -PhysDrv[E0:S0] -aN|-a0,1,2|-aALL
MegaCli -PDInstantSecureErase -PhysDrv[E0:S0,E1:S1,...] | [-Force] -aN|-a0,1,2|-aALL
MegaCli -CfgSpanAdd -rX -array0[E0:S1,E1:S1.....] array1[E0:S1,E1:S1.....] -szxxx -enblPI -aN|-a0,1,2|-aALL
MegaCli -LDMakeSecure -Lx|-L0,1,2,...|-Lall -aN|-a0,1,2|-aALL
MegaCli -DeleteSecurityKey | [-Force] -aN
MegaCli -CreateSecurityKey -Passphrase sssssssssss [-KeyID kkkkkkkkkkk] -aN
MegaCli -CreateSecurityKey useEKMS -aN
MegaCli -ChangeSecurityKey -OldPassphrase sssssssssss | -Passphrase sssssssssss |
[-KeyID kkkkkkkkkkk] -aN
MegaCli -ChangeSecurityKey -Passphrase sssssssssss |
[-KeyID kkkkkkkkkkk] -aN
MegaCli -ChangeSecurityKey useEKMS -oldPassphrase sssssssssss -aN
MegaCli -ChangeSecurityKey -useEKMS -aN
MegaCli -GetKeyID [-PhysDrv[E0:S0]] -aN
MegaCli -SetKeyID -KeyID kkkkkkkkkkk -aN
MegaCli -VerifySecurityKey -Passphrase sssssssssss -aN
MegaCli -GetPreservedCacheList -aN|-a0,1,2|-aALL
MegaCli -DiscardPreservedCache -Lx|-L0,1,2|-Lall -force -aN|-a0,1,2|-aALL
sssssssssss - It must be between eight and thirty-two
characters and contain at least one number,
one lowercase letter, one uppercase
letter and one non-alphanumeric character.
kkkkkkkkkkk - Must be less than 256 characters.
MegaCli -ShowSummary [-f filename] -aN
MegaCli -ELF -GetSafeId -aN|-a0,1,2|-aALL
MegaCli -ELF -ControllerFeatures -aN|-a0,1,2|-aALL
MegaCli -ELF -Applykey key
MegaCli -ELF -TransferToVault -aN|-a0,1,2|-aALL
MegaCli -ELF -DeactivateTrialKey -aN|-a0,1,2|-aALL
MegaCli -ELF -ReHostInfo -aN|-a0,1,2|-aALL
MegaCli -ELF -ReHostComplete -aN|-a0,1,2|-aALL
MegaCli -LDViewMirror -Lx|-L0,1,2,...|-Lall -aN|-a0,1,2|-aALL
MegaCli -LDJoinMirror -DataSrc
MegaCli -SecureErase
Start[
Simple|
[Normal [ |ErasePattern ErasePatternA|ErasePattern ErasePatternA ErasePattern ErasePatternB]]|
[Thorough [ |ErasePattern ErasePatternA|ErasePattern ErasePatternA ErasePattern ErasePatternB]]]
| Stop
| ShowProg
| ProgDsply
[-PhysDrv [E0:S0,E1:S1,...] | -Lx|-L0,1,2|-LALL] -aN|-a0,1,2|-aALL
MegaCli -Version -Cli|-Ctrl|-Driver|-Pd -aN|-a0,1,2|-aALL
MegaCli -Perfmon {-start -interval
MegaCli -DpmStat -Dsply {lct | hist | ra | ext } [-physdrv[E0:S0]] -aN|-a0,1,2|-aALL
MegaCli -DpmStat -Clear {lct | hist | ra | ext } -aN|-a0,1,2|-aALL
Note: The directly connected drives can be specified as [:S]
Wildcard '?' can be used to specify the enclosure ID for the drive in the
only enclosure without direct connected device or the direct connected
drives with no enclosure in the system.
Note:[-aALL] option assumes that the parameters specified are valid
for all the Adapters.
Note:ProgDsply option is not supported in VMWARE-COSLESS.
The following options may be given at the end of any command above:
[-Silent] [-AppLogFile filename] [-NoLog] [-page[N]]
[-] is optional.
N - Number of lines per page.
MegaCli XD -AddVd
MegaCli XD -RemVd
MegaCli XD -AddCdev
MegaCli XD -RemCdev
MegaCli XD -VdList | -Configured | -Unconfigured
MegaCli XD -CdevList | -Configured | -Unconfigured
MegaCli XD -ConfigInfo
MegaCli XD -PerfStats
MegaCli XD -OnlineVd
MegaCli XD -WarpDriveInfo -iN | -iALL
MegaCli XD -FetchSafeId -iN | -iALL
MegaCli XD -ApplyActivationKey
Exit Code: 0x00
MegaCLI Command Tutorial
This command lists all of the physical drives on adapter 0 or (-a0).
/opt/MegaRAID/MegaCli/MegaCli64 -pdlist -a0
| Useful Items | |
| Slot Number: | the physical slot the drive is on the server |
| Raw Size: | the size of the disk in GB |
Notable things
Slot Number:
Notice it will list the slot# so you know the physical position of the drive in the server.
Adapter #0
Enclosure Device ID: 32
Slot Number: 1
Enclosure position: 1
Device Id: 1
WWN: 5000C5003A260844
Sequence Number: 1
Media Error Count: 0
Other Error Count: 0
Predictive Failure Count: 0
Last Predictive Failure Event Seq Number: 0
PD Type: SAS
Raw Size: 279.396 GB [0x22ecb25c Sectors]
Non Coerced Size: 278.896 GB [0x22dcb25c Sectors]
Coerced Size: 278.875 GB [0x22dc0000 Sectors]
Sector Size: 0
Firmware state: Unconfigured(good), Spun Up
Device Firmware Level: FS64
Shield Counter: 0
Successful diagnostics completion on : N/A
SAS Address(0): 0x5000c5003a260845
SAS Address(1): 0x0
Connected Port Number: 1(path0)
Inquiry Data: SEAGATE ST9300603SS FS646SE3T176
FDE Capable: Not Capable
FDE Enable: Disable
Secured: Unsecured
Locked: Unlocked
Needs EKM Attention: No
Foreign State: None
Device Speed: 6.0Gb/s
Link Speed: 6.0Gb/s
Media Type: Hard Disk Device
Drive Temperature :28C (82.40 F)
PI Eligibility: No
Drive is formatted for PI information: No
PI: No PI
Port-0 :
Port status: Active
Port's Linkspeed: 6.0Gb/s
Port-1 :
Port status: Active
Port's Linkspeed: Unknown
Drive has flagged a S.M.A.R.T alert : No
MegaRAID Create RAID 10 Example
First we need the slots of our drives, in this exampe on this server I only had 4 drives and knew I wanted each of them, so doing a grep on slot was fine to use any that came out.
Get Slot Numbers of Drives
MegaCli64 -PDList -aALL|grep -i slot

Slot Number: 1

Slot Number: 3

Slot Number: 5

Slot Number: 7
Use the slot numbers from above later on in our array creation.
Get "Enclosure Device ID":
MegaCli64 -PDList -aALL|grep -i enclosure

Enclosure Device ID: 32

Enclosure position: 1

Enclosure Device ID: 32

Enclosure position: 1

Enclosure Device ID: 32

Enclosure position: 1

Enclosure Device ID: 32

Enclosure position: 1
In our case we can see the enclosure ID is 32
Create RAID 10 Array
CfgSpanAdd command which is required for a RAID 10 array.
r10 specifies it as RAID 10
Array is required as RAID 10 in theory is 2 RAID 1's combined into a RAID 0.
Note that in the brackets the 32:1 is based on the fact from above that our enclosure ID is "32" and the 1 is one of our slot numbers of a disk we want to use. Be sure to adjust according
MegaCli64 -CfgSpanAdd -r10 -Array0[32:1,32:3] -Array1[32:5,32:7] -a0
Adapter 0: Created VD 0
Adapter 0: Configured the Adapter!!
Exit Code: 0x00
Success in RAID 10
You will now see that you have a new device that automatically appears as the next available drive letter.
Disk /dev/sdc: 557.77 GiB, 598879502336 bytes, 1169686528 sectors

Disk model: PERC H710P

Units: sectors of 1 * 512 = 512 bytes

Sector size (logical/physical): 512 bytes / 512 bytes

I/O size (minimum/optimal): 512 bytes / 512 bytes
MegaRAID RAID 0 Example
MegaCli64 -CfgLdAdd -r0[32:5] -a0
The above creates a RAID 0 array out of a single drive located in enclosure 32 and slot#5 on adapter 0.
This is the way if you want simpler and better performance by using mdadm to create your own array.
Of course you could have specified multiple drives if you truly wanted a fast but totally unreliable RAID 0 multi disk array (eg. -r0[32:5,32:4]
Check array/rebuild state:
./MegaCli64  -LDInfo -LALL -aALL


Adapter 0 -- Virtual Drive Information:

Virtual Drive: 0 (Target Id: 0)

Name                :

RAID Level          : Primary-1, Secondary-0, RAID Level Qualifier-0

Size                : 557.75 GB

Sector Size         : 512

Mirror Data         : 557.75 GB

State               : Optimal

Strip Size          : 64 KB

Number Of Drives per span:2

Span Depth          : 2

Default Cache Policy: WriteBack, ReadAdaptive, Direct, No Write Cache if Bad BBU

Current Cache Policy: WriteBack, ReadAdaptive, Direct, No Write Cache if Bad BBU

Default Access Policy: Read/Write

Current Access Policy: Read/Write

Disk Cache Policy   : Disk's Default

Ongoing Progresses:

  Background Initialization: Completed 24%, Taken 10 min.

Encryption Type     : None

Default Power Savings Policy: Controller Defined

Current Power Savings Policy: None

Can spin up in 1 minute: Yes

LD has drives that support T10 power conditions: Yes

LD's IO profile supports MAX power savings with cached writes: No

Bad Blocks Exist: No

Is VD Cached: Yes

Cache Cade Type : Read Only
MegaRAID Create Single Disk RAID 0 Example
If you don't want to use the entire RAID function and want to use mdadm, you can create a fake RAID 0 of each drive to expose it as a sort of normal drive and then make a RAID out of that for use with mdadm. mdadm usually gives better performance, especially in RAID 10.
For example using an old 4 disk RAID 10 array with MegaRAID it produces only 249MB/s:
5242880000 bytes (5.2 GB, 4.9 GiB) copied, 21.0175 s, 249 MB/s
Now compare the same 4 disks with mdadm RAID 10 with virtual raid 0 drives
5242880000 bytes (5.2 GB, 4.9 GiB) copied, 16.2648 s, 322 MB/s
Note that this test was done while the array was still initializing too!
Look at how much faster the fully sync'd mdadm RAID 10 is (nearly 2x faster than the MegaRAID 10):
5242880000 bytes (5.2 GB, 4.9 GiB) copied, 10.412 s, 504 MB/s
Create each PD/physical drive using the enlosure ID and slot ID [32:1] for example.
MegaCli64 CfgLdAdd -r0 [32:1] -a0
Adapter 0: Created VD 0
Adapter 0: Configured the Adapter!!
Exit Code: 0x00
MegaCli64 CfgLdAdd -r0 [32:3] -a0
Adapter 0: Created VD 1
Adapter 0: Configured the Adapter!!
Exit Code: 0x00
MegaCli64 CfgLdAdd -r0 [32:5] -a0
Adapter 0: Created VD 2
Adapter 0: Configured the Adapter!!
Exit Code: 0x00
MegaCli64 CfgLdAdd -r0 [32:7] -a0
Adapter 0: Created VD 3
Adapter 0: Configured the Adapter!!
After this just do the normal mdadm config on each disk (in my case the above created a /dev/sdc sdd sde sdf).
How To Delete Virtual Drive
For example above we created the Virtual Drive with ID "0"
Virtual Drive: 0 (Target Id: 0)
./MegaCli64 CfgLdDel -L0 -Force -a0
The 0 in -L0 means logical drive 0 from above. Change to match your ID.
If you don't use -Force before -a0 you get this error: Virtual Disk is associate with Cache Cade. Please Use force option to delete
Adapter 0: Deleted Virtual Drive-0(target id-0)
How to use smartctl normally with megaraid
One other irritating thing about tools like megaraid is that smart doesn't work as you expect. Take a virtual drive /dev/sdc it doesn't show anything useful.
With smartctl you can use the megaraid option/plugin and specify the drive#/slot# and get normal info like this:
Note below the magic is in -d megaraid,3 which says we want the megaraid drive#3 or slot#3 smart info, which then gives us the normal expected info.
 smartctl -a /dev/sdc -d megaraid,3 -T permissive

smartctl 7.1 2019-12-30 r5022 [x86_64-linux-5.4.0-26-generic] (local build)

Copyright (C) 2002-19, Bruce Allen, Christian Franke, www.smartmontools.org


=== START OF INFORMATION SECTION ===

Vendor:               IBM-ESXS

Product:              ST9300603SS   F

Revision:             B53A

Compliance:           SPC-3

User Capacity:        300,000,000,000 bytes [300 GB]

Logical block size:   512 bytes

Rotation Rate:        10000 rpm

Form Factor:          2.5 inches

Logical Unit id:      0x5000c5001dbdea07

Serial number:        3SE1MFK400009035N4B3

Device type:          disk

Transport protocol:   SAS (SPL-3)

Local Time is:        Mon Mar 24 20:16:16 2025 UTC

SMART support is:     Available - device has SMART capability.

SMART support is:     Enabled

Temperature Warning:  Enabled


=== START OF READ SMART DATA SECTION ===

SMART Health Status: OK

Current Drive Temperature:     0 C

Drive Trip Temperature:        0 C


Elements in grown defect list: 0


Error Counter logging not supported


Device does not support Self Test logging
Convert-im6.q16: attempt to perform an operation not allowed by the security policy `PDF' @ error/constitute.c/IsCoderAuthorized/413. convert-im6.q16: no images defined `pts-time.jpg' @ error/convert.c/ConvertImageCommand/3258. solution ImageMagick P
Were you trying to convert a PDF and get this message?:
Convert-im6.q16: attempt to perform an operation not allowed by the security policy `PDF' @ error/constitute.c/IsCoderAuthorized/413.
convert-im6.q16: no images defined `pts-time.jpg' @ error/convert.c/ConvertImageCommand/3258.
Solution:
Find the "PDF" pattern and set it like below:
<policy domain="coder" rights="read|write" pattern="PDF" />
By default the rights are none (rights="none") which is why you get that error.
Apache PHP sending expires header solution cannot use cache with CDN
We've had clients asking why their CDN is not working, it is often a PHP setting that causes the below header to be sent:
expires: Thu, 19 Nov 1981 08:52:00 GMT
Solution Edit your /etc/php.ini
Set the option below as just being empty. Generally the default is nocache and will result in sending the expires header from 1981.
session.cache_limiter =
Here is what the man says about the option:
; Set to {nocache,private,public,} to determine HTTP caching aspects
; or leave this empty to avoid sending anti-caching headers.
; http://php.net/session.cache-limiter
However, we have often seen that any option but being empty results in the expires header being sent. If you want your content to be cachable by CDN, then make sure the session.cache_limiter contains a NULL/empty value.
How to install virt-manager in Mint 22/Ubuntu 22
Step 1.) Install virt-manager
sudo apt install virt-manager
Step 2.) Start libvirtd
sudo systemctl start libvirtd
sudo systemctl enable libvirtd
Step 3.) Permissions
Your user needs access to libvirt and kvm or it won't work without running as sudo.
sudo usermod -a -G kvm yourusername
sudo usermond -a -G libvirt yourusername
Step 4.) Logout and Login
If you get errors relating to being unable to connect to QEMU or not active connection, it is probably a permissions issue.

if you get errors with being unable to connect to libvirtd, it is probably not started.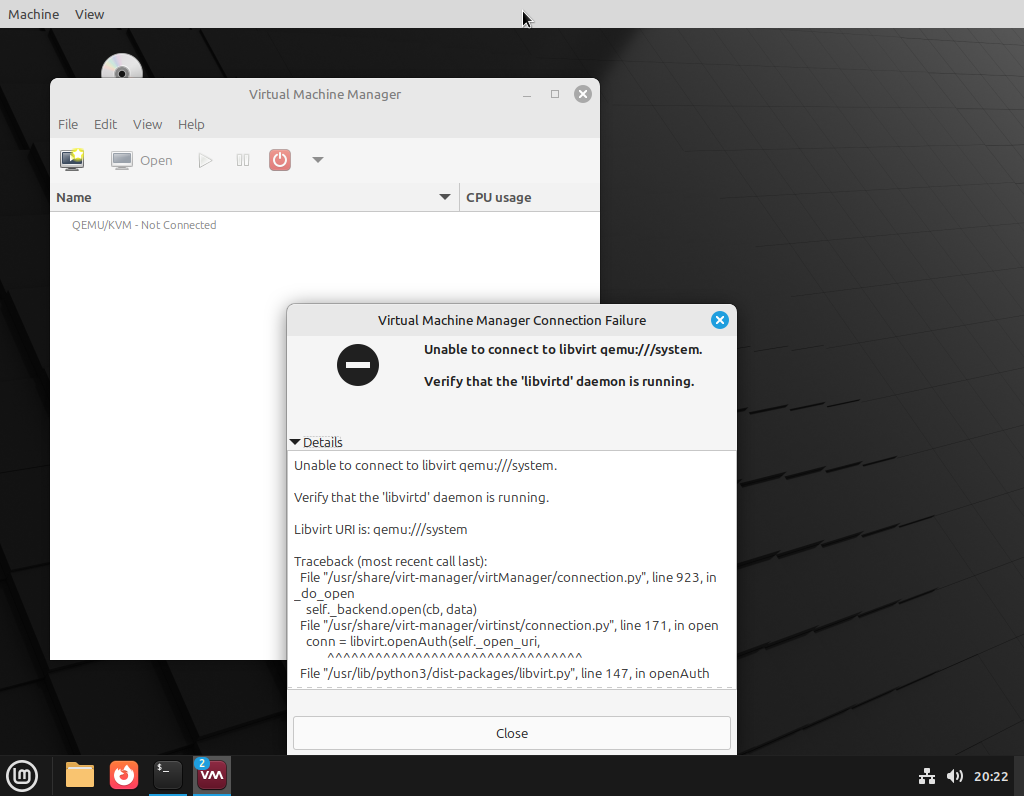
Infiniband Guide
A practical guide for admins who need to plan the required amount of bandwidth and what connectors/cards are needed for which.
| Standard | Speed | Cable/Connector |
| SDR | 8G | SFP |
| DDR | 10/16G | SFP, QSFP |
| QDR | 40/32G | QSFP |
| FDR | 56G | QSFP |
| EDR | 100G | QSP28 |
| HDR | 200G | QSP56 |
| NDR | 400G | QSFP-DD |
| XDR | 800G | OSFP, QSFP-DD |
python mysql install error: /bin/sh: 1: mysql_config: not found /bin/sh: 1: mariadb_config: not found /bin/sh: 1: mysql_config: not found mysql_config --version
These errors are usually caused by the lack mysql client dev files
If using mariadb install this:
apt-get install libmariadbclient-dev
If using mysql install this:
apt-get install libmysqlclient-dev
pip3 install mysql
The directory '/root/.cache/pip/http' or its parent directory is not owned by the current user and the cache has been disabled. Please check the permissions and owner of that directory. If executing pip with sudo, you may want sudo's -H flag.
The directory '/root/.cache/pip' or its parent directory is not owned by the current user and caching wheels has been disabled. check the permissions and owner of that directory. If executing pip with sudo, you may want sudo's -H flag.
Collecting mysql
Downloading https://files.pythonhosted.org/packages/9a/52/8d29c58f6ae448a72fbc612955bd31accb930ca479a7ba7197f4ae4edec2/mysql-0.0.3-py3-none-any.whl
Collecting mysqlclient (from mysql)
Downloading https://files.pythonhosted.org/packages/50/5f/eac919b88b9df39bbe4a855f136d58f80d191cfea34a3dcf96bf5d8ace0a/mysqlclient-2.1.1.tar.gz (88kB)
100% |████████████████████████████████| 92kB 5.5MB/s
Complete output from command python setup.py egg_info:
/bin/sh: 1: mysql_config: not found
/bin/sh: 1: mariadb_config: not found
/bin/sh: 1: mysql_config: not found
mysql_config --version
mariadb_config --version
mysql_config --libs
Traceback (most recent call last):
File "
File "/tmp/pip-install-twfzngc5/mysqlclient/setup.py", line 15, in
metadata, options = get_config()
File "/tmp/pip-install-twfzngc5/mysqlclient/setup_posix.py", line 70, in get_config
libs = mysql_config("libs")
File "/tmp/pip-install-twfzngc5/mysqlclient/setup_posix.py", line 31, in mysql_config
raise OSError("{} not found".format(_mysql_config_path))
OSError: mysql_config not found
----------------------------------------
Command "python setup.py egg_info" failed with error code 1 in /tmp/pip-install-twfzngc5/mysqlclient/
FreePBX 17 How To Add a Trunk
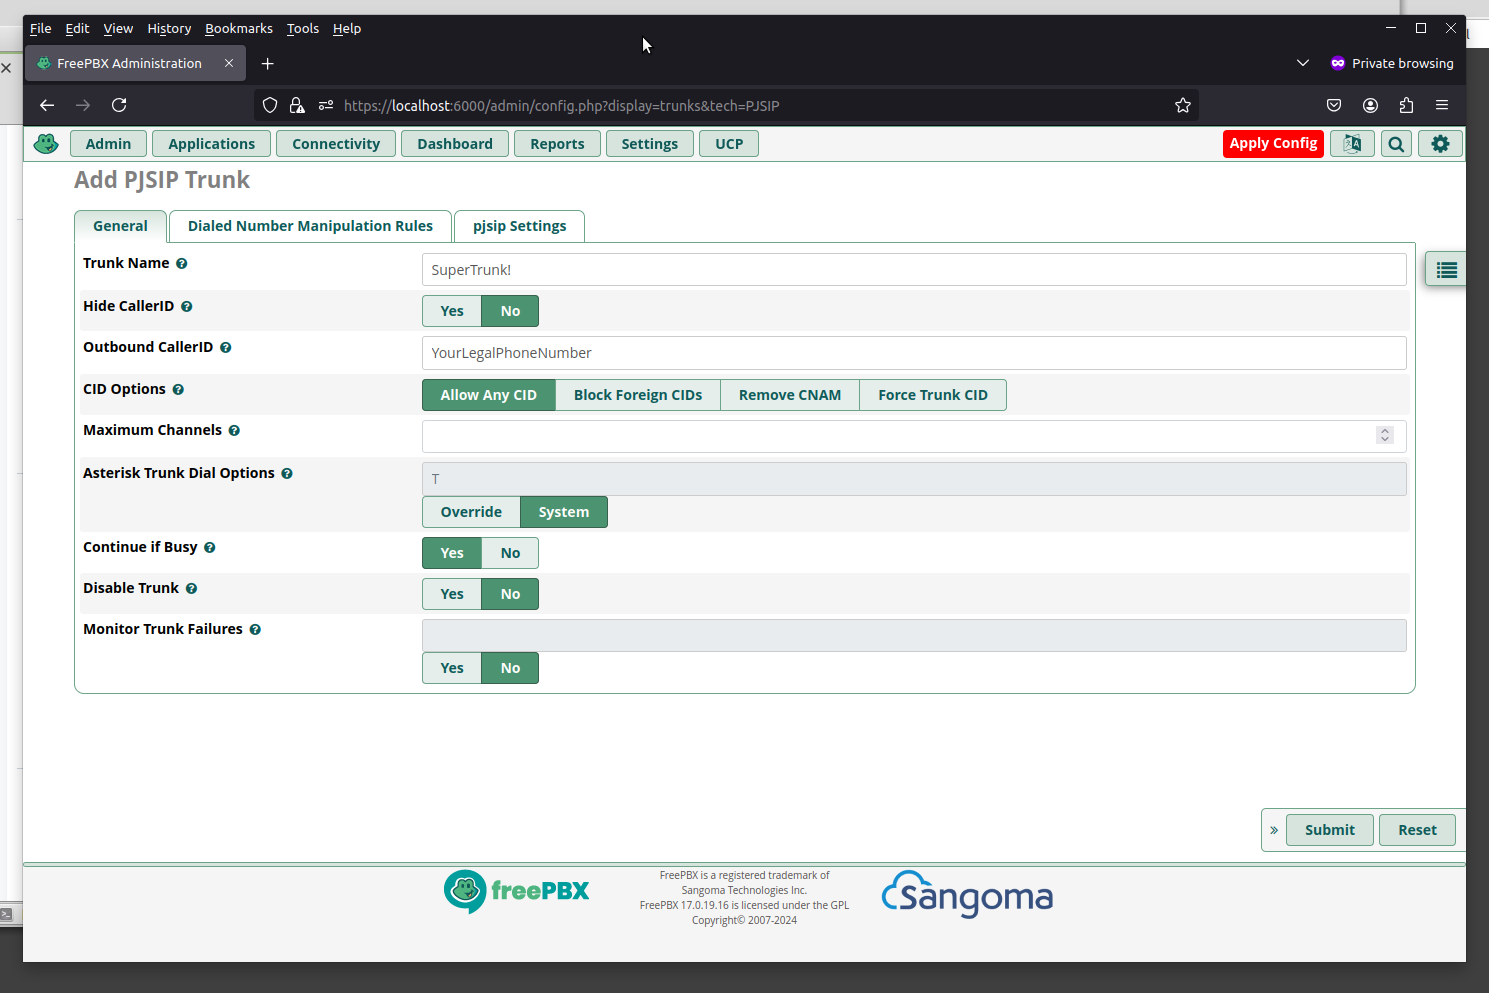
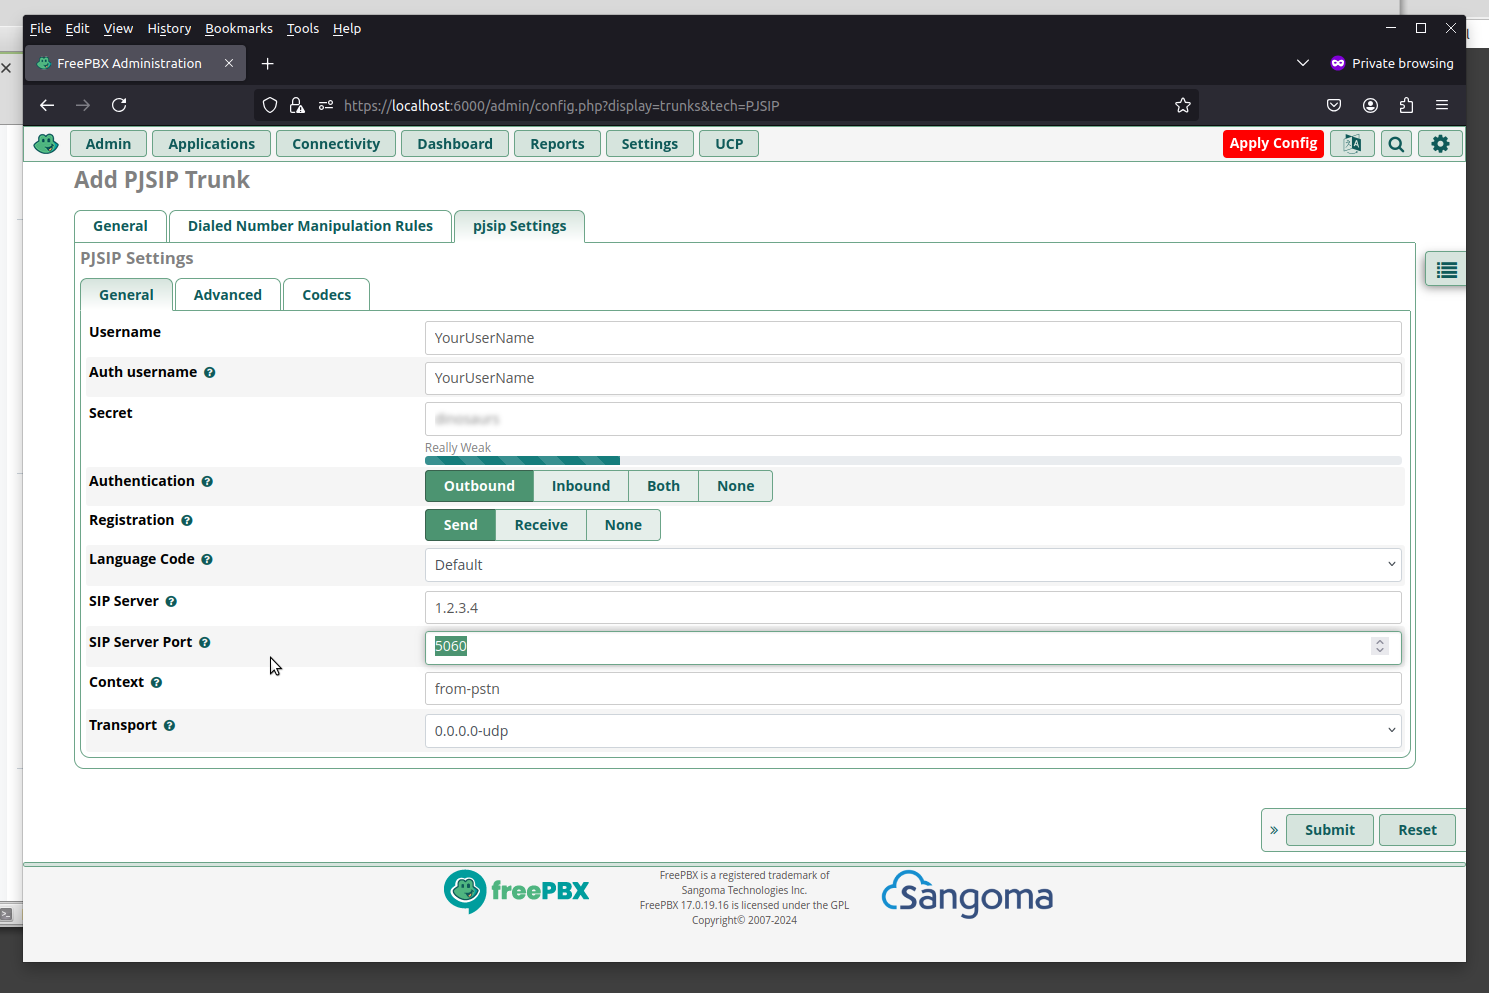


Make sure you choose your Trunk under "Trunk Sequence for Matched Routes"
Setup Your Dial-Patterns Using the Wizard
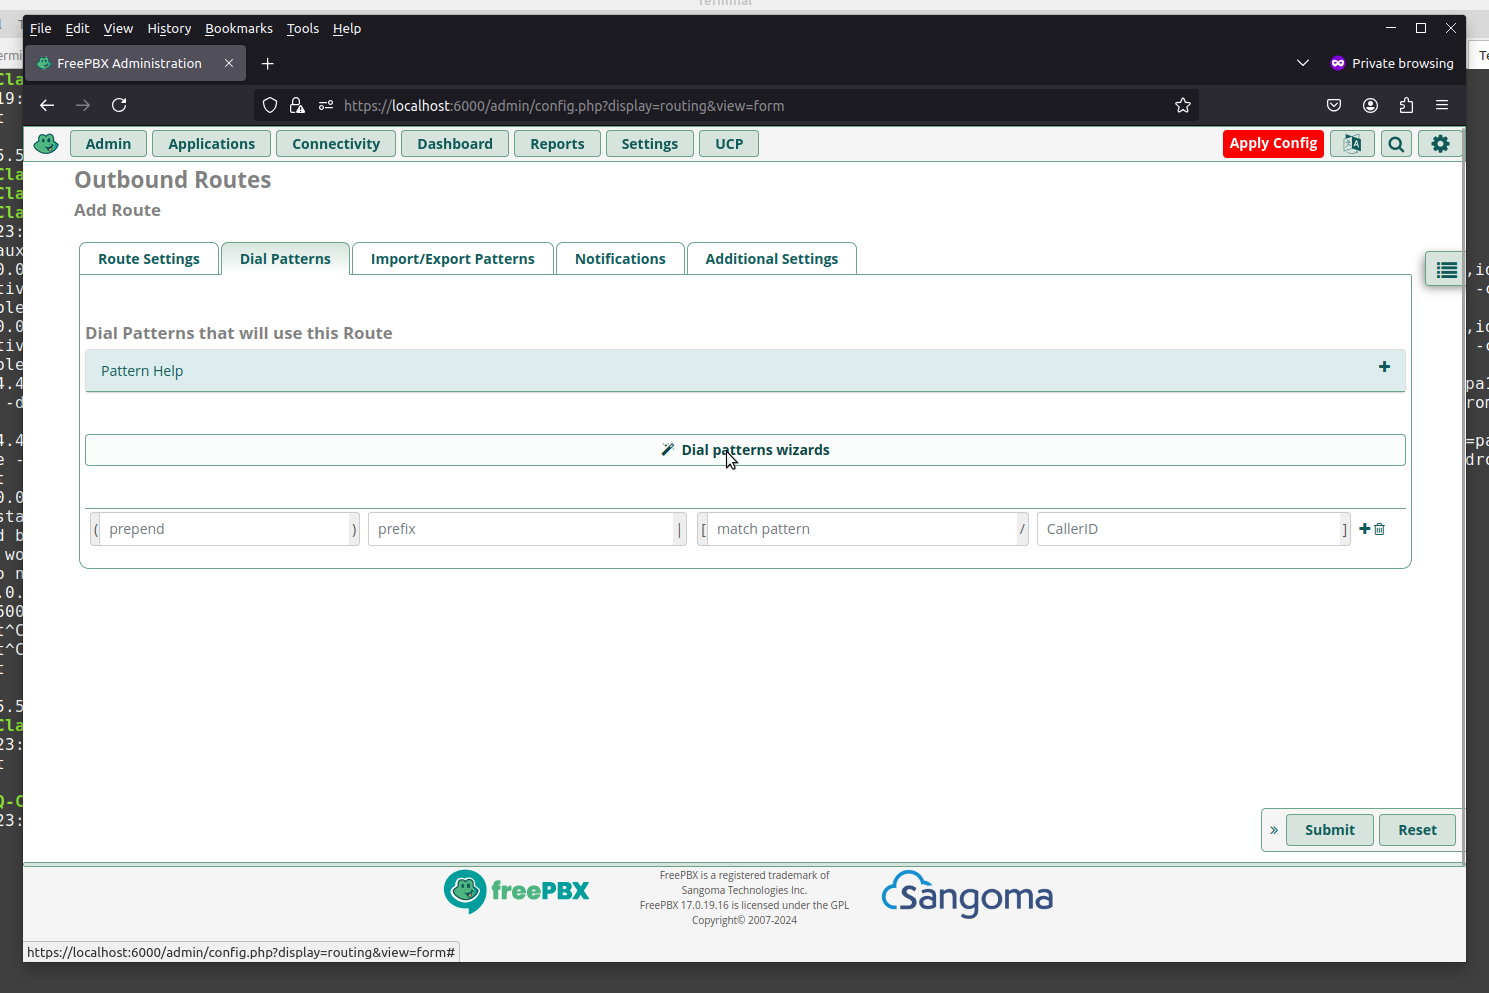
Remember to Click Submit and then Apply
Docker Container Onboot Policy - How to make sure a container is always running
Generally most containers are by default set not to start automatically.
Ther eare 3 settings for the "RestartPolicy" of containers:
no: Do not automatically restart the container (default).
always: Always restart the container regardless of the exit status.
unless-stopped: Always restart the container unless it is explicitly stopped.
on-failure: Restart the container only if it exits with a non-zero status
Here is how you can see the policy:
docker ps -aq | xargs -I {} docker inspect --format='{{.Name}}: {{.HostConfig.RestartPolicy.Name}}' {}
We can see the output of all containers on the node and in the case below we see that all 3 are set to "no".
/festive_wiles: no
/magical_goldberg: no
/angry_hamilton: no
Say if we wanted "festive_wiles" to always be running (eg. if the server/node is rebooted we want the container to startup automatically):
docker update --restart=always festive_wiles
How can set these startup/restart settings when creating the container?
We just specify --restart=
docker run --name YourContainerName --restart=always -d nginx
FreePBX 17 How To Add Phones / Extensions and Register
Step 1 - Login to FreePBX and Go to Connectivity
Click Connectivity -> Extensions
Step 2 - Create Extension
Click on "Quick Create Extension" or "Add Extension".
Quick is fine for more users, unless you have more specific requirements.
Step 3 - Create the Extension
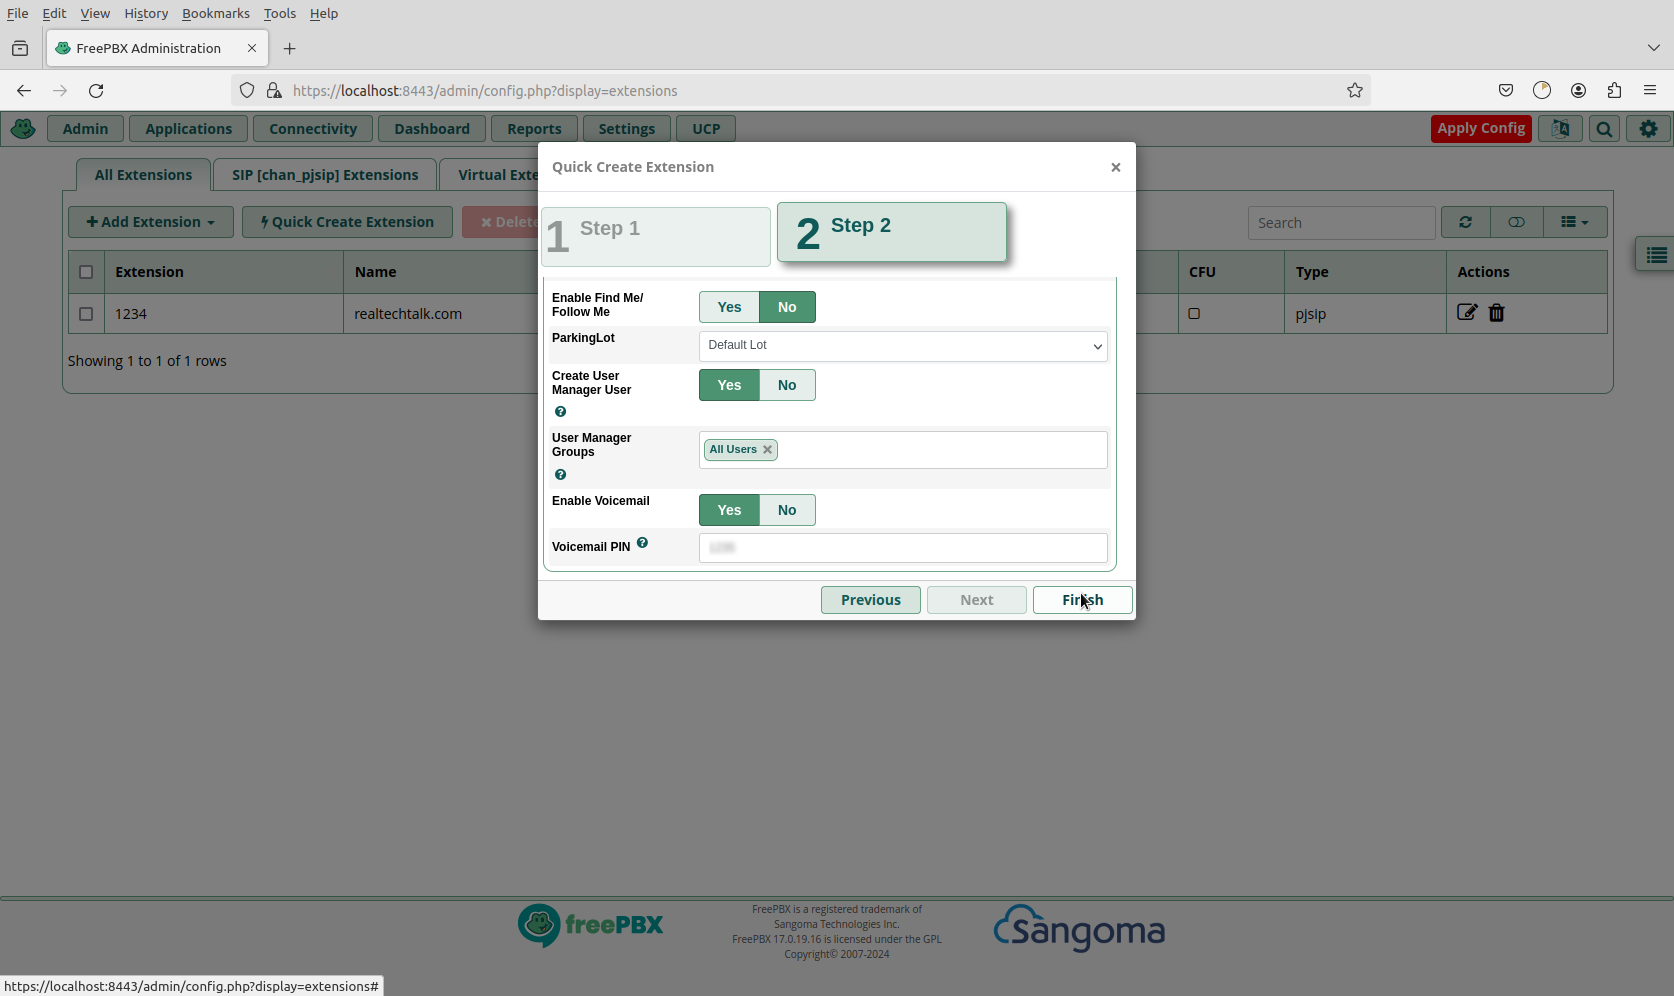
Once you click finish, the details are then e-mailed to the user.
If you use Quick Create, you can just edit the extension and click on their "secret" field to find the password.
To make your SIP softphone or real register use the following info:
SIP Server: Your IP/Domain of FreePBX
Username: Extension# (eg 1234)
Password: the secret
3CX Example
Warning: The driver descriptor says the physical block size is 2048 bytes, but Linux says it is 512 bytes. solution
Disk /dev/sdb: 15.22 GiB, 16336814080 bytes, 31907840 sectors

Disk model: SD/MMC

Units: sectors of 1 * 512 = 512 bytes

Sector size (logical/physical): 512 bytes / 512 bytes

I/O size (minimum/optimal): 512 bytes / 512 bytes

Disklabel type: dos

Disk identifier: 0x00000000
The fdisk output is above and below is the error you may get when trying to use the drive or even format it.
Warning: The driver descriptor says the physical block size is 2048 bytes, but Linux says it is 512 bytes.
wipefs is a useful tool to show us what filesystems exist on the drive.
root@mint:/home/mint# wipefs /dev/sdb
DEVICE OFFSET TYPE UUID LABEL
sdb 0x52 vfat 53E2-5BC6
sdb 0x0 vfat 53E2-5BC6
sdb 0x1fe vfat 53E2-5BC6
Let's wipe out all filesystems to fix the error
Make sure you have backed up any data.
Change sdX below with the actual drive you want to do this to.
wipefs --all /dev/sdX
Cisco How To Use a Third Party SIP Phone (eg. Avaya, 3CX)
Most relevant config points from my video here.
1.) Create a new End User
The most important part is setting the "Digest Credentials", that is the password that the phone will use to authenticate.
2.) Add a New Phone
Device -> Phone
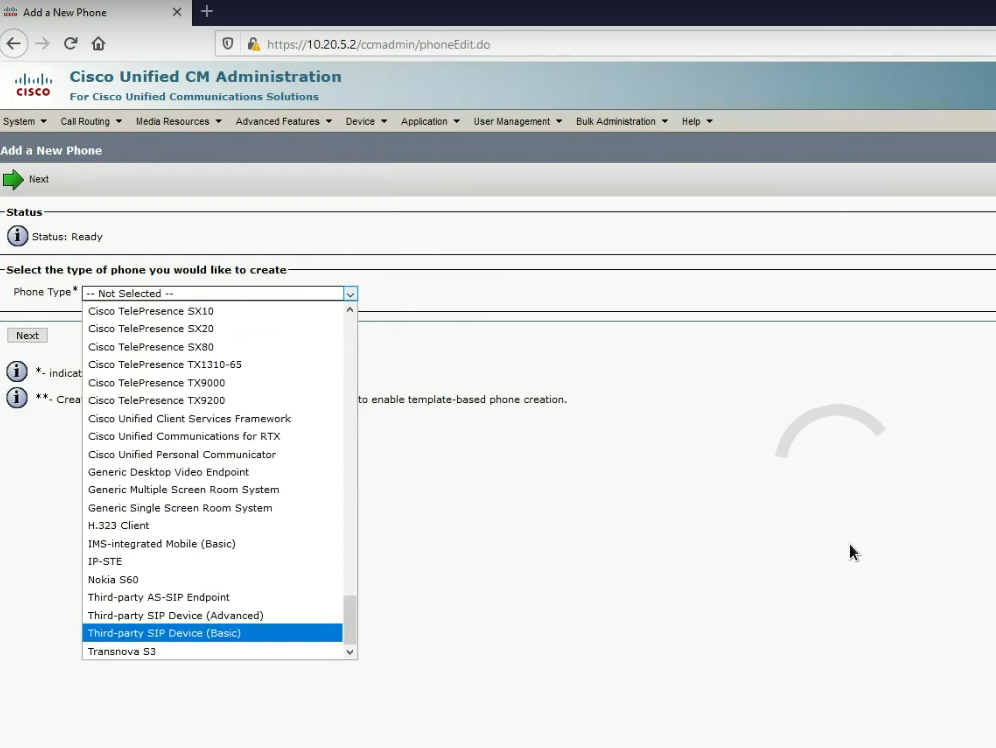
3.)
Set a fake MAC address in the right format eg. AAABBBCCCDDD.
Remember to assign the phone to the user you created earlier.
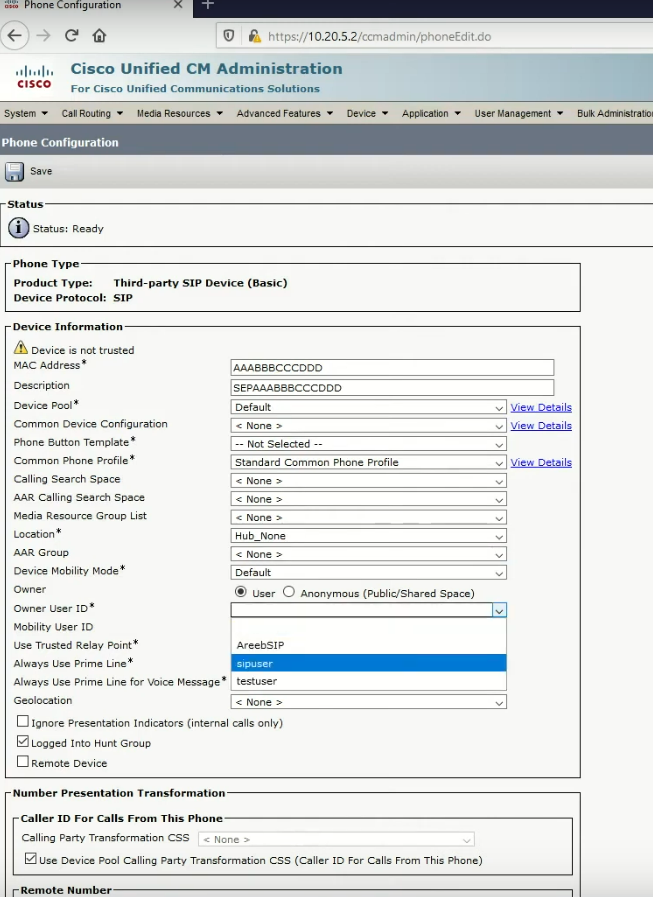
Set the "Third-party SIP Device Basic - Standard SIP" security profile as below.

Scroll down and set the Digest user to the user we sent earlier.
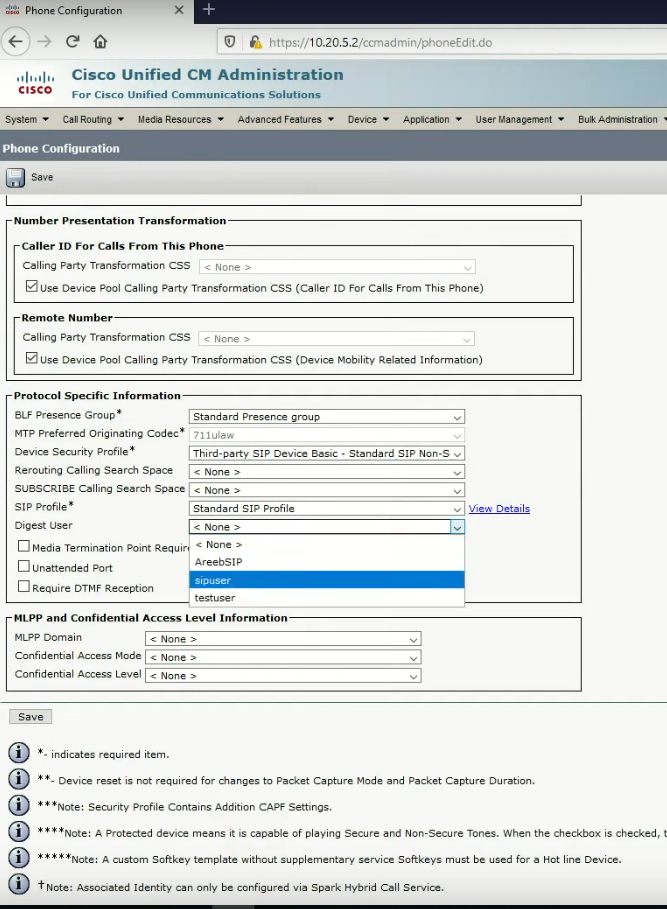
Remember to create a DN, your phone will then authenticate with the DN as the username and the password of the "Digest User".
Cisco Unified Communication Manager (CUCM) - How To Add Phones
Before starting you should reset your phone(s) if they have been previously registered to another CME/CUCM:
Before starting go to "Cisco Unified Serviceability" drop-down on the top-right
Under Tools go to Service Activation.
Enable "CallManger" and "tftp" in order for phones to register.
Step 1 - Go The Phone Menu 
Step 2 - Add New Phone 
Step 3 - Choose Phone Type 
Step 4 - Set Phone MAC
The format is SEPMACADDRESS
As we can see, the minimum requirements are that we specify the following:
Device Name:
Device Pool:
Owner User ID:
Device Security Profile:
Step 5 - Add New DN (top left) 
pptp / pptpd not working in DD-WRT iptables / router
Although it is well-known that pptp is not secure and is subject to many forms of attacks, the reality is that a lot of legacy and embedded devices use pptp. I argue that if it is being used for routing or remote access or over an already secure connection (eg. another VPN like ikev2) then this is still acceptable. Or in a LAN or in a public environment where no private data is exchanged. However, if the nature of the data is extremely sensitive, you should do whatever it takes to have the second layer of encryption by using a secure VPN protocol.
In iptables you can find many threads and discussions about how to make pptp work with iptables, with crazy forwarding rules and blindly and manually allowing all GRE etc... However it's much more simple in my experience. You just need to enable the netfilter conntracking to be able to connect your pptp client.
This solution also applies to a node running Kubernetes and Docker containers (eg. an embedded device that is for some odd reason using pptp). If you can, switch to ikev2 or OpenVPN.
sysctl -w net.netfilter.nf_conntrack_helper=1
For permanent changes add this to /etc/sysctl.conf:
net.netfilter.nf_conntrack_helper=1
There are other modules necessary to make pptp work, but you can see that any recent kernel will load them on its own:
nf_nat_pptp            20480  0

nf_conntrack_pptp      24576  1 nf_nat_pptp

nf_nat                 45056  3 nf_nat_pptp,iptable_nat,xt_MASQUERADE

nf_conntrack          139264  6 xt_conntrack,nf_nat,nf_conntrack_pptp,nf_nat_pptp,nf_conntrack_netlink,xt_MASQUERADE
systemd-journald high memory usage solution
Sometimes systemd-journald can take several hundred megs of RAM or more which is bad for microservices and embedded devices.
Edit /etc/systemd/journald.conf
You can set it to max 5M of RAM like below:
SystemMaxUse=5M
How to Install FreePBX 17 in Linux Debian Ubuntu Mint Guide
FreePBX official install guide is here.
Requirements:
- Debian 12 Download Link
- Minimal - System Utilities
- RAM: 4G
- HDD: 20G
Note that if you don't have the required base OS you will get an error like this at the end of the install
2024-10-23 00:30:22 - Upgrading FreePBX 17 modules
2024-10-23 00:30:22 - Installation failed at step Upgrading FreePBX 17 modules. Please check log /var/log/pbx/freepbx17-install-2024.11.05-00.14.36.log for details.
2024-10-23 00:30:22 - Error at line: 1135 exiting with code 255 (last command was: fwconsole ma upgradeall >> $log)
2024-10-23 00:30:22 - Exiting script
#log
In modulefunctions.class.php line 2814:
preg_replace(): Passing null to parameter #3 ($subject) of type array|string is deprecated
moduleadmin [-f|--force] [-d|--debug] [--edge] [--ignorecache] [--stable] [--color] [--skipchown] [-e|--autoenable] [--skipdisabled] [--snapshot SNAPSHOT] [--format FORMAT] [-R|--repo REPO] [-t|--tag TAG] [--skipbreakingcheck] [--sendemail] [--onlystdout] [--] [
2024-10-23 00:30:22 - ****** INSTALLATION FAILED *****
2024-10-23 00:30:22 - Installation failed at step Upgrading FreePBX 17 modules. Please check log /var/log/pbx/freepbx17-install-2024.11.05-00.14.36.log for details.
2024-10-23 00:30:22 - Error at line: 1135 exiting with code 255 (last command was: fwconsole ma upgradeall >> $log)
2024-10-23 00:30:22 - Exiting script
Step 1- Get and execute the official Sangoma (maker of Asterisk) install script:
wget https://github.com/FreePBX/sng_freepbx_debian_install/raw/master/sng_freepbx_debian_install.sh
bash sng_freepbx_debian_install.sh
The install took about 20 minutes for me on a single core Xeon on an SSD.
If successful it should look like this at the end:
______ ______ ______ __ __
| ___| | ___ | ___ \ / /
| |_ _ __ ___ ___ | |_/ /| |_/ / V /
| _| | '__| / _ / _ | __/ | ___ /
| | | | | __/| __/| | | |_/ // /^
_| |_| ___| ___|_| ____/ / /
NOTICE! You have 4 notifications! Please log into the UI to see them!
Current Network Configuration
+-----------+-------------------+---------------------------+
| Interface | MAC Address | IP Addresses |
+-----------+-------------------+---------------------------+
| ens3 | | |
| | | fe80::dcad:beff:feef:6e79 |
+-----------+-------------------+---------------------------+
Please note most tasks should be handled through the GUI.
You can access the GUI by typing one of the above IPs in to your web browser.
For support please visit:
http://www.freepbx.org/support-and-professional-services
+---------------------------------------------------------------------+
| This machine is not activated. Activating your system ensures that |
| your machine is eligible for support and that it has the ability to |
| install Commercial Modules. |
| |
| If you already have a Deployment ID for this machine, simply run: |
| |
| fwconsole sysadmin activate deploymentid |
| |
| to assign that Deployment ID to this system. If this system is new, |
| please go to Activation (which is on the System Admin page in the |
| Web UI) and create a new Deployment there. |
+---------------------------------------------------------------------+
Step 2 - Setup and Login to the GUI
Then enter the Administration Section
Do all of the default Firewall Settings and then you'll be in the Admin home page
Firewall Issues
CLI Firewall Commands:
fwconsole firewall help

Valid Commands:

disable : Disable the System Firewall. This will shut it down cleanly.

stop : Stop the System Firewall

start : Start (and enable, if disabled) the System Firewall

restart : Restart the System Firewall

lerules [enable] or [disable] : Enable or disable Lets Encrypt rules.

trust : Add the hostname or IP specified to the Trusted Zone

untrust : Remove the hostname or IP specified from the Trusted Zone

list [zone] : List all entries in zone 'zone'

add [zone] [id id id..] : Add to 'zone' the IDs provided.

del [zone] [id id id..] : Delete from 'zone' the IDs provided.

listzones : Show zones that can be used to add and del.

fix_custom_rules : Create the files for the custom rules if they don't exist and set the permissions and owners correctly.

sync : Synchronizes all selected zones of the firewall module with the intrusion detection whitelist.

f2bstatus or f2bs : Display ignored and banned IPs. (Only root user).


When adding or deleting from a zone, one or many IDs may be provided.

These may be IP addresses, hostnames, or networks.
Example:
fwconsole firewall add trusted 10.46.80.0/24 hostname.example.com 1.2.3.4
Note that the firewall in production should never be disabled as there are massive amounts of hackers that target FreePBX and SIP servers. This can be used for learning, but ideally the firewall should be configured to whitelist yourself or other trusted IPs, rather than completely disabling.
If you are locked out:
Change 192.168.1.0/24 to your subnet or IP
iptables -I INPUT -s 192.168.1.0/24 -j ACCEPT
systemctl stop fail2ban
This buys time before the firewall reactivates.
Bug in installer script:
This happens if you try the near impossible by using an older/different Debian
The current script as of 2024-10-11 has a bug where they pass -S to add-apt-repository when it must be a lower case -s which breaks everything as you can see in the log:
 esolving deb.freepbx.org (deb.freepbx.org)... 52.217.40.28, 54.231.128.57, 52.217.9.44, ...

Connecting to deb.freepbx.org (deb.freepbx.org)|52.217.40.28|:80... connected.

HTTP request sent, awaiting response... 200 OK

Length: 3139 (3.1K) [binary/octet-stream]

Saving to: 'STDOUT'


     0K ...                                                   100% 19.4M=0s


2024-10-11 21:52:03 (19.4 MB/s) - written to stdout [3139/3139]


Usage: add-apt-repository
add-apt-repository is a script for adding apt sources.list entries.

It can be used to add any repository and also provides a shorthand

syntax for adding a Launchpad PPA (Personal Package Archive)

repository.
 - The apt repository source line to add. This is one of:

  a complete apt line in quotes,

  a repo url and areas in quotes (areas defaults to 'main')

  a PPA shortcut.

  a distro component


  Examples:

    apt-add-repository 'deb http://myserver/path/to/repo stable myrepo'

    apt-add-repository 'http://myserver/path/to/repo myrepo'

    apt-add-repository 'https://packages.medibuntu.org free non-free'

    apt-add-repository http://extras.ubuntu.com/ubuntu

    apt-add-repository ppa:user/repository

    apt-add-repository ppa:user/distro/repository

    apt-add-repository multiverse


If --remove is given the tool will remove the given sourceline from your

sources.list


add-apt-repository: error: no such option: -S
This can be fixed by editing the bash installer file you downloaded and changing -S to -s
How To Install Cisco's CUCM (Cisco Unified Communication Manager) 12 Guide
This is a quick overview of the main screens that you will need to go through to do the Cisco Unified Communication Manager installation (CUCM).
Skip the media test
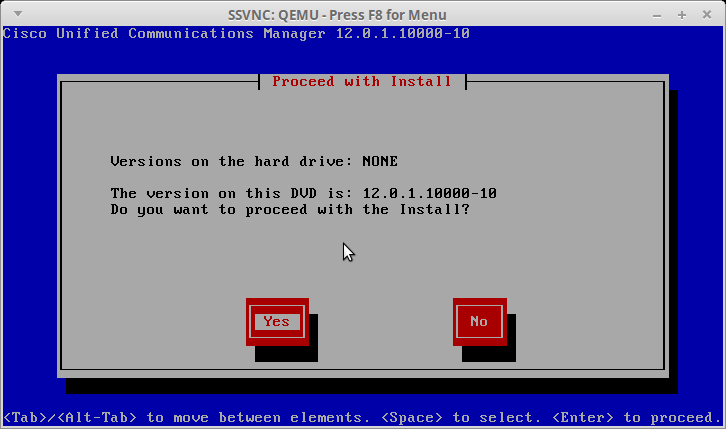
Skip the Platform Installation Wizard (we'll do it later)
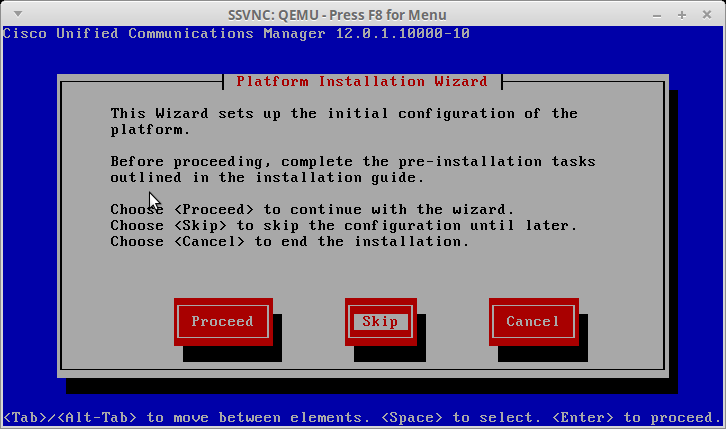
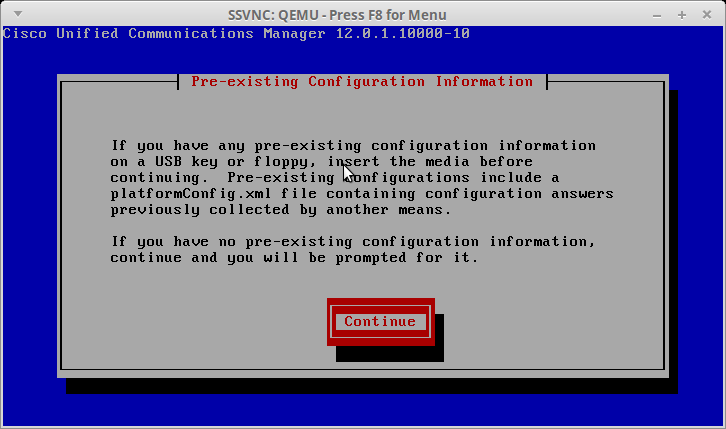
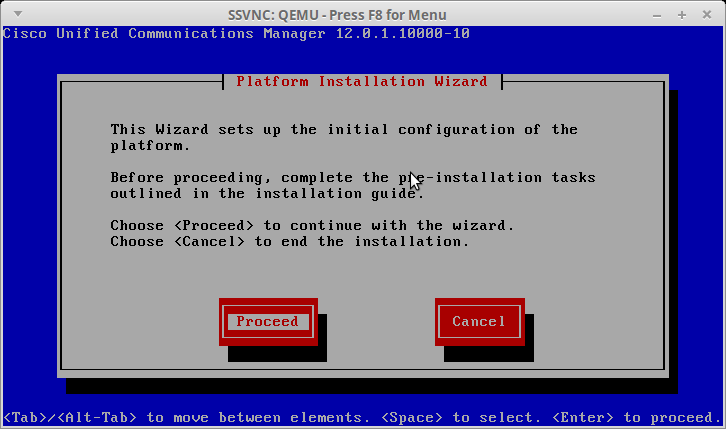
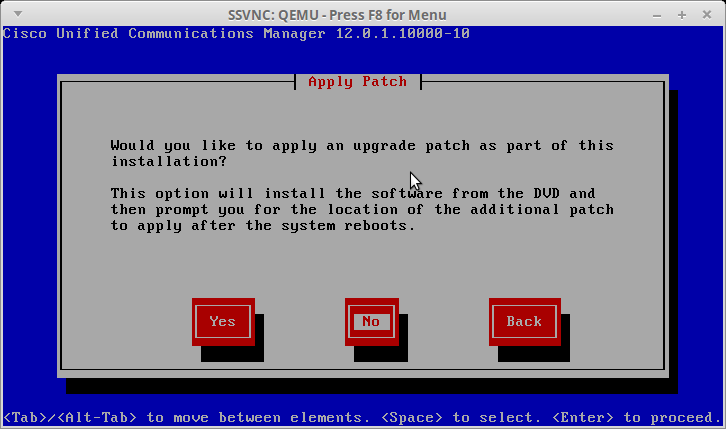
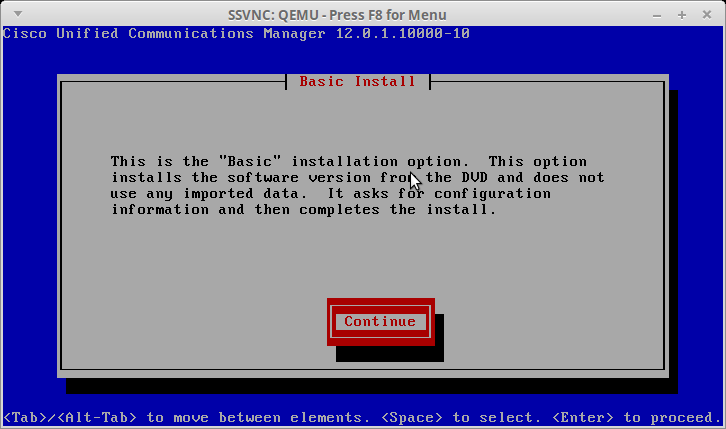
Set the relevant hostname and IP address information
Remember below is just an example, make sure you set a valid IP for your network.


Don't worry about a DNS error exactly like below
If you get the exact error below notice that it is complaining about "Reverse DNS lookup failed". You can safely proceed and continue the install, or if you control your own DNS, then you can add a reverse entry for your IP to avoid this error.
In the next screens you will be creating different usernames and passwords for different purposes (eg. Admin user, App/UI user etc..). Make sure you write down what each username and password is for and DO NOT forget them .
Create your SSL certificate, normally it would be something relevant to your company eg. (yourcompany.com).
First Node Configuration Screen.
If this is your first install and you don't have an existing Cluster you should choose "Yes".
Otherwise you would Choose "No" and enter the details of the Publisher in the next screen.
Normally we should have NTP in production, you may opt not to use NTP if your firewall blocks it or if your network has no outside access.

Keep your Security Password Somewhere Safe
The most common issue in setting up a Cluster is that you have bad network and/or the wrong Security Password.
Normally you would want SMTP but if you are on a network that doesn't allow SMTP or you have no mail account to use, it is OK to say "No" for now.
This step is another crucial part of the install and where people go wrong.
Note that if you have specified a bad IP or a non-working default gateway that this step will fail and you'll need to go back and set proper IP info.
This is one of the longest steps below. Note that there is some timeout in the install script, if this step takes too long the install times out, fails and you have to reinstall.
This is normally only an issue on machines with lots of IOPS of other usage or if you have an older/slower RAID array or mechanical disks/insufficient IO bandwidth at the moment.
Congrats! After this point, you should be able to reboot and login to the Web GUI of CUCM (using your application user).
Note that it may take 5-15 minutes on initial boot for the Web GUI to be ready.
Linux Ubuntu Redhat How To Extract Images from PDF
Just use pdfimages:
Change yourpdf.pdf to the name of your pdf
output-name is the name format (eg. output-name01.jpg output-name02.jpg) is how the files will be named if you use "output-name". Change as needed.
pdfimages -all yourpdf.pdf output-name
After that you will have extracted all of the images.
You can also just run the command with -list and see all of the images contained within the pdf like this:
pdfimages -list file.pdf
page num type width height color comp bpc enc interp object ID x-ppi y-ppi size ratio
--------------------------------------------------------------------------------------------
1 0 image 2543 1553 rgb 3 8 jpeg no 4 0 231 188 64.6K 0.6%
2 1 image 2543 1553 rgb 3 8 jpeg no 4 0 231 188 64.6K 0.6%
2 2 image 1120 1120 rgb 3 8 jpeg no 8 0 136 136 245K 6.7%
2 3 smask 1120 1120 gray 1 8 image no 8 0 136 136 1236B 0.1%
3 4 image 2543 1553 rgb 3 8 jpeg no 4 0 231 188 64.6K 0.6%
3 5 image 1120 1120 rgb 3 8 jpeg no 14 0 136 136 216K 5.9%
3 6 smask 1120 1120 gray 1 8 image no 14 0 136 136 1236B 0.1%
4 7 image 2543 1553 rgb 3 8 jpeg no 4 0 231 188 64.6K 0.6%
5 8 image 2543 1553 rgb 3 8 jpeg no 4 0 231 188 64.6K 0.6%
6 9 image 2543 1553 rgb 3 8 jpeg no 4 0 231 188 64.6K 0.6%
7 10 image 2543 1553 rgb 3 8 jpeg no 4 0 231 188 64.6K 0.6%
8 11 image 2543 1553 rgb 3 8 jpeg no 4 0 231 188 64.6K 0.6%
9 12 image 2543 1553 rgb 3 8 jpeg no 4 0 231 188 64.6K 0.6%
10 13 image 2543 1553 rgb 3 8 jpeg no 4 0 231 188 64.6K 0.6%
11 14 image 2543 1553 rgb 3 8 jpeg no 4 0 231 188 64.6K 0.6%
11 15 image 726 429 rgb 3 8 image no 41 0 66 66 13.6K 1.5%
11 16 smask 726 429 gray 1 8 image no 41 0 66 66 343B 0.1%
12 17 image 2543 1553 rgb 3 8 jpeg no 4 0 231 188 64.6K 0.6%
12 18 image 726 429 rgb 3 8 image no 48 0 66 66 12.4K 1.4%
12 19 smask 726 429 gray 1 8 image no 48 0 66 66 343B 0.1%
13 20 image 2543 1553 rgb 3 8 jpeg no 4 0 231 188 64.6K 0.6%
13 21 image 726 429 rgb 3 8 image no 55 0 66 66 10.6K 1.2%
13 22 smask 726 429 gray 1 8 image no 55 0 66 66 343B 0.1%
14 23 image 2543 1553 rgb 3 8 jpeg no 4 0 231 188 64.6K 0.6%
14 24 image 726 429 rgb 3 8 image no 62 0 66 66 13.1K 1.4%
14 25 smask 726 429 gray 1 8 image no 62 0 66 66 343B 0.1%
15 26 image 2543 1553 rgb 3 8 jpeg no 4 0 231 188 64.6K 0.6%
15 27 image 726 429 rgb 3 8 image no 69 0 66 66 11.9K 1.3%
15 28 smask 726 429 gray 1 8 image no 69 0 66 66 343B 0.1%
16 29 image 2543 1553 rgb 3 8 jpeg no 4 0 231 188 64.6K 0.6%
16 30 image 726 429 rgb 3 8 image no 76 0 66 66 16.2K 1.8%
16 31 smask 726 429 gray 1 8 image no 76 0 66 66 343B 0.1%
17 32 image 2543 1553 rgb 3 8 jpeg no 4 0 231 188 64.6K 0.6%
17 33 image 726 429 rgb 3 8 image no 83 0 66 66 10.8K 1.2%
17 34 smask 726 429 gray 1 8 image no 83 0 66 66 343B 0.1%
18 35 image 2543 1553 rgb 3 8 jpeg no 4 0 231 188 64.6K 0.6%
18 36 image 726 429 rgb 3 8 image no 90 0 66 66 11.2K 1.2%
18 37 smask 726 429 gray 1 8 image no 90 0 66 66 343B 0.1%
19 38 image 2543 1553 rgb 3 8 jpeg no 4 0 231 188 64.6K 0.6%
19 39 image 726 429 rgb 3 8 image no 97 0 66 66 13.3K 1.5%
19 40 smask 726 429 gray 1 8 image no 97 0 66 66 343B 0.1%
20 41 image 2543 1553 rgb 3 8 jpeg no 4 0 231 188 64.6K 0.6%
20 42 image 726 429 rgb 3 8 image no 104 0 66 66 13.4K 1.5%
20 43 smask 726 429 gray 1 8 image no 104 0 66 66 343B 0.1%
21 44 image 2543 1553 rgb 3 8 jpeg no 4 0 231 188 64.6K 0.6%
21 45 image 726 429 rgb 3 8 image no 111 0 66 66 8856B 0.9%
21 46 smask 726 429 gray 1 8 image no 111 0 66 66 343B 0.1%
22 47 image 2543 1553 rgb 3 8 jpeg no 4 0 231 188 64.6K 0.6%
22 48 image 726 429 rgb 3 8 image no 118 0 66 66 8841B 0.9%
22 49 smask 726 429 gray 1 8 image no 118 0 66 66 343B 0.1%
23 50 image 2543 1553 rgb 3 8 jpeg no 4 0 231 188 64.6K 0.6%
23 51 image 726 429 rgb 3 8 image no 125 0 66 66 17.3K 1.9%
23 52 smask 726 429 gray 1 8 image no 125 0 66 66 343B 0.1%
24 53 image 2543 1553 rgb 3 8 jpeg no 4 0 231 188 64.6K 0.6%
24 54 image 726 429 rgb 3 8 image no 132 0 66 66 15.0K 1.6%
24 55 smask 726 429 gray 1 8 image no 132 0 66 66 343B 0.1%
25 56 image 2543 1553 rgb 3 8 jpeg no 4 0 231 188 64.6K 0.6%
25 57 image 726 429 rgb 3 8 image no 139 0 66 66 15.0K 1.6%
25 58 smask 726 429 gray 1 8 image no 139 0 66 66 343B 0.1%
26 59 image 2543 1553 rgb 3 8 jpeg no 4 0 231 188 64.6K 0.6%
26 60 image 726 429 rgb 3 8 image no 146 0 66 66 14.8K 1.6%
26 61 smask 726 429 gray 1 8 image no 146 0 66 66 343B 0.1%
27 62 image 2543 1553 rgb 3 8 jpeg no 4 0 231 188 64.6K 0.6%
27 63 image 726 429 rgb 3 8 image no 153 0 66 66 13.6K 1.5%
27 64 smask 726 429 gray 1 8 image no 153 0 66 66 343B 0.1%
28 65 image 2543 1553 rgb 3 8 jpeg no 4 0 231 188 64.6K 0.6%
28 66 image 726 429 rgb 3 8 image no 160 0 66 66 15.0K 1.6%
28 67 smask 726 429 gray 1 8 image no 160 0 66 66 343B 0.1%
29 68 image 2543 1553 rgb 3 8 jpeg no 4 0 231 188 64.6K 0.6%
29 69 image 726 429 rgb 3 8 image no 167 0 66 66 13.3K 1.5%
29 70 smask 726 429 gray 1 8 image no 167 0 66 66 343B 0.1%
30 71 image 2543 1553 rgb 3 8 jpeg no 4 0 231 188 64.6K 0.6%
30 72 image 726 429 rgb 3 8 image no 174 0 66 66 12.9K 1.4%
30 73 smask 726 429 gray 1 8 image no 174 0 66 66 343B 0.1%
31 74 image 2543 1553 rgb 3 8 jpeg no 4 0 231 188 64.6K 0.6%
31 75 image 726 429 rgb 3 8 image no 181 0 66 66 13.3K 1.5%
31 76 smask 726 429 gray 1 8 image no 181 0 66 66 343B 0.1%
32 77 image 2543 1553 rgb 3 8 jpeg no 4 0 231 188 64.6K 0.6%
32 78 image 726 429 rgb 3 8 image no 188 0 66 66 13.7K 1.5%
32 79 smask 726 429 gray 1 8 image no 188 0 66 66 343B 0.1%
33 80 image 2543 1553 rgb 3 8 jpeg no 4 0 231 188 64.6K 0.6%
33 81 image 726 429 rgb 3 8 image no 195 0 66 66 12.3K 1.3%
33 82 smask 726 429 gray 1 8 image no 195 0 66 66 343B 0.1%
34 83 image 2543 1553 rgb 3 8 jpeg no 4 0 231 188 64.6K 0.6%
34 84 image 726 429 rgb 3 8 image no 202 0 66 66 12.4K 1.4%
34 85 smask 726 429 gray 1 8 image no 202 0 66 66 343B 0.1%
35 86 image 2543 1553 rgb 3 8 jpeg no 4 0 231 188 64.6K 0.6%
35 87 image 726 429 rgb 3 8 image no 209 0 66 66 13.2K 1.5%
35 88 smask 726 429 gray 1 8 image no 209 0 66 66 343B 0.1%
36 89 image 2543 1553 rgb 3 8 jpeg no 4 0 231 188 64.6K 0.6%
36 90 image 726 429 rgb 3 8 image no 216 0 66 66 12.9K 1.4%
36 91 smask 726 429 gray 1 8 image no 216 0 66 66 343B 0.1%
37 92 image 2543 1553 rgb 3 8 jpeg no 4 0 231 188 64.6K 0.6%
37 93 image 726 429 rgb 3 8 image no 223 0 66 66 13.2K 1.5%
37 94 smask 726 429 gray 1 8 image no 223 0 66 66 343B 0.1%
38 95 image 2543 1553 rgb 3 8 jpeg no 4 0 231 188 64.6K 0.6%
38 96 image 726 429 rgb 3 8 image no 230 0 66 66 12.3K 1.4%
38 97 smask 726 429 gray 1 8 image no 230 0 66 66 343B 0.1%
39 98 image 2543 1553 rgb 3 8 jpeg no 4 0 231 188 64.6K 0.6%
39 99 image 726 429 rgb 3 8 image no 237 0 66 66 12.5K 1.4%
39 100 smask 726 429 gray 1 8 image no 237 0 66 66 343B 0.1%
40 101 image 2543 1553 rgb 3 8 jpeg no 4 0 231 188 64.6K 0.6%
40 102 image 726 429 rgb 3 8 image no 244 0 66 66 12.4K 1.4%
40 103 smask 726 429 gray 1 8 image no 244 0 66 66 343B 0.1%
41 104 image 2543 1553 rgb 3 8 jpeg no 4 0 231 188 64.6K 0.6%
41 105 image 726 429 rgb 3 8 image no 251 0 66 66 12.5K 1.4%
41 106 smask 726 429 gray 1 8 image no 251 0 66 66 343B 0.1%
42 107 image 2543 1553 rgb 3 8 jpeg no 4 0 231 188 64.6K 0.6%
42 108 image 726 429 rgb 3 8 image no 258 0 66 66 17.3K 1.9%
42 109 smask 726 429 gray 1 8 image no 258 0 66 66 343B 0.1%
43 110 image 2543 1553 rgb 3 8 jpeg no 4 0 231 188 64.6K 0.6%
43 111 image 726 429 rgb 3 8 image no 265 0 66 66 14.7K 1.6%
43 112 smask 726 429 gray 1 8 image no 265 0 66 66 343B 0.1%
44 113 image 2543 1553 rgb 3 8 jpeg no 4 0 231 188 64.6K 0.6%
44 114 image 726 429 rgb 3 8 image no 272 0 66 66 15.5K 1.7%
44 115 smask 726 429 gray 1 8 image no 272 0 66 66 343B 0.1%
45 116 image 2543 1553 rgb 3 8 jpeg no 4 0 231 188 64.6K 0.6%
45 117 image 726 429 rgb 3 8 image no 279 0 66 66 12.8K 1.4%
45 118 smask 726 429 gray 1 8 image no 279 0 66 66 343B 0.1%
46 119 image 2543 1553 rgb 3 8 jpeg no 4 0 231 188 64.6K 0.6%
46 120 image 726 429 rgb 3 8 image no 286 0 66 66 15.0K 1.6%
46 121 smask 726 429 gray 1 8 image no 286 0 66 66 343B 0.1%
47 122 image 2543 1553 rgb 3 8 jpeg no 4 0 231 188 64.6K 0.6%
47 123 image 726 429 rgb 3 8 image no 293 0 66 66 14.4K 1.6%
47 124 smask 726 429 gray 1 8 image no 293 0 66 66 343B 0.1%
48 125 image 2543 1553 rgb 3 8 jpeg no 4 0 231 188 64.6K 0.6%
48 126 image 726 429 rgb 3 8 image no 300 0 66 66 15.6K 1.7%
48 127 smask 726 429 gray 1 8 image no 300 0 66 66 343B 0.1%
49 128 image 2543 1553 rgb 3 8 jpeg no 4 0 231 188 64.6K 0.6%
49 129 image 726 429 rgb 3 8 image no 307 0 66 66 13.6K 1.5%
49 130 smask 726 429 gray 1 8 image no 307 0 66 66 343B 0.1%
50 131 image 2543 1553 rgb 3 8 jpeg no 4 0 231 188 64.6K 0.6%
50 132 image 726 429 rgb 3 8 image no 314 0 66 66 14.3K 1.6%
50 133 smask 726 429 gray 1 8 image no 314 0 66 66 343B 0.1%
51 134 image 2543 1553 rgb 3 8 jpeg no 4 0 231 188 64.6K 0.6%
51 135 image 726 429 rgb 3 8 image no 321 0 66 66 15.2K 1.7%
51 136 smask 726 429 gray 1 8 image no 321 0 66 66 343B 0.1%
52 137 image 2543 1553 rgb 3 8 jpeg no 4 0 231 188 64.6K 0.6%
52 138 image 726 429 rgb 3 8 image no 328 0 66 66 14.7K 1.6%
52 139 smask 726 429 gray 1 8 image no 328 0 66 66 343B 0.1%
53 140 image 2543 1553 rgb 3 8 jpeg no 4 0 231 188 64.6K 0.6%
53 141 image 726 429 rgb 3 8 image no 335 0 66 66 12.3K 1.3%
53 142 smask 726 429 gray 1 8 image no 335 0 66 66 343B 0.1%
54 143 image 2543 1553 rgb 3 8 jpeg no 4 0 231 188 64.6K 0.6%
54 144 image 726 429 rgb 3 8 image no 342 0 66 66 12.5K 1.4%
54 145 smask 726 429 gray 1 8 image no 342 0 66 66 343B 0.1%
55 146 image 2543 1553 rgb 3 8 jpeg no 4 0 231 188 64.6K 0.6%
55 147 image 726 429 rgb 3 8 image no 349 0 66 66 12.3K 1.3%
55 148 smask 726 429 gray 1 8 image no 349 0 66 66 343B 0.1%
56 149 image 2543 1553 rgb 3 8 jpeg no 4 0 231 188 64.6K 0.6%
56 150 image 726 429 rgb 3 8 image no 356 0 66 66 12.8K 1.4%
56 151 smask 726 429 gray 1 8 image no 356 0 66 66 343B 0.1%
Linux and Windows Dual Boot Issue NIC Won't work After Booting Windows
In Windows, with some NICs, especially Intel, Windows may enable features on the card that break it in Linux. It is hard to troubleshoot as what you'll see is that the NIC is still detected in Linux, the NIC/port will be up but nothing will work (eg. DHCP requests or even static IPs won't work). You may see STP bridge traffic but that is all.
In a corporate environment this can result in many calls to support and is essentially downtime and an unnecessary waste of resources.
Solution - Disable any Power Management and Wake on LAN Features in Windows
Generally these are any of the "Wake on LAN" or "Wake on Magic" or simiilarly named features. Make sure you disable those under Device Manager for any of your NICs.
Quick Fix - If you have no control over the Windows NIC
The quick fix for this (if you don't have control over Windows) is powering off the machine and powering back.
Cisco CME How To Enable ACD hunt groups
In our example below, we create 2 hunt groups.
You could assume the #1 group is sales and #2 group is support etc.. and you can create more as needed.
The main part of hunt is the "list" option where you add each phone number that is to be part of the group
ephone-hunt 1 sequential

 pilot 2001

 list 1234

 timeout 10


ephone-hunt 2 sequential

 pilot 2002

 list 5678

 timeout 10
ephone-hunt 1 sequential
This sets up the first hunt group. The keyword sequential specifies that calls will be sent to each phone in the list one by one until someone answers, or the list is exhausted.
pilot 2001: This is the number used to reach the hunt group. When someone calls this number (2001), the system will follow the hunt sequence.
list 1234: This is the list of ephone-dn (directory numbers) the call will be routed to. In this case, the call will be sequentially forwarded to phones associated with extension 1234.
timeout 10: This is the amount of time (in seconds) the system will wait before trying the next phone in the sequence. In this case, it will wait for 10 seconds before forwarding the call to the next phone.
How to install gns3 on Linux Ubuntu Mint
Step 01 - Download
Visit https://gns3.com/software/download
Click on "Linux" on the side under "Installation".
Run these commands:
What we are doing is adding the repo/ppa for gns3, then updating apt and then install gns3 and the gui.
sudo add-apt-repository ppa:gns3/ppa

sudo apt update

sudo apt install gns3-gui gns3-server
Run gns3 from the terminal by typing "gns3"
How to convert audio for Asterisk .wav format
In our example we take "sound.mp3" and convert it to .wav.
Generally Asterisk for its wave needs one audio channel (-ac 1) / mono and 8000hz (-ar 8000) instead of the standard CD/MP3 of 44100hz.
Here is the command to convert into Asterisk .wav format:
ffmpeg -i sound.mp3 -ac 1 -ar 8000 sound.wav
Errors Asterisk may give you if the format is wrong:
-- Executing [91781891@cme:3] Playback("SIP/234-00000008", "/var/lib/asterisk/sounds/sound") in new stack
[Sep 26 15:45:32] WARNING[4400][C-00000009]: format_wav.c:111 check_header_fmt: Unexpected frequency mismatch 44100 (expecting 8000)
[Sep 26 15:45:32] WARNING[4400][C-00000009]: file.c:510 fn_wrapper: Unable to open format wav
[Sep 26 15:45:32] WARNING[4400][C-00000009]: file.c:1303 ast_streamfile: Unable to open /var/lib/asterisk/sounds/sound (format (ulaw)): No such file or directory
[Sep 26 15:45:32] WARNING[4400][C-00000009]: app_playback.c:513 playback_exec: Playback failed on SIP/234-00000008 for /var/lib/asterisk/sounds/sound
-- Executing [9132131@cme:3] Playback("SIP/234-00000006", "/var/lib/asterisk/sounds/sound") in new stack
[Sep 26 15:44:18] WARNING[4384][C-00000007]: format_wav.c:102 check_header_fmt: Not in mono 2
[Sep 26 15:44:18] WARNING[4384][C-00000007]: file.c:510 fn_wrapper: Unable to open format wav
[Sep 26 15:44:18] WARNING[4384][C-00000007]: file.c:1303 ast_streamfile: Unable to open /var/lib/asterisk/sounds/sound (format (ulaw)): No such file or directory
[Sep 26 15:44:18] WARNING[4384][C-00000007]: app_playback.c:513 playback_exec: Playback failed on SIP/234-00000006 for /var/lib/asterisk/sounds/sound
Using Cisco CME Router with Asterisk as a dial-peer
#Remember that you need a valid gateway IP unless the Asterisk server is on the same subnet and LAN
Set Valid Gateway IP (if you don't have one already)
ip route 0.0.0.0 0.0.0.0 GATEWAYIP
Enable VOIP Trust
voice service voip

 ip address trusted list

  ipv4 0.0.0.0 0.0.0.0

  sip
Set Credentials For Asterisk and Register To Asterisk
sip-ua

 credentials username username password password realm asterisk

 registrar ipv4:ASTERISKIP expires 3600

 sip-server ipv4:ASTERISKIP
Set a Dial-Peer which uses Asterisk
This is so we can actually make calls out through it. In our case we are simulating a typical office setup where you dial 9 for outside access. This is a very "unoptimized" way that takes too long, in reality you probably want dial-peers that have more specific matches eg for local numbers (713-403-1234) format.
dial-peer voice 123 voip

 destination-pattern 9T

 session protocol sipv2

 session target ipv4:ASTERISKIP

 codec g711ulaw
At this point if you have done things correctly, all calls beginning with a 9 will go out through Asterisk (unless you already have more specific dial-peers).
Remember Asterisk must be configured to accept the client. In some cases, you may need to modify the security users for the "friend" on Asterisk.
Cisco CME How To Configure SIP Trunk VOIP
This is how we configure outside PSTN access or dialing through another SIP trunk. Beware that this a simplistic example that neglects most security including SRTP
First you'll need to be in config mode:
Step - 1 Enter Voice Service VOIP security options
There are more options but for now we'll just focus on security/allowing connections to and from our phones and the trunk.
Router(config)#voice service voip
Then enter the trusted IP list:
Router(conf-voi-serv)#ip address trusted list
Set Trusted IPs:
In practice you would set the static IPs/ranges of your SIP trunk(s)
o be easy/insecure for testing just set any IP as being trusted (for trusted/LAN/testing only!)
Router(cfg-iptrust-list)#ipv4 0.0.0.0 0.0.0.0
To set a specify IP
This could be one of your SIP trunk IPs
Router(cfg-iptrust-list)#ipv4 192.168.5.20 255.255.255.0
To set a range (/24):
This may be a range of phones on your internal network that you want to trust.
Router(cfg-iptrust-list)#ipv4 10.0.0.0 255.255.255.0
You can add more entries as needed.
Step 2 - Setup Trunk
We'll set our preferred codec list
Router(config)#voice class codec 1
Router(config-class)#codec preference 1 g711ulaw

Router(config-class)#codec preference 2 g729r8
Go back to config mode:
Here is how we setup our trunk, depending on your service provider it may have different requirements (most providers will provide example configs).
Basically we are just authenticating using our username and password from our SIP provider and the last part "realm" is the IP or domain of the server.
authentication command will use the default username/password when authenticating.
credentials command is really the same but you can have multiple of these (eg. if you have accounts with multiple SIP trunks/providers).
Router(config)#sip-ua
Router(config-sip-ua)#credentials username YOUR-USERNAME password 0 YOUR-PASSWORD realm IP-or-domain-of-Trunk.com
There is another option for credentials which can specify a specific phone number tied to the account (some providers do this and some may not).
Router(config-sip-ua)#credentials number 1234 username YOUR-USERNAME password 0 YOUR-PASSWORD realm IP-or-domain-of-Trunk.com
Router(config-sip-ua)#authentication username YOUR-USERNAME password 0 YOUR-PASSWORD realm IP-or-domain-of-Trunk.com
Step 3 - Use Trunk for outgoing calls
This is a generic use the trunk for all non-local calls, but in practice, you may have many providers and may have a more specific dial pattern so perhaps calls for country ABC go through dialpeer 4444 to give better or cheaper calls to a specific destination.
Be in config mode
In our example we call our dial-peer "123" but it could be any unused number.
Create the dial-peer
Router(config)#dial-peer voice 123 voip
We set destination pattern as anything starting with a 9 (the idea is that 9 is for dialing out, change according to your needs).
Router(config-dial-peer)#destination-pattern 9T
We set the protocol as sip, since we use this protocol for a SIP trunk of course.
Router(config-dial-peer)#session protocol sipv2
We set the codec, a very standard g711ulaw, but change according to your needs (what your provider also must support).
Router(config-dial-peer)#codec g711ulaw
Set callerid (usually should be the number your provider assigned):
In this example we set callerid as "12345678"
Router(config-dial-peer)#clid network-number 12345678
Set your session target
It's Cisco talk about which IP/domain do we send the calls to when this dial-peer is matched?
You can use a hostname like this
Router(config-dial-peer)#session target dns:your-server-domain
Or preferably if they have a static IP use this:
Router(config-dial-peer)#session target ipv4:192.168.5.254
Congrats, after this you should be able to make outgoing calls to the PSTN!
Virtualbox host Only Network Error Failed to save host network interface parameter - Cannot change gateway IP of host only network
In newer versions this is a very stubborn issue. Here is how you fix it.
Step 1 - Create networks.conf
sudo mkdir /etc/vbox/
sudo vi /etc/vbox/networks.conf
put this in:
In our case we can use the slash /16 range of 192.168.0..0, change the subnet according to your needs (do not break the formatting remember you need * and space before the subnet as shown)
* 192.168.0.0/16
Note there is a * and a space between the 192.168.0.0/16 otherwise it won't work.
Step 2 - Restart and close Virtualbox
service virtualbox restart
now reopen the GUI.
Edit your host-only network, you will find the IP changes back. However, if you close and open Vbox you should see that it did indeed set.
Cisco CME and C7200 Router Testing and Learning Environment on Ubuntu 20+ Setup Tutorial Guide
Since newer versions of Ubuntu like 20, you will find there is no longer dynagen and that the dynamips provided is faulty and will segfault each time:
Cisco Router Simulation Platform (version 0.2.14-amd64/Linux stable)

Copyright (c) 2005-2011 Christophe Fillot.

Build date: Apr  3 2018 12:20:29


Local UUID: 3c1c0b7f-2fab-4fda-b40b-74841d1bcfe0


Instance ID set to 1.

netio_tap_create: unable to open TAP device tap1 (No such file or directory)

C7200 'default': unable to create NETIO descriptor for slot 0

IOS image file: c7200-adventerprisek9-mz.151-4.M.bin


ILT: loaded table "mips64j" from cache.

ILT: loaded table "mips64e" from cache.

ILT: loaded table "ppc32j" from cache.

ILT: loaded table "ppc32e" from cache.

CPU0: carved JIT exec zone of 64 Mb into 2048 pages of 32 Kb.

C7200 instance 'default' (id 1):

  VM Status  : 0

  RAM size   : 256 Mb

  IOMEM size : 0 Mb

  NVRAM size : 128 Kb

  NPE model  : npe-400

  Midplane   : vxr

  IOS image  : c7200-adventerprisek9-mz.151-4.M.bin


Loading ELF file 'c7200-adventerprisek9-mz.151-4.M.bin'...

ELF entry point: 0x80008000


C7200 'default': starting simulation (CPU0 PC=0xffffffffbfc00000), JIT enabled.


Segmentation fault (core dumped)
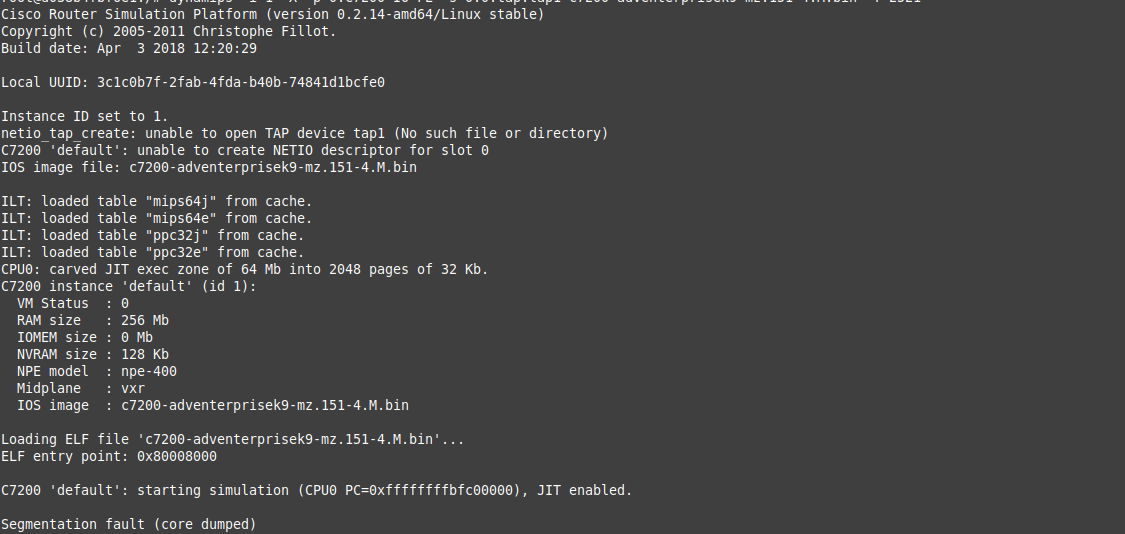
Solution - Compile The Newer Version of dynamips
As you can see from the output, the newest version in the repo is 0.2.14 which was built in 2018. The versioning numbers themselves, without being a whole number, are understandly "alpha" sounding versions.
Clearly, something has to be fixed and there is no newer version in the repos, so we'll have to compile our own.
Fortunately the project was picked up and lives on here: https://github.com/GNS3/dynamips
Step 1 - Get Required Packages
apt install git libpcap0.8-dev libelf-dev cmake
Step 2 - Get Source Code:
git clone https://github.com/GNS3/dynamips
Cloning into 'dynamips'...

remote: Enumerating objects: 4195, done.

remote: Counting objects: 100% (775/775), done.

remote: Compressing objects: 100% (134/134), done.

remote: Total 4195 (delta 694), reused 641 (delta 641), pack-reused 3420 (from 1)

Receiving objects: 100% (4195/4195), 2.63 MiB | 20.39 MiB/s, done.

Resolving deltas: 100% (3019/3019), done.
Step 3 - Prepare Environment and Compile
cd dynamips
mkdir build
cd build
cmake .. -DDYNAMIPS_CODE=stable
You should see this at the end of successful compilation:
-- DYNAMIPS_FLAGS=-m64;-Wall;-O2;-fomit-frame-pointer

-- DYNAMIPS_DEFINITIONS=-DHAS_POSIX_MEMALIGN=1;-DDYNAMIPS_VERSION="0.2.23";-DJIT_ARCH="amd64";-DJIT_CPU=CPU_amd64;-DMIPS64_ARCH_INC_FILE="mips64_amd64_trans.h";-DPPC32_ARCH_INC_FILE="ppc32_amd64_trans.h";-D_FILE_OFFSET_BITS=64;-D_LARGEFILE_SOURCE;-D_LARGEFILE64_SOURCE;-DLINUX_ETH;-DGEN_ETH;-DHAS_RFC2553=1;-DOSNAME=Linux

-- DYNAMIPS_INCLUDES=/usr/include

-- DYNAMIPS_LIBRARIES=dl;rt;nsl;/usr/lib/x86_64-linux-gnu/libelf.so;-lpthread;/usr/lib/x86_64-linux-gnu/libpcap.so

-- configure - END

Summary:

  CMAKE_INSTALL_PREFIX               : /usr/local

  DYNAMIPS_ARCH                      : amd64

  DYNAMIPS_CODE                      : stable

  DYNAMIPS_RENAME                    : dynamips_amd64_stable -> dynamips  (auto)

  BUILD_NVRAM_EXPORT                 : ON

  BUILD_UDP_SEND                     : OFF

  BUILD_UDP_RECV                     : OFF

  Large File support                 : ENABLE_LARGEFILE=ON

  Linux Ethernet (RAW sockets)       : ENABLE_LINUX_ETH=ON  (linux_eth)

  Generic Ethernet (libpcap/WinPcap) : ENABLE_GEN_ETH=ON  (gen_eth)

  IPv6 support (RFC 2553)            : ENABLE_IPV6=ON

-- Configuring done

-- Generating done

-- Build files have been written to: /root/dynamips/build

root@d038b4fbf6e1:~/dynamips/build#
Now make and install
make
make install
ln -s /usr/local/bin/dynamips /bin
Confirm it is the right version:
You should as below that it is version 0.2.23 and the compilation date should be the date and time you did this.
dynamips|head

Please specify an IOS image filename

Cisco Router Simulation Platform (version 0.2.23-amd64/Linux stable)

Copyright (c) 2005-2011 Christophe Fillot.

Build date: Sep 16 2024 21:09:39
Abusive IP ranges blacklist
Make sure this makes sense for you but I've started to block a lot of commercial Cloud services and easily accessible providers as they are a very high source of abusive traffic. The cost savings for a lot of organizations are huge, as you now have less bandwidth usage and less resource usage from garbage/bot/malicious traffic. This mainly works for when you can be reasonably sure that your audience has no business visiting your service(s) from freely accessible commercial IP space (eg. Amazon, Huawei Cloud, Oracle Cloud etc..). In general, any large service that offers Cloud to anyone without proper authentication, for cheap or offer any free trials/refunds (having a credit card is not enough authentication) is going to be a huge source of abusive traffic.
Some is not meant to be abusive but many of the SEO tools and services will scan your site, often causing a huge load by constantly hitting your services every second or several times per second. Even if this does not slow your services down, there is a cost to it and you may be surprised at how much it is costing you or how much extra CPU, RAM and disk IO is wasted to abuse.
This will serve as a comprehensive list of suggested ranges to block. If this causes issues from legitimate traffic, make sure you have a mechanism in place to whitelist "known good IPs" that you, your work or clients may be using. Also discourage the use of rotating IPs unless there is a good reason, all traffic should be received by static IPs that are whitelisted.
If you have publicly accessible services, there are generally not too many good reasons why users should be hitting you from commercial cloud services or VPN providers (unless your users genuinely need a VPN for security or to access your services). These services are a huge waste of resources as in many cases, I've seen 80-90% of traffic is just garbage traffic, and often it is a competitor or bad actor using these services to actively attack public services.
Now if you happen to know a service that uses a cloud service, such as Pinterest using Amazon and don't want to block it, you can whitelist their IP ranges as most reputable services will list their range of IPs for this purpose.
Note that this is not recommended as replacement for good security and firewalls but it already reduces the abusive traffic angle.
However, given that the Cloud providers offer services to anyone, they are still a source of intentionally maliicious traffic because throw away accounts are allowed on many Cloud services (eg. free trial that one uses with a prepaid credit card for the purposes of abuse).
The presence or lack of presence of a Cloud provider here does not mean they are better or worse for abuse, but I just haven't gotten a chance to list them here yet.
All proposed blocks are based on real-world examples (eg. abusive traffic coming from those hosts).
In another post we'll list a bunch of bad user agents to block.
When not to use Cloud Providers
1.) If you value privacy or control of your data
2.) If you are using it as a VPN or other outward facing service there is a good chance it may be transparently blocked.
3.) If you must use a VPN, it is best to run it from one of your office's legitimate internet connection as these IPs are the least likely to be blocked.
Where are they really from?
Beware that user agents can be forged, many DDOS services will try to masquerade as a legitimate service or scanning tool but you will often find that there is no relation (eg. a bot hitting your site that has the Google bot agent set but is really from Digital Ocean and not truly Google).
Other proposed blocks:
In general any cheap provider and any large provider should probably be blocked. This especially means providers that offer a free trial or X-day money back guarantee.
- GCP (Google Cloud)
- Vultr (Cloud)
- Hetzner (Cheap host)
- Microsoft Azure
- Oracle Cloud
- Worldstream (smaller but abusive traffic)
- Scaleway
- OVH
- Leaseweb
- IPXO LLC
- Server Destroyers LLC
Other Crap:
turnitin
It's a service for plagiarism but we've seen it hitting client servers abusively so it's the same as a DDOS/waste of resources/botnet since it offers no value to the hoster.
199.47.80.0/21
Block SEO Tools:
Popular tools include:
- Moz
- Ahrefs
- SEMRush
- Majestic SEO
If you aren't using the tools for the particular site(s) running then these should be blocked or at least give them a 403 based on the user agent.
We've seen several SEO tools used at once by determined attacker as a similar impact as DDOS by having reports run on the target site/URL done by several SEO tools or other scanning site performance tools that were otherwise legitimate.
Block Search Engines/Crawlers:
If you don't get traffic from certain search engines then consider blocking them. There are dozens of other smaller crawling services that cause huge issues.
Block AI Tools:
This has the double effect of preserving your resources and stopping AI from stealing or using your info in their replies.
Our experience is that most providers simply don't have time or care about the large amount of abuse reports they get (eg. complain and you will usually never receive any response or action).
Huawei Cloud is a good idea to block as I've seen too many cases of abuse from their ranges despite them not being considered such a huge provider compared to AWS.
1.178.32.0/20
1.178.48.0/20
101.44.0.0/20
101.44.144.0/20
101.44.16.0/20
101.44.160.0/20
101.44.173.0/24
101.44.176.0/20
101.44.192.0/20
101.44.208.0/22
101.44.212.0/22
101.44.216.0/22
101.44.220.0/22
101.44.224.0/22
101.44.228.0/22
101.44.232.0/22
101.44.236.0/22
101.44.244.0/22
101.44.248.0/22
101.44.252.0/24
101.44.253.0/24
101.44.254.0/24
101.44.255.0/24
101.44.32.0/20
101.44.48.0/20
101.44.64.0/20
101.44.80.0/20
101.44.96.0/20
101.46.0.0/20
101.46.128.0/21
101.46.136.0/21
101.46.144.0/21
101.46.152.0/21
101.46.160.0/21
101.46.168.0/21
101.46.176.0/21
101.46.184.0/21
101.46.192.0/21
101.46.208.0/21
101.46.216.0/21
101.46.236.0/22
101.46.240.0/22
101.46.248.0/22
101.46.252.0/24
101.46.254.0/24
101.46.255.0/24
101.46.32.0/20
101.46.48.0/20
101.46.64.0/20
103.215.0.0/24
103.215.1.0/24
103.215.3.0/24
103.239.72.0/24
103.240.157.0/24
103.255.61.0/24
103.255.62.0/24
110.238.100.0/22
110.238.104.0/21
110.238.112.0/21
110.238.120.0/22
110.238.124.0/22
110.238.64.0/21
110.238.72.0/21
110.238.80.0/20
110.238.96.0/24
110.238.98.0/24
110.238.99.0/24
110.239.127.0/24
110.239.64.0/19
110.239.96.0/19
110.41.210.0/24
110.41.90.0/24
111.119.192.0/20
111.119.208.0/20
111.119.224.0/20
111.119.240.0/20
114.119.128.0/19
114.119.160.0/21
114.119.168.0/24
114.119.169.0/24
114.119.170.0/24
114.119.171.0/24
114.119.172.0/22
114.119.176.0/20
115.30.32.0/20
115.30.48.0/20
119.12.160.0/20
119.13.112.0/20
119.13.160.0/24
119.13.161.0/24
119.13.162.0/23
119.13.163.0/24
119.13.164.0/22
119.13.168.0/24
119.13.169.0/24
119.13.170.0/24
119.13.171.0/24
119.13.172.0/24
119.13.173.0/24
119.13.174.0/24
119.13.175.0/24
119.13.64.0/24
119.13.65.0/24
119.13.66.0/23
119.13.68.0/22
119.13.72.0/22
119.13.76.0/22
119.13.80.0/21
119.13.88.0/22
119.13.92.0/22
119.13.96.0/20
119.8.0.0/21
119.8.128.0/24
119.8.129.0/24
119.8.13.0/24
119.8.130.0/23
119.8.132.0/22
119.8.136.0/21
119.8.144.0/20
119.8.15.0/24
119.8.160.0/19
119.8.18.0/24
119.8.192.0/20
119.8.192.0/21
119.8.200.0/21
119.8.208.0/20
119.8.21.0/24
119.8.22.0/24
119.8.224.0/24
119.8.227.0/24
119.8.228.0/22
119.8.23.0/24
119.8.232.0/21
119.8.24.0/21
119.8.240.0/23
119.8.242.0/23
119.8.244.0/24
119.8.245.0/24
119.8.246.0/24
119.8.247.0/24
119.8.248.0/24
119.8.249.0/24
119.8.250.0/24
119.8.252.0/24
119.8.253.0/24
119.8.254.0/23
119.8.32.0/19
119.8.4.0/24
119.8.64.0/22
119.8.68.0/24
119.8.69.0/24
119.8.70.0/24
119.8.71.0/24
119.8.72.0/21
119.8.8.0/21
119.8.80.0/20
119.8.96.0/19
121.91.152.0/21
121.91.168.0/21
121.91.200.0/21
121.91.200.0/24
122.8.128.0/20
122.8.144.0/20
122.8.160.0/20
122.8.176.0/21
122.8.184.0/22
122.8.188.0/22
124.243.128.0/18
124.243.156.0/24
124.243.157.0/24
124.243.158.0/24
124.243.159.0/24
124.71.248.0/24
124.71.249.0/24
124.71.252.0/24
124.71.253.0/24
124.81.0.0/20
124.81.16.0/20
124.81.160.0/20
124.81.176.0/20
124.81.192.0/20
124.81.208.0/20
124.81.224.0/20
124.81.240.0/20
124.81.32.0/20
124.81.48.0/20
124.81.64.0/20
124.81.80.0/20
14.137.132.0/22
14.137.136.0/22
14.137.140.0/22
14.137.152.0/24
14.137.153.0/24
14.137.154.0/24
14.137.156.0/24
14.137.157.0/24
14.137.161.0/24
14.137.169.0/24
14.137.170.0/23
14.137.172.0/22
149.232.128.0/20
149.232.144.0/20
150.40.128.0/20
150.40.144.0/20
150.40.160.0/20
150.40.176.0/20
150.40.192.0/20
150.40.208.0/20
150.40.224.0/20
150.40.240.0/20
154.220.192.0/19
154.81.16.0/20
154.83.0.0/23
154.86.32.0/20
154.86.48.0/20
154.93.100.0/23
154.93.104.0/23
156.227.22.0/23
156.230.32.0/21
156.230.40.0/21
156.230.64.0/18
156.232.16.0/20
156.240.128.0/18
156.249.32.0/20
156.253.16.0/20
159.138.0.0/20
159.138.112.0/21
159.138.114.0/24
159.138.120.0/22
159.138.124.0/24
159.138.125.0/24
159.138.126.0/23
159.138.128.0/20
159.138.144.0/20
159.138.152.0/21
159.138.16.0/22
159.138.160.0/20
159.138.176.0/23
159.138.178.0/24
159.138.179.0/24
159.138.180.0/24
159.138.181.0/24
159.138.182.0/23
159.138.188.0/23
159.138.190.0/23
159.138.192.0/20
159.138.20.0/22
159.138.208.0/21
159.138.216.0/22
159.138.220.0/23
159.138.224.0/20
159.138.24.0/21
159.138.240.0/20
159.138.32.0/20
159.138.48.0/20
159.138.64.0/21
159.138.67.0/24
159.138.76.0/24
159.138.77.0/24
159.138.78.0/24
159.138.79.0/24
159.138.80.0/20
159.138.96.0/20
166.108.192.0/20
166.108.208.0/20
166.108.224.0/20
166.108.240.0/20
176.52.128.0/20
176.52.144.0/20
180.87.192.0/20
180.87.208.0/20
180.87.224.0/20
180.87.240.0/20
182.160.0.0/20
182.160.16.0/24
182.160.17.0/24
182.160.18.0/23
182.160.20.0/24
182.160.24.0/21
182.160.36.0/22
182.160.49.0/24
182.160.52.0/22
182.160.56.0/24
182.160.57.0/24
182.160.58.0/24
182.160.59.0/24
182.160.60.0/24
182.160.61.0/24
182.160.62.0/24
183.87.112.0/20
183.87.128.0/20
183.87.144.0/20
183.87.32.0/20
183.87.48.0/20
183.87.64.0/20
183.87.80.0/20
183.87.96.0/20
188.239.0.0/20
188.239.16.0/20
189.1.192.0/20
189.1.208.0/20
189.1.224.0/20
189.1.240.0/20
189.28.112.0/20
189.28.96.0/20
190.92.192.0/19
190.92.224.0/19
190.92.248.0/24
190.92.252.0/24
190.92.253.0/24
190.92.254.0/24
193.105.244.0/23
193.84.248.0/23
201.77.32.0/20
202.170.88.0/21
203.123.80.0/20
203.167.20.0/23
203.167.22.0/24
212.34.192.0/20
212.34.208.0/20
212.34.216.32/32
213.250.128.0/20
213.250.144.0/20
27.106.0.0/20
27.106.112.0/20
27.106.16.0/20
27.106.32.0/20
27.106.48.0/20
27.106.64.0/20
27.106.80.0/20
27.106.96.0/20
43.225.140.0/22
43.255.104.0/22
45.194.104.0/21
45.199.144.0/22
45.202.128.0/19
45.202.160.0/20
45.202.176.0/21
45.202.184.0/21
45.203.32.0/21
45.203.40.0/21
46.250.160.0/20
46.250.176.0/20
49.0.192.0/21
49.0.200.0/21
49.0.224.0/22
49.0.228.0/22
49.0.232.0/21
49.0.240.0/20
80.238.132.0/22
80.238.136.0/22
80.238.180.0/24
80.238.190.0/24
80.238.192.0/20
80.238.208.0/20
80.238.224.0/20
83.101.0.0/21
83.101.16.0/21
83.101.48.0/21
83.101.56.0/21
87.119.12.0/24
94.45.160.0/24
94.45.161.0/24
94.45.163.0/24
94.74.112.0/21
94.74.120.0/21
94.74.64.0/20
94.74.80.0/20
94.74.96.0/20
Digital Ocean
Digital Ocean is a huge offender based on experience and we have never seen any response to abuse complaints.
5.101.96.0/21
5.101.104.0/22
5.101.108.0/24
5.101.109.0/24
5.101.110.0/24
5.101.111.0/24
24.144.64.0/22
24.144.68.0/22
24.144.72.0/24
24.144.73.0/24
24.144.74.0/23
24.144.76.0/22
24.144.80.0/20
24.144.96.0/19
24.199.64.0/22
24.199.68.0/22
24.199.72.0/21
24.199.80.0/20
24.199.96.0/20
24.199.112.0/20
37.139.0.0/19
45.55.0.0/19
45.55.32.0/19
45.55.64.0/19
45.55.96.0/22
45.55.100.0/22
45.55.104.0/22
45.55.108.0/22
45.55.112.0/22
45.55.116.0/22
45.55.120.0/22
45.55.124.0/22
45.55.128.0/18
45.55.192.0/18
46.101.0.0/18
46.101.64.0/22
46.101.68.0/22
46.101.72.0/21
46.101.80.0/20
46.101.96.0/19
46.101.128.0/17
64.23.128.0/20
64.23.144.0/20
64.23.160.0/20
64.23.176.0/20
64.23.192.0/19
64.23.224.0/20
64.23.240.0/20
64.225.0.0/20
64.225.16.0/20
64.225.32.0/20
64.225.48.0/20
64.225.64.0/20
64.225.80.0/22
64.225.84.0/22
64.225.88.0/22
64.225.92.0/22
64.225.96.0/20
64.225.112.0/20
64.226.64.0/20
64.226.80.0/20
64.226.96.0/20
64.226.112.0/20
64.227.0.0/20
64.227.16.0/20
64.227.32.0/20
64.227.48.0/20
64.227.64.0/20
64.227.80.0/20
64.227.96.0/20
64.227.112.0/20
64.227.128.0/19
64.227.160.0/20
64.227.176.0/20
67.205.128.0/20
67.205.144.0/20
67.205.160.0/20
67.205.176.0/20
67.207.64.0/23
67.207.66.0/24
67.207.68.0/22
67.207.72.0/22
67.207.76.0/22
67.207.80.0/20
68.183.0.0/20
68.183.16.0/20
68.183.32.0/20
68.183.48.0/20
68.183.64.0/20
68.183.80.0/20
68.183.96.0/20
68.183.112.0/20
68.183.128.0/20
68.183.144.0/20
68.183.160.0/20
68.183.176.0/20
68.183.192.0/20
68.183.208.0/20
68.183.224.0/20
68.183.240.0/22
68.183.244.0/22
68.183.248.0/22
68.183.252.0/22
69.55.48.0/22
69.55.49.0/24
69.55.54.0/24
69.55.55.0/24
69.55.58.0/23
69.55.60.0/22
80.240.128.0/20
82.196.0.0/20
95.85.0.0/18
103.253.144.0/22
104.131.0.0/18
104.131.64.0/18
104.131.128.0/20
104.131.144.0/20
104.131.160.0/20
104.131.176.0/20
104.131.192.0/19
104.131.224.0/19
104.236.0.0/18
104.236.64.0/18
104.236.128.0/18
104.236.192.0/18
104.248.0.0/20
104.248.16.0/20
104.248.32.0/20
104.248.48.0/20
104.248.64.0/20
104.248.80.0/20
104.248.96.0/22
104.248.100.0/22
104.248.104.0/22
104.248.108.0/22
104.248.112.0/20
104.248.128.0/20
104.248.144.0/20
104.248.160.0/20
104.248.176.0/20
104.248.192.0/20
104.248.208.0/20
104.248.224.0/20
104.248.240.0/20
107.170.0.0/17
107.170.128.0/19
107.170.160.0/19
107.170.192.0/18
128.199.0.0/20
128.199.16.0/20
128.199.32.0/19
128.199.64.0/18
128.199.128.0/18
128.199.192.0/18
134.122.0.0/20
134.122.16.0/20
134.122.32.0/20
134.122.48.0/20
134.122.64.0/20
134.122.80.0/20
134.122.96.0/20
134.122.112.0/20
134.209.0.0/20
134.209.16.0/20
134.209.32.0/20
134.209.48.0/20
134.209.64.0/20
134.209.80.0/20
134.209.96.0/20
134.209.112.0/20
134.209.128.0/22
134.209.132.0/22
134.209.136.0/22
134.209.140.0/22
134.209.144.0/20
134.209.160.0/20
134.209.176.0/20
134.209.192.0/20
134.209.208.0/20
134.209.224.0/20
134.209.240.0/20
137.184.0.0/20
137.184.16.0/20
137.184.32.0/20
137.184.48.0/20
137.184.64.0/20
137.184.80.0/20
137.184.96.0/20
137.184.112.0/20
137.184.128.0/20
137.184.144.0/20
137.184.160.0/20
137.184.176.0/20
137.184.192.0/20
137.184.208.0/20
137.184.224.0/20
137.184.240.0/22
137.184.244.0/22
137.184.248.0/22
137.184.252.0/24
137.184.254.0/24
137.184.255.0/24
138.68.0.0/20
138.68.16.0/20
138.68.32.0/24
138.68.34.0/24
138.68.36.0/22
138.68.40.0/21
138.68.48.0/20
138.68.64.0/20
138.68.80.0/20
138.68.96.0/20
138.68.112.0/22
138.68.116.0/22
138.68.120.0/23
138.68.122.0/23
138.68.124.0/22
138.68.128.0/20
138.68.144.0/20
138.68.160.0/20
138.68.176.0/20
138.68.192.0/22
138.68.196.0/22
138.68.200.0/22
138.68.204.0/22
138.68.208.0/20
138.68.224.0/20
138.68.240.0/20
138.197.0.0/20
138.197.16.0/20
138.197.32.0/20
138.197.48.0/22
138.197.52.0/22
138.197.56.0/22
138.197.60.0/22
138.197.64.0/20
138.197.80.0/20
138.197.96.0/20
138.197.112.0/20
138.197.128.0/20
138.197.144.0/20
138.197.160.0/20
138.197.176.0/20
138.197.192.0/20
138.197.208.0/20
138.197.224.0/22
138.197.228.0/22
138.197.232.0/22
138.197.236.0/22
138.197.240.0/22
138.197.252.0/22
139.59.0.0/20
139.59.16.0/20
139.59.32.0/20
139.59.48.0/22
139.59.52.0/22
139.59.56.0/21
139.59.64.0/20
139.59.80.0/20
139.59.96.0/20
139.59.112.0/20
139.59.128.0/19
139.59.160.0/20
139.59.176.0/20
139.59.192.0/22
139.59.196.0/22
139.59.200.0/22
139.59.204.0/22
139.59.208.0/21
139.59.216.0/22
139.59.220.0/22
139.59.224.0/20
139.59.240.0/20
141.0.169.0/24
141.0.170.0/24
142.93.0.0/20
142.93.16.0/20
142.93.32.0/20
142.93.48.0/20
142.93.64.0/20
142.93.80.0/20
142.93.96.0/20
142.93.112.0/20
142.93.128.0/20
142.93.144.0/20
142.93.160.0/20
142.93.176.0/20
142.93.192.0/20
142.93.208.0/20
142.93.224.0/20
142.93.240.0/20
143.110.128.0/20
143.110.144.0/20
143.110.160.0/20
143.110.176.0/20
143.110.192.0/20
143.110.208.0/20
143.110.224.0/20
143.110.240.0/20
143.198.0.0/20
143.198.16.0/20
143.198.32.0/20
143.198.48.0/20
143.198.64.0/20
143.198.80.0/20
143.198.96.0/20
143.198.112.0/20
143.198.128.0/20
143.198.144.0/20
143.198.160.0/20
143.198.176.0/20
143.198.192.0/20
143.198.208.0/20
143.198.224.0/20
143.198.240.0/22
143.198.244.0/22
143.198.248.0/22
143.244.128.0/20
143.244.144.0/20
143.244.160.0/20
143.244.176.0/20
143.244.196.0/22
143.244.200.0/22
143.244.204.0/22
143.244.208.0/22
143.244.212.0/22
143.244.217.0/24
143.244.218.0/24
143.244.219.0/24
143.244.220.0/22
144.126.192.0/20
144.126.208.0/20
144.126.224.0/20
144.126.240.0/22
144.126.244.0/22
144.126.248.0/22
144.126.252.0/22
146.185.128.0/19
146.185.160.0/20
146.185.176.0/21
146.185.184.0/21
146.190.0.0/22
146.190.4.0/22
146.190.8.0/22
146.190.12.0/22
146.190.16.0/20
146.190.32.0/19
146.190.64.0/20
146.190.80.0/20
146.190.96.0/20
146.190.112.0/20
146.190.128.0/19
146.190.160.0/20
146.190.176.0/22
146.190.184.0/22
146.190.188.0/22
146.190.192.0/22
146.190.196.0/22
146.190.200.0/22
146.190.204.0/22
146.190.208.0/20
146.190.224.0/20
146.190.240.0/20
147.182.128.0/20
147.182.144.0/20
147.182.160.0/20
147.182.176.0/20
147.182.192.0/20
147.182.208.0/20
147.182.224.0/20
147.182.240.0/20
152.42.128.0/20
152.42.144.0/22
152.42.148.0/22
152.42.152.0/22
152.42.156.0/22
152.42.160.0/19
152.42.192.0/19
152.42.224.0/20
152.42.240.0/20
157.230.0.0/20
157.230.16.0/20
157.230.32.0/20
157.230.48.0/20
157.230.64.0/22
157.230.68.0/22
157.230.72.0/22
157.230.76.0/22
157.230.80.0/20
157.230.96.0/20
157.230.112.0/20
157.230.128.0/20
157.230.144.0/20
157.230.160.0/20
157.230.176.0/20
157.230.192.0/22
157.230.196.0/22
157.230.200.0/22
157.230.204.0/22
157.230.208.0/20
157.230.224.0/20
157.230.240.0/20
157.245.0.0/20
157.245.16.0/22
157.245.20.0/22
157.245.24.0/22
157.245.28.0/22
157.245.32.0/20
157.245.48.0/20
157.245.64.0/20
157.245.80.0/20
157.245.96.0/20
157.245.112.0/20
157.245.128.0/20
157.245.144.0/20
157.245.160.0/20
157.245.176.0/20
157.245.192.0/20
157.245.208.0/20
157.245.224.0/20
157.245.240.0/20
159.65.0.0/20
159.65.16.0/20
159.65.32.0/20
159.65.48.0/20
159.65.64.0/20
159.65.80.0/20
159.65.96.0/20
159.65.112.0/20
159.65.128.0/20
159.65.144.0/20
159.65.160.0/20
159.65.176.0/20
159.65.192.0/20
159.65.208.0/22
159.65.212.0/22
159.65.216.0/21
159.65.224.0/20
159.65.240.0/20
159.89.0.0/20
159.89.16.0/20
159.89.32.0/20
159.89.48.0/21
159.89.58.0/24
159.89.59.0/24
159.89.60.0/24
159.89.61.0/24
159.89.62.0/24
159.89.63.0/24
159.89.64.0/20
159.89.80.0/20
159.89.96.0/20
159.89.112.0/20
159.89.128.0/20
159.89.144.0/20
159.89.160.0/20
159.89.176.0/20
159.89.192.0/20
159.89.208.0/22
159.89.212.0/22
159.89.216.0/22
159.89.220.0/22
159.89.224.0/20
159.89.240.0/22
159.89.244.0/22
159.89.248.0/22
159.89.252.0/22
159.203.0.0/20
159.203.16.0/20
159.203.32.0/20
159.203.48.0/22
159.203.52.0/22
159.203.56.0/21
159.203.64.0/20
159.203.80.0/20
159.203.96.0/20
159.203.112.0/20
159.203.128.0/20
159.203.144.0/22
159.203.148.0/22
159.203.152.0/22
159.203.156.0/22
159.203.160.0/20
159.203.176.0/20
159.203.192.0/20
159.203.208.0/20
159.203.224.0/20
159.203.240.0/20
159.223.0.0/20
159.223.16.0/20
159.223.32.0/20
159.223.48.0/20
159.223.64.0/20
159.223.80.0/20
159.223.96.0/20
159.223.112.0/20
159.223.128.0/20
159.223.144.0/20
159.223.160.0/19
159.223.192.0/20
159.223.208.0/20
159.223.224.0/20
159.223.240.0/22
159.223.244.0/22
159.223.248.0/22
161.35.0.0/20
161.35.16.0/20
161.35.32.0/20
161.35.48.0/20
161.35.64.0/20
161.35.80.0/20
161.35.96.0/20
161.35.112.0/20
161.35.128.0/20
161.35.144.0/20
161.35.160.0/20
161.35.176.0/20
161.35.192.0/20
161.35.208.0/20
161.35.224.0/20
161.35.240.0/22
161.35.244.0/22
161.35.248.0/22
161.35.252.0/22
162.243.0.0/17
162.243.128.0/19
162.243.160.0/20
162.243.184.0/22
162.243.188.0/23
162.243.190.0/24
162.243.191.0/24
162.243.192.0/18
163.47.8.0/22
164.90.128.0/20
164.90.144.0/20
164.90.160.0/20
164.90.176.0/20
164.90.192.0/20
164.90.208.0/20
164.90.224.0/20
164.90.240.0/22
164.90.244.0/22
164.90.248.0/24
164.90.249.0/24
164.90.250.0/24
164.90.252.0/22
164.92.64.0/19
164.92.96.0/19
164.92.128.0/20
164.92.144.0/20
164.92.160.0/20
164.92.176.0/20
164.92.192.0/20
164.92.208.0/20
164.92.224.0/20
164.92.240.0/20
165.22.0.0/20
165.22.16.0/20
165.22.32.0/20
165.22.48.0/20
165.22.64.0/20
165.22.80.0/20
165.22.96.0/20
165.22.112.0/20
165.22.128.0/20
165.22.144.0/20
165.22.160.0/20
165.22.176.0/20
165.22.192.0/20
165.22.208.0/20
165.22.224.0/20
165.22.240.0/20
165.227.0.0/20
165.227.16.0/20
165.227.32.0/20
165.227.48.0/20
165.227.64.0/20
165.227.80.0/20
165.227.96.0/20
165.227.112.0/20
165.227.128.0/20
165.227.144.0/20
165.227.160.0/20
165.227.176.0/20
165.227.192.0/20
165.227.208.0/20
165.227.224.0/20
165.227.240.0/22
165.227.244.0/22
165.227.248.0/22
165.227.252.0/22
165.232.32.0/20
165.232.48.0/20
165.232.64.0/20
165.232.80.0/20
165.232.96.0/20
165.232.112.0/20
165.232.128.0/20
165.232.144.0/20
165.232.160.0/20
165.232.176.0/20
167.71.0.0/20
167.71.16.0/20
167.71.32.0/20
167.71.48.0/20
167.71.64.0/20
167.71.80.0/20
167.71.96.0/20
167.71.112.0/20
167.71.128.0/20
167.71.144.0/20
167.71.160.0/20
167.71.176.0/20
167.71.192.0/20
167.71.208.0/20
167.71.224.0/20
167.71.240.0/20
167.99.0.0/20
167.99.16.0/22
167.99.20.0/22
167.99.24.0/22
167.99.28.0/22
167.99.32.0/20
167.99.48.0/20
167.99.64.0/20
167.99.80.0/20
167.99.96.0/20
167.99.112.0/20
167.99.128.0/20
167.99.144.0/20
167.99.160.0/20
167.99.176.0/20
167.99.192.0/20
167.99.208.0/20
167.99.224.0/20
167.99.240.0/20
167.172.0.0/22
167.172.4.0/22
167.172.8.0/22
167.172.12.0/22
167.172.16.0/20
167.172.32.0/20
167.172.48.0/20
167.172.64.0/20
167.172.80.0/20
167.172.96.0/20
167.172.112.0/20
167.172.128.0/20
167.172.144.0/20
167.172.160.0/20
167.172.176.0/20
167.172.192.0/20
167.172.208.0/20
167.172.224.0/20
167.172.240.0/20
170.64.128.0/18
170.64.192.0/19
170.64.224.0/20
170.64.240.0/21
170.64.248.0/21
174.138.0.0/20
174.138.16.0/20
174.138.32.0/20
174.138.48.0/20
174.138.64.0/20
174.138.80.0/20
174.138.96.0/22
174.138.100.0/22
174.138.104.0/22
174.138.108.0/22
174.138.112.0/22
174.138.116.0/22
174.138.120.0/22
174.138.124.0/22
178.62.0.0/18
178.62.64.0/18
178.62.128.0/18
178.62.192.0/18
178.128.0.0/20
178.128.16.0/20
178.128.32.0/20
178.128.48.0/20
178.128.64.0/20
178.128.80.0/20
178.128.96.0/20
178.128.112.0/20
178.128.128.0/22
178.128.132.0/22
178.128.136.0/22
178.128.140.0/22
178.128.144.0/20
178.128.160.0/20
178.128.176.0/20
178.128.192.0/20
178.128.208.0/20
178.128.224.0/20
178.128.240.0/20
185.14.184.0/22
188.166.0.0/18
188.166.64.0/18
188.166.128.0/22
188.166.132.0/22
188.166.136.0/22
188.166.140.0/22
188.166.144.0/20
188.166.160.0/21
188.166.168.0/21
188.166.176.0/20
188.166.192.0/22
188.166.196.0/22
188.166.200.0/22
188.166.204.0/22
188.166.208.0/20
188.166.224.0/20
188.166.240.0/20
188.226.128.0/17
192.34.56.0/21
192.81.208.0/21
192.81.216.0/22
192.81.220.0/22
192.241.128.0/19
192.241.160.0/19
192.241.192.0/19
192.241.224.0/20
192.241.240.0/20
198.199.64.0/20
198.199.80.0/21
198.199.88.0/22
198.199.92.0/22
198.199.96.0/20
198.199.112.0/21
198.199.120.0/22
198.199.124.0/22
198.211.96.0/20
198.211.112.0/22
198.211.116.0/23
198.211.118.0/23
198.211.120.0/21
204.48.16.0/20
206.81.0.0/20
206.81.16.0/20
206.189.0.0/20
206.189.16.0/20
206.189.32.0/20
206.189.48.0/20
206.189.64.0/20
206.189.80.0/20
206.189.96.0/20
206.189.112.0/20
206.189.128.0/20
206.189.144.0/20
206.189.160.0/20
206.189.176.0/20
206.189.192.0/20
206.189.208.0/20
206.189.224.0/20
206.189.240.0/22
206.189.244.0/22
206.189.248.0/22
206.189.252.0/22
207.154.192.0/20
207.154.208.0/20
207.154.224.0/20
207.154.240.0/20
208.68.36.0/22
209.38.0.0/22
209.38.4.0/22
209.38.8.0/21
209.38.16.0/20
209.38.32.0/20
209.38.48.0/22
209.38.52.0/22
209.38.64.0/20
209.38.96.0/20
209.38.128.0/19
209.38.160.0/22
209.38.164.0/22
209.38.168.0/22
209.38.172.0/22
209.38.176.0/20
209.38.192.0/19
209.38.224.0/19
209.97.128.0/20
209.97.144.0/20
209.97.160.0/20
209.97.176.0/20
Google Cloud (GCP):
https://www.gstatic.com/ipranges/cloud.json

34.1.208.0/20
34.35.0.0/16
34.152.86.0/23
34.177.50.0/23
34.80.0.0/15
34.137.0.0/16
35.185.128.0/19
35.185.160.0/20
35.187.144.0/20
35.189.160.0/19
35.194.128.0/17
35.201.128.0/17
35.206.192.0/18
35.220.32.0/21
35.221.128.0/17
35.229.128.0/17
35.234.0.0/18
35.235.16.0/20
35.236.128.0/18
35.242.32.0/21
104.155.192.0/19
104.155.224.0/20
104.199.128.0/18
104.199.192.0/19
104.199.224.0/20
104.199.242.0/23
104.199.244.0/22
104.199.248.0/21
107.167.176.0/20
130.211.240.0/20
34.92.0.0/16
34.96.128.0/17
34.104.88.0/21
34.124.24.0/21
34.150.0.0/17
35.215.128.0/18
35.220.27.0/24
35.220.128.0/17
35.241.64.0/18
35.242.27.0/24
35.243.8.0/21
34.84.0.0/16
34.85.0.0/17
34.104.62.0/23
34.104.128.0/17
34.127.190.0/23
34.146.0.0/16
34.157.64.0/20
34.157.164.0/22
34.157.192.0/20
35.187.192.0/19
35.189.128.0/19
35.190.224.0/20
35.194.96.0/19
35.200.0.0/17
35.213.0.0/17
35.220.56.0/22
35.221.64.0/18
35.230.240.0/20
35.242.56.0/22
35.243.64.0/18
104.198.80.0/20
104.198.112.0/20
34.97.0.0/16
34.104.49.0/24
34.127.177.0/24
35.217.128.0/17
35.220.45.0/24
35.242.45.0/24
35.243.56.0/21
34.0.96.0/19
34.22.64.0/19
34.22.96.0/20
34.47.64.0/18
34.50.0.0/18
34.64.32.0/19
34.64.64.0/22
34.64.68.0/22
34.64.72.0/21
34.64.80.0/20
34.64.96.0/19
34.64.128.0/22
34.64.132.0/22
34.64.136.0/21
34.64.144.0/20
34.64.160.0/19
34.64.192.0/18
35.216.0.0/17
34.0.227.0/24
34.47.128.0/17
34.93.0.0/16
34.100.128.0/17
34.104.108.0/23
34.124.44.0/23
34.152.64.0/22
34.153.58.0/23
34.153.250.0/23
34.157.87.0/24
34.157.215.0/24
34.177.32.0/22
35.200.128.0/17
35.201.41.0/24
35.207.192.0/18
35.220.42.0/24
35.234.208.0/20
35.242.42.0/24
35.244.0.0/18
34.0.0.0/20
34.104.120.0/23
34.124.56.0/23
34.126.208.0/20
34.131.0.0/16
34.153.32.0/24
34.153.224.0/24
34.1.128.0/20
34.1.192.0/20
34.21.128.0/17
34.87.0.0/17
34.87.128.0/18
34.104.58.0/23
34.104.106.0/23
34.124.42.0/23
34.124.128.0/17
34.126.64.0/18
34.126.128.0/18
34.128.44.0/23
34.128.60.0/23
34.142.128.0/17
34.143.128.0/17
34.153.40.0/23
34.153.232.0/23
34.157.82.0/23
34.157.88.0/23
34.157.210.0/23
35.185.176.0/20
35.186.144.0/20
35.187.224.0/19
35.197.128.0/19
35.198.192.0/18
35.213.128.0/18
35.220.24.0/23
35.234.192.0/20
35.240.128.0/17
35.242.24.0/23
35.247.128.0/18
34.34.216.0/21
34.50.64.0/18
34.101.18.0/24
34.101.20.0/22
34.101.24.0/22
34.101.32.0/19
34.101.64.0/18
34.101.128.0/17
34.128.64.0/18
34.152.68.0/24
34.153.44.0/24
34.153.236.0/24
34.157.254.0/24
35.219.0.0/17
34.40.128.0/17
34.87.192.0/18
34.104.104.0/23
34.116.64.0/18
34.124.40.0/23
34.128.36.0/24
34.128.48.0/24
34.151.64.0/18
34.151.128.0/18
35.189.0.0/18
35.197.160.0/19
35.201.0.0/19
35.213.192.0/18
35.220.41.0/24
35.234.224.0/20
35.242.41.0/24
35.244.64.0/18
34.0.16.0/20
34.1.176.0/20
34.104.122.0/23
34.124.58.0/23
34.126.192.0/20
34.129.0.0/16
34.0.240.0/20
34.104.116.0/22
34.116.128.0/17
34.118.0.0/17
34.124.52.0/22
34.88.0.0/16
34.104.96.0/21
34.124.32.0/21
35.203.232.0/21
35.217.0.0/18
35.220.26.0/24
35.228.0.0/16
35.242.26.0/24
34.0.192.0/19
34.157.44.0/23
34.157.172.0/23
34.164.0.0/16
34.175.0.0/16
8.34.208.0/23
8.34.211.0/24
8.34.220.0/22
23.251.128.0/20
34.22.112.0/20
34.22.128.0/17
34.34.128.0/18
34.38.0.0/16
34.76.0.0/14
34.118.254.0/23
34.140.0.0/16
35.187.0.0/17
35.187.160.0/19
35.189.192.0/18
35.190.192.0/19
35.195.0.0/16
35.205.0.0/16
35.206.128.0/18
35.210.0.0/16
35.220.96.0/19
35.233.0.0/17
35.240.0.0/17
35.241.128.0/17
35.242.64.0/19
104.155.0.0/17
104.199.0.0/18
104.199.66.0/23
104.199.68.0/22
104.199.72.0/21
104.199.80.0/20
104.199.96.0/20
130.211.48.0/20
130.211.64.0/19
130.211.96.0/20
146.148.2.0/23
146.148.4.0/22
146.148.8.0/21
146.148.16.0/20
146.148.112.0/20
192.158.28.0/22
34.1.160.0/20
34.32.0.0/17
34.152.80.0/23
34.177.36.0/23
34.1.144.0/20
34.17.0.0/16
34.157.124.0/23
34.157.250.0/23
34.39.0.0/17
34.89.0.0/17
34.105.128.0/17
34.127.186.0/23
34.128.52.0/22
34.142.0.0/17
34.147.128.0/17
34.157.36.0/22
34.157.40.0/22
34.157.168.0/22
35.189.64.0/18
35.197.192.0/18
35.203.210.0/23
35.203.212.0/22
35.203.216.0/22
35.214.0.0/17
35.220.20.0/22
35.230.128.0/19
35.234.128.0/19
35.235.48.0/20
35.242.20.0/22
35.242.128.0/18
35.246.0.0/17
34.0.224.0/24
34.0.226.0/24
34.40.0.0/17
34.89.128.0/17
34.104.112.0/23
34.107.0.0/17
34.118.244.0/22
34.124.48.0/23
34.141.0.0/17
34.157.48.0/20
34.157.176.0/20
34.159.0.0/16
35.198.64.0/18
35.198.128.0/18
35.207.64.0/18
35.207.128.0/18
35.220.18.0/23
35.234.64.0/18
35.235.32.0/20
35.242.18.0/23
35.242.192.0/18
35.246.128.0/17
34.1.224.0/19
34.32.128.0/17
34.34.0.0/17
34.90.0.0/15
34.104.126.0/23
34.124.62.0/23
34.141.128.0/17
34.147.0.0/17
34.157.80.0/23
34.157.92.0/22
34.157.208.0/23
34.157.220.0/22
35.204.0.0/16
35.214.128.0/17
35.220.16.0/23
35.234.160.0/20
35.242.16.0/23
34.65.0.0/16
34.104.110.0/23
34.124.46.0/23
35.216.128.0/17
35.220.44.0/24
35.235.216.0/21
35.242.44.0/24
34.0.160.0/19
34.153.38.0/24
34.153.230.0/24
34.154.0.0/16
34.157.8.0/23
34.157.121.0/24
34.157.136.0/23
34.157.249.0/24
35.219.224.0/19
34.1.0.0/20
34.155.0.0/16
34.157.12.0/22
34.157.140.0/22
34.163.0.0/16
34.36.0.0/16
34.49.0.0/16
34.54.0.0/16
34.95.64.0/18
34.96.64.0/18
34.98.64.0/18
34.102.128.0/17
34.104.27.0/24
34.107.128.0/17
34.110.128.0/17
34.111.0.0/16
34.116.0.0/21
34.117.0.0/16
34.120.0.0/16
34.128.128.0/18
34.144.192.0/18
34.149.0.0/16
34.160.0.0/16
35.186.192.0/18
35.190.0.0/18
35.190.64.0/19
35.190.112.0/20
35.201.64.0/18
35.227.192.0/18
35.241.0.0/18
35.244.128.0/17
107.178.240.0/20
130.211.4.0/22
130.211.8.0/21
130.211.16.0/20
130.211.32.0/20
34.1.32.0/20
34.18.0.0/16
34.157.126.0/23
34.157.252.0/23
34.1.48.0/20
34.152.84.0/23
34.166.0.0/16
34.177.48.0/23
34.0.64.0/19
34.157.90.0/23
34.157.216.0/23
34.165.0.0/16
34.19.128.0/17
34.20.0.0/17
34.47.0.0/18
34.95.0.0/18
34.104.76.0/22
34.118.128.0/18
34.124.12.0/22
34.128.37.0/24
34.128.42.0/23
34.128.49.0/24
34.128.58.0/23
34.152.0.0/18
35.203.0.0/17
35.215.0.0/18
35.220.43.0/24
35.234.240.0/20
35.242.43.0/24
34.0.32.0/20
34.104.114.0/23
34.124.50.0/23
34.124.112.0/20
34.130.0.0/16
34.152.69.0/24
34.157.255.0/24
34.51.0.0/17
34.153.42.0/23
34.153.234.0/23
34.39.128.0/17
34.95.128.0/17
34.104.80.0/21
34.124.16.0/21
34.151.0.0/18
34.151.192.0/18
35.198.0.0/18
35.199.64.0/18
35.215.192.0/18
35.220.40.0/24
35.235.0.0/20
35.242.40.0/24
35.247.192.0/18
34.0.48.0/20
34.104.50.0/23
34.127.178.0/23
34.153.33.0/24
34.153.225.0/24
34.176.0.0/16
8.34.210.0/24
8.34.212.0/22
8.34.216.0/22
8.35.192.0/21
23.236.48.0/20
23.251.144.0/20
34.0.225.0/24
34.16.0.0/17
34.27.0.0/16
34.28.0.0/14
34.33.0.0/16
34.41.0.0/16
34.42.0.0/16
34.44.0.0/15
34.46.0.0/16
34.66.0.0/15
34.68.0.0/14
34.72.0.0/16
34.118.200.0/21
34.121.0.0/16
34.122.0.0/15
34.128.32.0/22
34.132.0.0/14
34.136.0.0/16
34.153.48.0/21
34.153.240.0/21
34.157.84.0/23
34.157.96.0/20
34.157.212.0/23
34.157.224.0/20
34.170.0.0/15
34.172.0.0/15
34.177.52.0/22
35.184.0.0/16
35.188.0.0/17
35.188.128.0/18
35.188.192.0/19
35.192.0.0/15
35.194.0.0/18
35.202.0.0/16
35.206.64.0/18
35.208.0.0/15
35.220.64.0/19
35.222.0.0/15
35.224.0.0/15
35.226.0.0/16
35.232.0.0/16
35.238.0.0/15
35.242.96.0/19
104.154.16.0/20
104.154.32.0/19
104.154.64.0/19
104.154.96.0/20
104.154.113.0/24
104.154.114.0/23
104.154.116.0/22
104.154.120.0/23
104.154.128.0/17
104.155.128.0/18
104.197.0.0/16
104.198.16.0/20
104.198.32.0/19
104.198.64.0/20
104.198.128.0/17
107.178.208.0/20
108.59.80.0/21
130.211.112.0/20
130.211.128.0/18
130.211.192.0/19
130.211.224.0/20
146.148.32.0/19
146.148.64.0/19
146.148.96.0/20
162.222.176.0/21
173.255.112.0/21
199.192.115.0/24
199.223.232.0/22
199.223.236.0/24
34.22.0.0/19
35.186.0.0/17
35.186.128.0/20
35.206.32.0/19
35.220.46.0/24
35.242.46.0/24
107.167.160.0/20
108.59.88.0/21
173.255.120.0/21
34.23.0.0/16
34.24.0.0/15
34.26.0.0/16
34.73.0.0/16
34.74.0.0/15
34.98.128.0/21
34.118.250.0/23
34.138.0.0/15
34.148.0.0/16
34.152.72.0/21
34.177.40.0/21
35.185.0.0/17
35.190.128.0/18
35.196.0.0/16
35.207.0.0/18
35.211.0.0/16
35.220.0.0/20
35.227.0.0/17
35.229.16.0/20
35.229.32.0/19
35.229.64.0/18
35.231.0.0/16
35.237.0.0/16
35.242.0.0/20
35.243.128.0/17
104.196.0.0/18
104.196.65.0/24
104.196.66.0/23
104.196.68.0/22
104.196.96.0/19
104.196.128.0/18
104.196.192.0/19
162.216.148.0/22
34.21.0.0/17
34.48.0.0/16
34.85.128.0/17
34.86.0.0/16
34.104.60.0/23
34.104.124.0/23
34.118.252.0/23
34.124.60.0/23
34.127.188.0/23
34.145.128.0/17
34.150.128.0/17
34.157.0.0/21
34.157.16.0/20
34.157.128.0/21
34.157.144.0/20
35.186.160.0/19
35.188.224.0/19
35.194.64.0/19
35.199.0.0/18
35.212.0.0/17
35.220.60.0/22
35.221.0.0/18
35.230.160.0/19
35.234.176.0/20
35.236.192.0/18
35.242.60.0/22
35.243.40.0/21
35.245.0.0/16
34.1.16.0/20
34.157.32.0/22
34.157.160.0/22
34.162.0.0/16
34.104.56.0/23
34.127.184.0/23
34.161.0.0/16
35.206.10.0/23
34.0.128.0/19
34.157.46.0/23
34.157.174.0/23
34.174.0.0/16
34.19.0.0/17
34.53.0.0/17
34.82.0.0/15
34.105.0.0/17
34.118.192.0/21
34.127.0.0/17
34.145.0.0/17
34.157.112.0/21
34.157.240.0/21
34.168.0.0/15
35.185.192.0/18
35.197.0.0/17
35.199.144.0/20
35.199.160.0/19
35.203.128.0/18
35.212.128.0/17
35.220.48.0/21
35.227.128.0/18
35.230.0.0/17
35.233.128.0/17
35.242.48.0/21
35.243.32.0/21
35.247.0.0/17
104.196.224.0/19
104.198.0.0/20
104.198.96.0/20
104.199.112.0/20
34.20.128.0/17
34.94.0.0/16
34.102.0.0/17
34.104.64.0/21
34.108.0.0/16
34.118.248.0/23
34.124.0.0/21
35.215.64.0/18
35.220.47.0/24
35.235.64.0/18
35.236.0.0/17
35.242.47.0/24
35.243.0.0/21
34.22.32.0/19
34.104.52.0/24
34.106.0.0/16
34.127.180.0/24
35.217.64.0/18
35.220.31.0/24
35.242.31.0/24
34.16.128.0/17
34.104.72.0/22
34.118.240.0/22
34.124.8.0/22
34.125.0.0/16
35.219.128.0/18
34.37.0.0/16
34.128.46.0/23
34.128.62.0/23
Hetzner
5.9.0.0/16
5.75.128.0/17
5.161.0.0/21
5.161.164.0/22
5.161.168.0/21
5.161.238.0/23
5.222.0.0/15
23.88.0.0/17
37.27.0.0/16
45.145.227.0/24
46.4.0.0/16
46.62.128.0/17
49.12.0.0/15
65.21.0.0/16
65.108.0.0/15
77.42.0.0/17
78.46.0.0/15
78.138.62.0/24
85.10.192.0/18
88.99.0.0/16
88.198.0.0/16
89.167.0.0/17
91.99.0.0/16
91.107.128.0/17
91.190.240.0/21
91.233.8.0/22
94.130.0.0/16
95.216.0.0/15
116.202.0.0/15
128.140.0.0/17
135.181.0.0/16
136.243.0.0/16
138.199.128.0/17
138.201.0.0/16
142.132.128.0/17
144.76.0.0/16
148.251.0.0/16
157.90.0.0/16
157.180.0.0/17
159.69.0.0/16
162.55.0.0/16
167.233.0.0/16
167.235.0.0/16
168.119.0.0/16
171.25.225.0/24
176.9.0.0/16
178.63.0.0/16
178.212.75.0/24
185.12.64.0/22
185.50.120.0/23
185.107.52.0/22
185.126.28.0/22
185.157.83.0/24
185.157.176.0/22
185.171.224.0/22
185.189.228.0/22
185.213.45.0/24
185.216.237.0/24
185.226.99.0/24
185.228.8.0/23
185.242.76.0/24
185.253.111.0/24
188.34.128.0/17
188.40.0.0/16
188.245.0.0/16
193.25.170.0/23
193.110.6.0/23
193.163.198.0/24
194.42.180.0/22
194.42.184.0/22
194.62.106.0/24
195.60.226.0/24
195.201.0.0/16
195.248.224.0/24
197.242.84.0/22
201.131.3.0/24
204.29.146.0/24
213.133.96.0/19
213.232.193.0/24
213.239.192.0/18
216.55.108.0/22
ahrefs (SEO tool)
You can often see your logs dominated by their IPs. Block all of ahrefs listed IPs.
On any random day, a lot of sites will receive quite a bit of traffic and high frequency queries from ahrefs. If you aren't using their SEO service there is no point in allowing their traffic.
54.36.148.0/24
54.36.149.0/24
195.154.122.0/24
195.154.123.0/24
195.154.126.0/24
195.154.127.0/24
51.222.253.0/26
167.114.139.0/24
54.39.6.0/24
54.39.136.0/24
142.44.233.0/24
54.39.0.0/24
51.161.37.0/24
142.44.220.0/24
54.39.210.0/24
54.39.203.0/24
148.113.130.0/24
51.222.95.0/24
51.161.65.0/24
54.39.89.0/24
15.235.27.0/24
148.113.128.0/24
15.235.96.0/24
142.44.228.0/24
142.44.225.0/24
51.222.168.0/24
15.235.98.0/24
54.37.118.64/27
51.75.236.128/27
92.222.108.96/27
51.68.247.192/27
176.31.139.0/27
5.39.1.224/27
92.222.104.192/27
37.59.204.128/27
94.23.188.192/27
5.39.109.160/27
51.195.244.0/24
198.244.168.0/24
198.244.226.0/24
51.195.183.0/24
198.244.183.0/24
54.38.147.0/24
198.244.240.0/24
198.244.242.0/24
51.89.129.0/24
51.195.215.0/24
168.119.68.0/24
198.244.186.0/24
202.94.84.0/24
168.119.64.0/24
168.119.65.0/24
How to Install Any OS on a Physical Drive from Windows Using VMware Workstation (Linux, Windows, BSD)
Uses:
- Install OS on physical drive
- Linux installation VMware
- Install Windows on physical drive
- Boot OS from physical drive
- VMware Workstation tutorial
- Linux virtual machine to physical disk
- Windows to Linux migration
- Dual boot OS installation
- Boot from external SSD
- Linux, Windows, BSD installation guide
- Physical drive boot OS
- Create bootable OS drive VMware
- Install OS on external drive
Description:
"Learn how to install any operating system—Linux, BSD, Windows, and more—on a physical drive from within Windows using VMware Workstation! This step-by-step guide shows you how to set up any OS on an external or internal drive and boot directly from it. Whether you're looking to dual boot or completely migrate from Windows to a new OS, this tutorial covers everything you need. You don’t need a bootable USB drive—everything is done directly through VMware Workstation on Windows.
🔹 What you’ll learn:
- Installing any OS (Linux, BSD, Windows, etc.) on a physical disk using VMware Workstation
- Creating a bootable drive from Windows
- Dual boot setup with Windows and another OS
- Setting up any OS to boot from an external or internal drive
- Troubleshooting common installation issues
🔹 Tools needed:
- VMware Workstation
- OS ISO file (Linux, BSD, Windows, etc.)
- Physical drive (internal/external HDD or SSD)
Youtube Video of Installing Linux to a physical drive from VMWare Workstation in Windows.
Step 1 - Open the "Disk Management Tool" in Windows
In this example there is a disk 0 and disk 1. The easiest way is to verify by size, however if both drives are similar in size then the better way is to right click on each disk and click "Properties"
As we can see below Disk 0 is a WDC drive ( Western Digital ), if we know there's no other Western Digital drive and this is the one we want to install our OS to, choose this drive.
Step 2 - Create a new VM in VMWare Workstation
Open VMWare Workstation as "Administrator" and click "File -> New Virtual Machine" to create a new VM.
Step 3 - Create VM as "Custom (advanced)"
This just has the advantage of allowing us to have the Physical Drive attached initially as the only drive in VMWare rather than going back and modifying the storage settings/HDDs later on.
Step 4 - Choose the OS
In our example we are installing Ubuntu 64 bit, it's important to choose the correct OS type and even more important to choose the right architecture (eg 64 bit). This becomes more apparent later on if the intended computer you want to boot your installed OS on uses EFI (EFI mode can only be enabled easily when there is the 64-bit architecture selected).
Step 5 - Choose Your Physical Disk
This part is crucial and critical, if you mess this up you could delete your crypto keys or family photos by accident! If possible make sure all other drives/storage devices are disconnected or disabled by this time.
- Click "Use physical disk (for advanced users)" and then we'll select the physical drive#
- Remember that the drive number corresponds to the drive we identify in Disk Management (in our case we want to install to Drive 0 which we showed earlier is our WDC drive).
Make sure that you make proper note of the physical drive so you don't wipe the wrong drive and lose data!
Once again we choose PhysicalDrive0 because it corresponds to the identified "Disk 0" in Disk Management. You need to verify your physical drive number or you may wipe your data on an unintended drive.

After this point all the defaults are normally fine (continue to click next through the menu to create the VM).
Step 6 - Set EFI boot mode if you need
If your target device will be booting by EFI you need to edit your VM by going to Settings and then "Options" and "Advanced" and choose UEFI as the boot mode. This is not necessary if you will be booting by MBR (however many newer systems will only boot EFI)
Step 7 - Boot your .iso and install to your physical drive.
Install your OS like it's a normal physical machine, once the install is completed, power off the VM and you can now boot the drive you installed to on the same or other computer.
CDN Cloudflare how to set and preserve the real IP of the client without modifying application code on Apache
Your frontend CDN (eg. Cloudflare or even your own load balancer/proxy) must be sending the X-Forwarded-For and you must be running Apache on the backend.
This solves the problem where your logs and services will only see the proxy/CDN IP and not the real client IP.
modremoteip is the most modern and current working solution
Step 1.) Enable remoteip
a2enmod remoteip
Step 2.) Edit/Enable the correct config
Edit this file: /etc/apache2/conf-enabled/remoteip.conf
Make your entries like below (you can add more lines of RemoteIPTrustedProxy as needed).
RemoteIPHeader X-Forwarded-For

RemoteIPTrustedProxy 1.2.3.4
Step 3.) Restart Apache
You should now find that the client IP is what is shown in the Apache logs and REMOTE_ADDR variable. Remember to update the remoteip.conf with the current IPs of your load balancer/CDN service.
Note that most versions of mod_rpaf at least in newer Debian/Ubuntu seem to be broken and DO NOT work. The symptom will be that your Apache logs have the correct client IP but say in PHP the REMOTE_ADDR variable will be that of the proxy/loadbalancer/cloudflare even though you have added the correct IP's in the RPAF_ProxyIPs line. It appears the project is no longer maintained and working in newer Apache/PHP.
Here is some discussion about mod_rpaf in recent Debian/Ubuntu
mod_rpaf will fix all of this
This solution transparently sets the real IP of the client for Apache and any services that rely on the REMOTE_ADDR without having to modify any code.
Install the right tools:
#install the devel tools and gcc for your distro and git

yum -y install httpd-devel gcc git
Get the mod_rpaf source code
#let's git the mod_rpaf module (most distros don't have this as a package installable module) so we have to build it ourselves

cd ~

git clone https://github.com/gnif/mod_rpaf.git

cd mod_rpaf
Compile mod_rpaf
#let's compile and install the mod_rpaf.c code

apxs -i -c -n rpaf mod_rpaf.c
Edit httpd.conf
#edit the httpd.conf for Apache to enable mod_rpaf, be sure to set the RPAF_ProxyIPs to whatever IPs your CDN/proxy uses otherwise the original CDN IP will still be presented to Apache
Edit the two example of IPs below to be your CDN/Proxy/LoadBalancer IPs (if you only have 1 IP then only put 1 there).
LoadModule rpaf_module modules/mod_rpaf.so


    RPAF_Enable             On

    RPAF_Header             X-Forwarded-For

    RPAF_ProxyIPs           1.2.3.4 5.6.7.8

    RPAF_SetHostName        On

    RPAF_SetHTTPS           On

    RPAF_SetPort            On
#remember to restart httpd/apache
systemctl restart httpd

#now remove gcc and httpd-devel and git for security reasons

yum -y remove gcc httpd-devel git
If you are using varnish
When using varnish you need to add on the IP 127.0.0.1 to the RPAF_ProxyIPs line or it will break your logs, or in otherwords Varnish requests will all show up to Apache as 127.0.0.1 instead of the real client IP.
CentOS 7 fix Could not retrieve mirrorlist http://mirrorlist.centos.org/?release=7&arch=x86_64&repo=os&infra=container error was 14: curl#6 -
yum update
Loaded plugins: fastestmirror, ovl
Determining fastest mirrors
Could not retrieve mirrorlist http://mirrorlist.centos.org/?release=7&arch=x86_64&repo=os&infra=container error was
14: curl#6 - "Could not resolve host: mirrorlist.centos.org; Unknown error"
One of the configured repositories failed (Unknown),
and yum doesn't have enough cached data to continue. At this point the only
safe thing yum can do is fail. There are a few ways to work "fix" this:
1. Contact the upstream for the repository and get them to fix the problem.
2. Reconfigure the baseurl/etc. for the repository, to point to a working
upstream. This is most often useful if you are using a newer
distribution release than is supported by the repository (and the
packages for the previous distribution release still work).
3. Run the command with the repository temporarily disabled
yum --disablerepo=
4. Disable the repository permanently, so yum won't use it by default. Yum
will then just ignore the repository until you permanently enable it
again or use --enablerepo for temporary usage:
yum-config-manager --disable
or
subscription-manager repos --disable=
5. Configure the failing repository to be skipped, if it is unavailable.
Note that yum will try to contact the repo. when it runs most commands,
so will have to try and fail each time (and thus. yum will be be much
slower). If it is a very temporary problem though, this is often a nice
compromise:
yum-config-manager --save --setopt=
Cannot find a valid baseurl for repo: base/7/x86_64
The issue is that CentOS 7 went EOL in June 2024, but you can still access the packages in the CentOS vault for the last 7.9.2009 release for testing purposes or to create an environment to update to AlmaLinux or another newer distro.
[base]

name=CentOS-$releasever - Base

baseurl=http://vault.centos.org/7.9.2009/os/$basearch/

gpgcheck=1

gpgkey=file:///etc/pki/rpm-gpg/RPM-GPG-KEY-CentOS-7


[updates]

name=CentOS-$releasever - Updates

baseurl=http://vault.centos.org/7.9.2009/updates/$basearch/

gpgcheck=1

gpgkey=file:///etc/pki/rpm-gpg/RPM-GPG-KEY-CentOS-7


[extras]

name=CentOS-$releasever - Extras

baseurl=http://vault.centos.org/7.9.2009/extras/$basearch/

gpgcheck=1

gpgkey=file:///etc/pki/rpm-gpg/RPM-GPG-KEY-CentOS-7


[centosplus]

name=CentOS-$releasever - Plus

baseurl=http://vault.centos.org/7.9.2009/centosplus/$basearch/

gpgcheck=1

enabled=0

gpgkey=file:///etc/pki/rpm-gpg/RPM-GPG-KEY-CentOS-7
Solution for the SCLo repo
yum install centos-release-scl
/etc/yum.repos.d/CentOS-SCLo-scl.repo
[centos-sclo-sclo]

name=CentOS-7 - SCLo sclo

baseurl=http://vault.centos.org/7.9.2009/sclo/$basearch/sclo/

gpgcheck=1

enabled=1

gpgkey=file:///etc/pki/rpm-gpg/RPM-GPG-KEY-CentOS-7


[centos-sclo-sclo-source]

name=CentOS-7 - SCLo sclo Source

baseurl=http://vault.centos.org/7.9.2009/sclo/Source/sclo/

gpgcheck=1

enabled=0

gpgkey=file:///etc/pki/rpm-gpg/RPM-GPG-KEY-CentOS-7
/etc/yum.repos.d/CentOS-SCLo-scl
[centos-sclo-rh]

name=CentOS-7 - SCLo rh

baseurl=http://vault.centos.org/7.9.2009/sclo/$basearch/rh/

gpgcheck=1

enabled=1

gpgkey=file:///etc/pki/rpm-gpg/RPM-GPG-KEY-CentOS-7


[centos-sclo-rh-source]

name=CentOS-7 - SCLo rh Source

baseurl=http://vault.centos.org/7.9.2009/sclo/Source/rh/

gpgcheck=1

enabled=0

gpgkey=file:///etc/pki/rpm-gpg/RPM-GPG-KEY-CentOS-7
Ubuntu Debian How To Install Recommended Packages Automatically
A lot of times you may see when installing packages that apt will recommend packages, a lot of times when doing things like upgrading or install a new kernel, it is very smart at recommending related packages (eg. modules, headers, extras etc..)

All you need to do is add this flag to your "apt install" command:
--install-suggests
As you can see below, when we add this flag, it then installs all of the "Suggested packages" from above:
sudo apt install --install-suggests linux-image-5.15.0-119-generic

Reading package lists... Done

Building dependency tree

Reading state information... Done

The following packages were automatically installed and are no longer required:

  linux-objects-nvidia-510-4.15.0-188-generic linux-signatures-nvidia-4.15.0-188-generic

Use 'sudo apt autoremove' to remove them.

The following additional packages will be installed:

  fdutils linux-doc linux-headers-5.15.0-119-generic linux-hwe-5.15-headers-5.15.0-119 linux-modules-5.15.0-119-generic linux-modules-extra-5.15.0-119-generic

Suggested packages:

  linux-hwe-5.15-tools

The following NEW packages will be installed:

  fdutils linux-doc linux-headers-5.15.0-119-generic linux-hwe-5.15-headers-5.15.0-119 linux-image-5.15.0-119-generic linux-modules-5.15.0-119-generic linux-modules-extra-5.15.0-119-generic
How to set Linux Ubuntu Redhat Debian Command Line http https socks proxy for yum apt
Just export these variables:
export http_proxy="socks5://127.0.0.1:1234"

export https_proxy="socks5://127.0.0.1:1234"
The above example uses a socks 5 proxy at localhost and port 1234.
This is a great way to improve performance of some activities for things like package installation, especially if your routing is not ideal to the repos.
How to resize a pdf without losing much quality in Linux Mint Ubuntu Debian Redhat Solution
Do you have a PDF that was too large after merging using convert / ImageMagick?
Use gs or ghostscript as below, specify the output file and also the input file.
In the example below the output file is "outputfile-resized.pdf" and the input file is "original-pdf.pdf". Change the input file to the name of your pdf
gs -sDEVICE=pdfwrite -dCompatibilityLevel=1.4 -dPDFSETTINGS=/prepress -dNOPAUSE -dQUIET -dBATCH -sOutputFile=outputfile-resized.pdf original-pdf.pdf
For example the above method took a pdf from 12MB to about 500KB with no noticeable quality loss.
More Size Savings
In some cases with very high quality PDF's with images (eg. 300dpi), you may only save 20-30% which may not fit the Inbox of some e-mail providers still.
The next option is to change your DPI to be 150:
-dColorImageResolution=150
Add the above flag and adjust the 150 to be whatever dpi you need. The above example took a 47MB image down to 6.5MB.
qemu: could not load PC BIOS 'bios-256k.bin' solution
qemu: could not load PC BIOS 'bios-256k.bin'
The file exists here:
/usr/share/qemu/bios-256k.bin
It is symlinked to here:
/usr/share/seabios/bios.bin
A quick fix is manually specifying the BIOS:
-bios /usr/share/qemu/bios-256k.bin
Proxmox How To Custom Partition During Install
If you just have 1 disk per node/testing/POC then you can reduce the overall disk usage during install as below:
1.) Click on "Options" on the HDD that you want to install to.
.png)
2.) Under "hdsize" Set the Maximum Size smaller than the disk size.
In this example the disk is 60G and I set max size as 20G. This then leaves 40G remaining of unpartitioned space that you could later use for other things like Ceph, DRBD etc...

Hyper-V Linux VM Boots to Black Screen, Storage, NIC Not Found Issues
Hyper-V uses obscure virtual hardware, you can enable the FB device for Hyper-V but if you just need text/console to work just compile this option:
Device Drivers --->

  Graphics support --->

    <*> Framebuffer Devices --->

        <*> Simple framebuffer support
Ubuntu Mint How to Fix Missing/Broken /dev and /dev/pts which causes terminal to immediately close exit and not work
If you have ever seen a system where terminal in the GUI closes instantly and/or you cannot SSH to the server/machine.
mount -t devtmpfs none /dev

mount -t devpts none /dev/pts
How high can a Xeon CPU get?
As a fun test in an old/unloved dual CPU Xeon system, I removed the fan for the heatsink and after 1.5 hours, the system was completely stable and had surprisingly not crashed, despite exceeding or hitting the critical thermal levels

bash fix PATH environment variable "command not found" solution
If you are sure the binary/program exists, it could be that your PATH variable is broken or not set.
Just do this to set most of the common paths:
export PATH=$PATH:/usr/local/sbin:/usr/local/bin:/usr/sbin:/usr/bin:/sbin:/bin
There's no risk to the above, because it just takes your current PATH variable and adds more to what is already existing.
To make this permanent you can add this to your ~/.bashrc file
Ubuntu Linux Mint Debian Redhat Youtube Cannot Play HD or 4K videos, dropped frames or high CPU usage with Nvidia or AMD Driver
In a lot of distros, vdpau which accelerates video through the GPU is often not installed even in recent distros. This will result in Firefox with Youtube dropping frames when you check the "Stats for Nerds" and to the eye as jerky or slower video playback due to the dropped frames.
Some sites will say that because you are watching VP09 that there is no GPU support, but with vdpau installed and enabled, many GPUs will still be able to use hardware decoding for 4K Youtube videos. Information on this is spotty but you can clearly see the GPU utilization going up when watching Youtube GPUs, so the GPU is doing something to decode the video.
This will make you think that your GPU is not capable of playing even 1080P sometimes or 4K even though it is, as in many cases it is your CPU doing the video decoding and a lot of times some CPUs cannot reliably or consistently support 4K decoding in Youtube.
The easiest solution is to install vdpau and restart your browser:
sudo apt install vdpau-driver-all
I was surprised that this helped even on even much older cards including older Nvidia GPUs.
After doing the above and restarting Firefox, the stats for nerds showed 0 dropped frames when watching 4K, compared to some dropped frames at 1080P and many dropped at 4K before enabling vdpau.
.png)
One caveat that it may be that your video card is still too slow and may not be able to support decoding Youtube in fullscreen at certain resolutions. You may see the above but then on a weaker GPU, may find that it does drop frames when running fullscreen.
Sometimes frames will only drop when having the Stats for nerds on top, or the progress bar open.
In general VP09 full support and decoding is not guaranteed to work well or at all, and unfortunately Youtube has not stuck to normal standards that most GPUs support like H265 or H264, XVID, DIVX etc...
Related Links:
https://support.mozilla.org/en-US/kb/firefox-4k-ultra-high-definition-youtube-videos
https://www.reddit.com/r/linuxquestions/comments/ugp19e/help_playing_back_4k60fps_youtube_on_linux/
hostapd example configuration for high speed AC on 5GHz using WPA2
This example is using RTL8821AU chipset from a TP-Link T2U Plus USB adapter and other similar ones should work the same.
Here's how to get this chipset RTL8821AU working in Linux.
Here's how to get RTL8812 and RTL8822 working in Linux.
With these settings I can get very good speeds of 300+ mbit per second and for some reason the upload speed is faster than download.
Change wlan0 if your adapter has a different device name and make sure you set your WPA passphrase or change it.
interface=wlan0

#prevent client dropping

#max_inactivity=86400

skip_inactivity_poll=1

# Station inactivity limit in seconds (default is 300)

ap_max_inactivity=86400

wmm_enabled=1

beacon_int=100

dtim_period=2
# "a" simply means 5GHz

#driver=cfg80211

hw_mode=a

# the channel to use, 0 means the AP will search for the channel with the least interferences (ACS)

channel=36

#ieee80211d=1

country_code=US

ieee80211n=1

ht_capab=[HT40+][HT40-][SHORT-GI-20][SHORT-GI-40][MAX-AMSDU-7935]

#the below doesn't work hostapd wouldn't start

#ht_capab=[HT40+][HT40-][SHORT-GI-20][SHORT-GI-40][RX-STBC1][MAX-AMSDU-7935]

# 802.11ac support

ieee80211ac=1

wmm_enabled=1

#vht_capab=[MAX-MPDU-11454][SHORT-GI-80][HTC-VHT]

vht_capab=[MAX-MPDU-11454][SHORT-GI-80][RX-STBC-1][HTC-VHT][MAX-A-MPDU-LEN-EXP7]


#optimize?

beacon_int=100

dtim_period=2

max_num_sta=32

macaddr_acl=0

rts_threshold=2347

fragm_threshold=2346


#end optimize

ssid=rttWirelessInternet

auth_algs=1

wpa=2

wpa_key_mgmt=WPA-PSK

rsn_pairwise=CCMP

wpa_passphrase=YOURWirelessInSecurePasswordHere
#you want to disable PMF if you find your clients don't connect although it is less secure and subjects you to deauth attacks
ieee80211w=0
How to enable 80mhz mode:
vht_capab=[MAX-MPDU-11454][SHORT-GI-80][RX-STBC-1][HTC-VHT][MAX-A-MPDU-LEN-EXP7][VHT80]

vht_oper_chwidth=1
If you are using one of the RTL8xx drivers follow this guide so 80mhz mode works:
https://realtechtalk.com/RTL88X_Series_80Mhz_hostapd_mode_for_Linux_Debian_Kali-2646-articles
Special Mention About Clients Dropping
Until I had all of the below settings, clients would just drop off and not reconnect. Sypmtoms of this would be if you walked out of range and came back, the client eg. phone/laptop would not reconnect. If your phone went to sleep, it doesn't wakeup and automatically reconnect to the wifi, you would need to force connect the wifi manually.
skip_inactivity_poll=1

ap_max_inactivity=86400

wmm_enabled=1

beacon_int=100

dtim_period=2
hostapd how to enable and use WPS to connect wireless devices like printers
Edit your /etc/hostapd/hostapd.conf file like below and restart hostapd.
#WPS stuff

# Enable control interface for PBC/PIN entry
wpa_psk_file=/etc/hostapd/hostapd.psk

ctrl_interface=/var/run/hostapd

eap_server=1

wps_state=2

ap_setup_locked=1

wps_pin_requests=/var/run/hostapd.pin-req

config_methods=label display push_button keypad


#WPS model info stuff change to suit your needs

device_name=Your Device Name

manufacturer=Company

model_name=Model

model_number=ModelNum
Create the .psk file from above
touch /etc/hostapd/hostapd.psk
Restart hostapd
systemctl restart hostapd
Here's how to push the non-existent button on your router for WPS
hostapd_cli wps_pbc
Then you should get this and your device should be able to connect now.
Once you see the below, the device has 2 minutes to connect.
Selected interface 'wlan0'

OK
Dell Server Workstation iDRAC Dead after Firmware Update Solution R720, R320, R730
This is certainly a poor design, as you can read many seasoned admins who have updated their iDRAC only to have it killed. One possible cause is not by doing all the incremental updates, doing updates from an old iDRAC to one many revisions newer is a sure way to kill things, but even then there is no guarantee based on the amount of failures.
List of threads of people's dead iDRAC's:
https://www.reddit.com/r/homelab/comments/a49b4y/r720_idrac_help/?rdt=40792
https://www.reddit.com/r/homelab/comments/960wx8/dell_r720_idrac_recovery/
https://community.spiceworks.com/t/alert-idrac-not-responding-rebooting/776991
The first solution is don't mass update, as we've seen entire datacenters or racks full of Dell machines with dead iDRAC due to mass update attempts. It is likely not practical to do this fix on a wide scale unless you can migrate the applications to another facility or rack as this requires the servers to be pulled off the rack or at least pulled by the rails and to open the case of course.
Try This First (only if you have lights on the iDRAC):
This solution is for if your iDRAC is totally dead, no flashing lights, dead NIC etc...
You will first need a USB to TTL adapter like this Amazon affil link.
Another successful recovery: http://blog.ignoranthack.me/?p=86
You will see Dell themselves advising to replace the motherboard, but in many cases by connecting to the UART below with a USB to TTL cable, you can tell the iDRAC to reflash from the SDCARD image.
Based off this example of a Dell R720, we can see the UART pins which are labelled by this github user.
This area is at the back right of the server (if looking from the server from the front) and will require you to remove the riser cage to access this area.
Step 1.) Connect to USB to TTL adapter.
Be sure to use the correct pins below (remember the TX side of the TTL goes to the RX side of the UART and the the RX side of the TTL goes to the TX side of the UART). If in doubt, use a multimeter to make sure you aren't connecting to the wrong pins/getting voltage where you shouldn't be.
Note About Format of SD Card
I have seen this occur on some servers, I am not sure how it was done like this but the SD Card came formatted as the root drive, without any partition. It seems that U-Boot recovery DOES NOT like this, or the fact that it is a 16GB Card even though it is from Dell.
UTIL RECOVER:Transport:sd  TargetMMC:EMMC  File:firmimg.d7

UTIL RECOVER:ERROR:Could not locate 'firmimg.d7' in FAT or EXT2 file system.
If you get the errors above and you are sure the file exists, then it is worth doing the following.
1.) Backup all files from the SD Card.
2.) Completely wipe the card.
3.) Format a single partition as 2GB as ext2 (ext2 not ext3 or ext4 or it won't work as the environment does not have the kernel modules to load anything but FAT and EXT2).
Step 2.) Recover
Sometimes you may need to go through 2 rounds of bootup procedure by hitting all the annoying keys to get the server booted normally for this to work.
Connect using minicom or screen and run these commands:
screen /dev/ttyUSB0 115200
The connection speed is crucial, otherwise you will see nothing or garbage characters.
If all goes well you should see like below.

Make sure you have the file firmimg.d7 or whatever the name one is from the iDRAC firmware on the SD card that inserts at the front of the server.
util recover -emmc -from sd -f firmimg.d7 -noreset -clear
Some versions will not have this -from_sd option
iDRAC8=> util recover -emmc -from_sd -f firmimg.d6 -noreset -clear

util recover:mcgetopt:ERROR: option "-from_sd" was not found.
Then once the above completes do this:
util reset
Short iDRAC DBG interrupt/reboot pins
If you see a shell prompt like below (SH7757), you will need to short the DBG pins in the image from earlier.
Use a paper clip to short the two pins shown above as the interrupt/reboot pins in the diagram above.
After shorting you should see U-Boot again:
U-Boot 2009.08 (Mar 10 2012 - 02:52:09) Avocent (0.0.3) EVB, Build: jenkins-12G_iDRAC_Releases-402


CPU: SH-4A

BOARD: R0P7757LC00xxRL (C0 step) board

BOOT: Secure, HRK generated

DRAM:  240MB

  (240MB of 256MB total DRAM is available on U-Boot)

ENV:   Using primary env area.

In:    serial

Out:   serial

Err:   serial

PCIe:  Bridge loaded with 0x18000 bytes

WDT2:  Booted Lower Vector, 'uboot1'

sh_mmcif: 0, sh-sdhi: 1

Net:   sh_eth.0, sh_g_eth.0

INFO: 00:002 Start-up -to- util_idrac_main()

INFO: 00:004 U-Boot 2009.08 (Mar 10 2012 - 02:52:09) Avocent (0.0.3) EVB

INFO: 00:007 U-Boot checkin date(03-02-2012) Version(1.0.175)

INFO: 00:006 iDRAC PPID <NULL>

INFO: 00:003 SPI NOR init 4096 KiB N25Q032 bus=0 cs=0, speed=1000000, mode=3

INFO: 00:007 SH-4A Product: Major Ver=0x31  Minor Ver=0x13 C3 Little endian

             Family=0x10    Major Ver=0x30  Minor Ver=0x0b

PASS: 00:016 Dedicated monolithic mgmt NIC disabled

INFO: 00:128 BCM54610 OUI=0x3fffff  Model=0x3f  Revision=0x0f PhyAddr=1

INFO: 00:362 SD CARD:   Device: sh-sdhi   Manufacturer ID: 41   OEM: 3432

             Name: DELL1   Tran Speed: 25000000   Rd Block Len: 512

             SD version 2.0   High Capacity: Yes   Capacity: -843055104

INFO: 00:059 EMMC:   Device: sh_mmcif   Manufacturer ID: 90   OEM: 14a

             Name: HYNIX   Tran Speed: 25000000   Rd Block Len: 512

             MMC version 4.0   High Capacity: Yes   Capacity: 0

INFO: 00:019 CPLD: Major Ver=0x1  Minor Ver=0x0  Maint Ver=0x3

             Planar: Type=0x02  Rev=0x8  Rework=0x8  Scratch/PathRetry=0x00

PASS: 00:013 Coin cell detected good,  AD=0x397 low water=0x2c1

PASS: 00:008 PCIe C0 Ver=0.13 MCTP en, CRC=0x19592849 @0x8efbf3a8 cnt=0x18000

INFO: 00:007 Init PCIe mailbox(PCIe 0xFFEE0150=0x40010000)

INFO: 00:006 mode=normal

INFO: 00:002 reset_cause=ac

PASS: 00:005 Booted Lower Vector, 'uboot1' wdt2cnt=0

INFO: 00:005 wdt0cnt=0

PASS: 00:003 Clear CH1/CH2, clear 4K shared memory@0xffcaa000 on AC power up

PASS: 00:007 SMR0 no sermux env, default 0xd4

INFO: 00:004 GRACR=0x3c HISEL=0x00 SIRQCR5_D=0x03 SIRQCR6_D=0x01 LADMSK0=0xff2

             MRSTCR0=0xfedffe7f MRSTCR1=0xfff3ff0f MRSTCR2=0x7f80feff

             BARMAP=0x1 BCR=0x85000000 NCER=0x01fc NCMCR=0x0006 NCCSR=0x0303

PASS: 00:021 etherc0=78:45:C4:F6:88:68

             getherc0=78:45:C4:F6:88:69

INFO: 00:010 Fan logic for monolithic planar type 2

             fan1 - def 0000 1fff 3d   fan2 - def 0000 1fff 3d

             fan3 - def 0000 1fff 3d   fan4 - def 0000 1fff 3d

             fan5 - def 0000 1fff 3d   fan6 - def 0000 1fff 3d

             fan7 - def 0000 1fff 3d   fan8 - def 0000 1fff 3d

INFO: 00:076 Env and backup CRC'ed ok

*** no text signature found ***


INFO: 00:536 Sync eMMC/SPI NOR/Alternate u-boot images

PASS: 00:258 Current u-boot1 1.0.175 verified with 'ubootN'

             Trailer Struct - Missing start token, exp=0xc0de1111 rec=0x0

             U-boot2 in sync with u-boot1 1.0.175

PASS: 03:607 Verify OS Images N: CRC32 OK: Kernel=0x4d21804a Rootfs=0x40007db7

PASS: 00:008 Boot device=emmc  Boot partition1/N

             Boot Path Retry:P1/N=0 P5/N-1=0

INFO: 00:000 05:198


WDT2: Disabled

Initialization complete, proceed with boot

*** no text signature found ***


No.  Device

---------------------

 1   EVB SD/MMC

 4   FLASH


Current Device ==> 1


OS_WDT0_EN:180 seconds,  Re-load ILRAM:

Boot Path Retry:P1/N=0 P5/N-1=0

Copying kernel image ... OK

## Booting kernel from Legacy Image at 82000000 ...

   Image Name:   sh-linux

   Image Type:   SuperH Linux Kernel Image (gzip compressed)

   Data Size:    2535377 Bytes =  2.4 MB

   Load Address: 80001000

   Entry Point:  80002000

   Verifying Checksum ... OK

   Uncompressing Kernel Image ... OK

WDT2: Disable in do_bootm_linux()

sh_eth_init


Monolithic/DRB

init started: BusyBox v1.18.4 (2012-03-10 03:35:27 UTC)

starting pid 415, tty '': '/etc/init.d/rcS'

waitfor: pid 415 ...

setting net.ipv6.conf.default.accept_dad based on kernel bootup option

enable normal accept DAD for ipv6

Sat Jan 1 00:00:01 UTC 2000 To execute command __source /etc/sysapps_script/I_1000_mountfs.sh__

Sat Jan 1 00:00:03 UTC 2000 To execute command __source /etc/sysapps_script/I_1001_trigwdt.sh__

<========= Start H/W watchdog first... =========>

Sat Jan 1 00:00:03 UTC 2000 To execute command __source /etc/sysapps_script/I_1100_nfs.sh__

Sat Jan 1 00:00:03 UTC 2000 To execute command __source /etc/sysapps_script/I_1105_ps.sh__

XXXXXX /dev/mmcblk0p11

/dev/mmcblk0p11: recovering journal

fsck.ext3: Attempt to read block from filesystem resulted in short read while trying to re-open /dev/mmcblk0p11

e2fsck: io manager magic bad!

e2fsck 1.41.14 (22-Dec-2010)

fsck.ext3: Attempt to read block from filesystem resulted in short read while trying to open /dev/mmcblk0p11

Could this be a zero-length partition?

mount: mounting /dev/mmcblk0p11 on /flash/data0 failed: Invalid argument

mounting private storage fail, formatting partition

/etc/init.d/rcS: /etc/sysapps_script/I_1105_ps.sh: line 29: mkfs.ext3: Input/output error

/etc/init.d/rcS: /etc/sysapps_script/I_1105_ps.sh: line 29: tune2fs: Input/output error

mount: mounting /dev/mmcblk0p11 on /flash/data0 failed: Invalid argument

Sat Jan 1 00:00:04 UTC 2000 To execute command __source /etc/sysapps_script/I_1106_clear_ps.sh__

Sat Jan 1 00:00:04 UTC 2000 To execute command __source /etc/sysapps_script/I_1150_SYS_Drv.sh__

insmod: can't insert '/lib/modules/aess_eventhandlerdrv.ko': Input/output error

insmod: can't insert '/lib/modules/aess_kcsdrv.ko': Input/output error

insmod: can't insert '/lib/modules/aess_biospostdrv.ko': Input/output error

insmod: can't insert '/lib/modules/aess_gpiodrv.ko': Input/output error

insmod: can't insert '/lib/modules/aess_sgpiodrv.ko': Input/output error

insmod: can't insert '/lib/modules/aess_dynairqdrv.ko': Input/output error

insmod: can't insert '/lib/modules/aess_i2c_hwctrldrv.ko': Input/output error

insmod: can't insert '/lib/modules/aess_i2cdrv.ko': Input/output error

insmod: can't insert '/lib/modules/aess_spi1drv.ko': Input/output error

insmod: can't insert '/lib/modules/aess_pecisensordrv.ko': Input/output error

insmod: can't insert '/lib/modules/cryptodev.ko': Input/output error

insmod: read error from '/lib/modules/sh_tsip.ko': Input/output error

insmod: can't insert '/lib/modules/sh_tsip.ko': Input/output error

insmod: can't insert '/lib/modules/aess_fansensordrv.ko': Input/output error

insmod: can't insert '/lib/modules/aess_pwmdrv.ko': Input/output error

insmod: can't insert '/lib/modules/aess_timerdrv.ko': Input/output error

insmod: can't insert '/lib/modules/dell_cplddrv.ko': Input/output error

insmod: can't insert '/lib/modules/aess_rspidrv.ko': Input/output error

insmod: can't insert '/lib/modules/dell_fpdrv.ko': Input/output error

insmod: can't insert '/lib/modules/aess_adcsensordrv.ko': Input/output error

insmod: can't insert '/lib/modules/VKCSDriver.ko': Input/output error

insmod: can't insert '/lib/modules/aess_memdrv.ko': Input/output error

insmod: read error from '/lib/modules/sh_pbi.ko': Input/output error

insmod: can't insert '/lib/modules/sh_pbi.ko': Input/output error

Sat Jan 1 00:00:04 UTC 2000 To execute command __source /etc/sysapps_script/I_1170_mknode.sh__

Sat Jan 1 00:00:05 UTC 2000 To execute command __/etc/sysapps_script/config_lib_init.sh__

mounting Platform Data 1 partition

mount: mounting /dev/mmcblk0p9 on /tmp/pd0/ failed: Input/output error

/etc/sysapps_script/config_lib_init.sh: line 28: /etc/default/ipmi/getsysid: not found

mkdir: can't create directory '/flash/data0/config/': Read-only file system

/etc/sysapps_script/config_lib_init.sh: cd: line 38: can't cd to /flash/data0/config/

ln: ./lmcfg.txt: Read-only file system

ln: ./platcfggrp.txt: Read-only file system

ln: ./platcfgfld.txt: Read-only file system

ln: ./cfgfld.txt: Read-only file system

ln: ./cfggrp.txt: Read-only file system

ln: ./gencfggrp.txt: Read-only file system

ln: ./gencfgfld.txt: Read-only file system

ln: ./altdefaults.txt: Read-only file system

cp: can't stat '/tmp/pd0/network_config/Orca/iDRACnet.default': No such file or directory

cp: can't stat '/tmp/pd0/network_config/Orca/NICSelection.sh': No such file or directory


Sat Jan 1 00:00:06 UTC 2000 To execute command __source /etc/sysapps_script/I_1160_OSINET.sh__

Sat Jan 1 00:00:06 UTC 2000 To execute command __source /etc/sysapps_script/I_1200_etc_defaults.sh__

cp: can't create '/flash/data0/etc/hosts': Read-only file system

mkdir: can't create directory '/flash/data0/sysconfig': Read-only file system

mkdir: can't create directory '/flash/data0/ipsec': Read-only file system

/etc/sysapps_script/network_dev_init.sh: line 34: /tmp/pd0/ipmi/getsysid: not found

cp: can't create '/flash/data0/etc/hosts': Read-only file system

Sat Jan 1 00:00:06 UTC 2000 To execute command __source /etc/sysapps_script/I_1210_sysklog_syslogd.sh__

mkdir: can't create directory '/var/log/raclogd/': No such file or directory

touch: /var/log/raclogd/raclog: No such file or directory

chmod: /var/log/raclogd/raclog: No such file or directory

/etc/init.d/rcS: /etc/sysapps_script/I_1210_sysklog_syslogd.sh: line 16: /etc/sysapps_script/syslog.sh: Input/output error

Sat Jan 1 00:00:07 UTC 2000 To execute command __source /etc/sysapps_script/I_trab_asdf.sh__

insmod: read error from '/lib/modules/trab.ko': Input/output error

insmod: can't insert '/lib/modules/trab.ko': Input/output error

Sat Jan 1 00:00:07 UTC 2000 To execute command __source /etc/sysapps_script/I_usb_drv.sh__

NOTICE: Not full features configuration - kbdmouse not operational

insmod: can't insert '/lib/modules/g_r8a66597_udc.ko': Input/output error

failed load of g_r8a66597_udc

Sat Jan 1 00:00:07 UTC 2000 To execute command __source /etc/sysapps_script/I_video_drv.sh__

insmod: can't insert '/lib/modules/aess_video.ko': Input/output error

waitfor: pid 415, wpid 415


Please press Enter to activate this console. ^[[5~^[[5~

starting pid 550, tty '': '-/bin/sh'
Other useful recon output of how things work
iDRAC8=> util recover


UTIL RECOVER:Transport:tftp  TargetMMC:EMMC  File:firmimg.d7

UTIL RECOVER:Loading file "firmimg.d7" from TFTP server IP "192.168.0.100"

reset PHY of sh_g_eth.0

sh_eth: phy reset timeout

sh_eth: phy config timeout

UTIL RECOVER:ERROR:TFTP load.

UTIL FAIL
iDRAC8 commands
iDRAC8=> util help
Available "util" subcommands:
evc [-en
evc [-rise] [-fall] [-monitor]
fan [-set
fan [-init]
flash [-sd | -spi | -emmc]
[-b
iDRAC8=>

iDRAC8=> util recover -emmc -from sd -f firmimg.d6 -noreset -clear

util recover:mcgetopt:ERROR: option "-clear" was not found.


UTIL FAIL

iDRAC8=>

iDRAC8=> util recover -emmc -from sd -f firmimg.d6 -noreset


UTIL RECOVER:Transport:sd  TargetMMC:EMMC  File:firmimg.d6

UTIL RECOVER:ERROR:Could not locate 'firmimg.d6' in FAT or EXT2 file system.


UTIL FAIL

iDRAC8=> util recover -emmc -from sd -f firmimg.d7 -noreset


UTIL RECOVER:Transport:sd  TargetMMC:EMMC  File:firmimg.d7

UTIL RECOVER:ERROR:Could not locate 'firmimg.d7' in FAT or EXT2 file system.
U-Boot 2009.08 (Jun 11 2018 - 05:56:29) Avocent (0.0.3) EVB


CPU: SH-4A

BOARD: R0P7757LC00xxRL (Cn step) board

BOOT: Secure, HRK generated

DRAM:  240MB

  (240MB of 256MB total DRAM is available on U-Boot)

ENV:   Using primary env area.

In:    serial

Out:   serial

Err:   serial

WDT2:  Booted Lower Vector, 'uboot1'

sh_mmcif: 0, sh-sdhi: 1

Net:   sh_eth.0, sh_g_eth.0

INFO: 00:002 Start-up -to- util_idrac_main()

INFO: 00:005 U-Boot 2009.08 (Jun 11 2018 - 05:56:29) Avocent (0.0.3) EVB

INFO: 00:006 U-Boot checkin date(08-11-2016) Version(1.1.32)

INFO: 00:006 iDRAC PPID
INFO: 00:003 SPI NOR init 4096 KiB N25Q032 bus=0 cs=0, speed=1000000, mode=3

INFO: 00:007 SH-4A Product: Major Ver=0x31  Minor Ver=0x13 C3 Little endian

             Family=0x10    Major Ver=0x30  Minor Ver=0x0b

INFO: 00:140 BCM54610 OUI=0x00d897  Model=0x26  Revision=0x0a PhyAddr=1

INFO: 00:006 Dedicated monolithic mgmt NIC disabled

INFO: 00:340 SD CARD:   Device: sh-sdhi   Manufacturer ID: 41   OEM: 3432

             Name: DELL1   Tran Speed: 25000000   Rd Blk Len: 512

             SD ver 2.0   HC: Yes   cap(<2gb): 3451912192  cap(>2gb): 0

             ext_rev: 0    rst_n: 0  ext[96]: 0

INFO: 00:063 EMMC:   Device: sh_mmcif   Manufacturer ID: 90   OEM: 14a

             Name: HYNIX   Tran Speed: 25000000   Rd Blk Len: 512

             MMC ver 4.0   HC: Yes   cap(<2gb): 0  cap(>2gb): 7569408

             ext_rev: 5    rst_n: 0  ext[96]: 0

INFO: 00:023 CPLD: Major Ver=0x1  Minor Ver=0x0  Maint Ver=0x3

             Planar: Type=0x02  Rev=0x8  Rework=0x8  Scratch/PathRetry=0x0f

PASS: 00:014 Coin cell detected good,  AD=0x397 low water=0x2c1

PASS: 00:008 PCIe SH7757_C0 Ver=0.15 MCTP en, CRC=0x8e9b6875 @0x8efbd914 cnt=0x18000

INFO: 00:008 Init PCIe mailbox(PCIe 0xFFEE0150=0x40010000)

INFO: 00:006 mode=normal

INFO: 00:002 reset_cause=recover

PASS: 00:005 Booted Lower Vector, 'uboot1' wdt2cnt=0

INFO: 00:006 wdt0cnt=0  cpld_recover_cnt=0  ddr_recover_cnt=0

PASS: 00:006 SMR0 no sermux env, default 0xd4

INFO: 00:004 GRACR=0x3c HISEL=0x00 SIRQCR5_D=0x03 SIRQCR6_D=0x01 LADMSK0=0xff2

             MRSTCR0=0xfedffe7f MRSTCR1=0xfff3ff0f MRSTCR2=0x6f80feff

             BARMAP=0x1 BCR=0x85000000 NCER=0x01fc NCMCR=0x0006 NCCSR=0x0303

PASS: 00:021 etherc0=

             getherc0=

INFO: 00:008 Fan logic is not modified on Non-AC power up

INFO: 00:052 Env and backup CRC'ed ok

*** no text signature found ***

INFO: 00:696 Sync eMMC/SPI NOR/Alternate u-boot images

PASS: 00:077 Current u-boot1 1.1.32 verified with 'ubootN1'

             Trailer Struct - Missing start token, exp=0xc0de1111 rec=0x0


FAIL: 06:813 Verify OS Images N-1: Rootfs crc exp=0xe8caa151 rec=0xcfb9c0a7

             blk_start=0x48003 blk_size=0x301f0 ENV bcnt=0x603e000

FAIL: 00:013 Boot device=emmc  Boot partition5/N-1

             Boot Path Retry:P1/N=3 P5/N-1=3  Recover

INFO: 00:000 15:265

Hit any key to stop autoboot:  0

WDT2: Disable in abortboot()

OSWDT: Disable in abortboot()

CPLD_BMCRDY: Enable BMC_MIN_RDY in abortboot().  Prevent BIOS reset.


NOTE: After stopping u-boot in this development mode.  You may need to

      warm/cold reset the server when booting iDRAC manually as BIOS

      may have already viewed iDRAC as unresponsive.


RECOVER:Max retries occured for both N/N-1 paths, OR forced recover.
Full Recovery Output
Sometimes it does not go well especially if you didn't know your EMMC is bad where it stores the firmware.
Not having the -noreset and -clear seems to have created this situation, with the waitpid but at that point the iDRAC lights and NIC were flashing. I then hard powered down and had to use the DBG pins to get back into U-Boot.
iDRAC8=> util recover -emmc -from sd


UTIL RECOVER:Transport:sd  TargetMMC:EMMC  File:firmimg.d7

Loading file "firmimg.d7" from mmc device 1:1 (xxb1)

54542562 bytes read

UTIL RECOVER:SD load passed from EXT2 fs.

UTIL RECOVER:Transport time [sec:mil]: 46:594


Clear OS images in partition/s.

Clear kernelN, rootfsN, ubootN

'EMMC' blk size=[0x200][512]  Erase to 0xffffffff

Mem buf size=[0x06000000][100663296]  Total bytes=[0x08000000][134217728]

blocks[0x1:0x40001][1:262145]

Blocks [0x30001:0x40000] Buf[0x88000000]..fill buffer..erase/write

Completed loop 1,  Elapsed time in hr:min:sec:mil 14:122


Clear rootfsN1

'EMMC' blk size=[0x200][512]  Erase to 0xffffffff

Mem buf size=[0x06000000][100663296]  Total bytes=[0x06F80000][116916224]

blocks[0x48003:0x7fc03][294915:523267]

Blocks [0x78003:0x7fc02] Buf[0x88000000]..fill buffer..erase/write

Completed loop 1,  Elapsed time in hr:min:sec:mil 09:950


Clear ubootN1

'EMMC' blk size=[0x200][512]  Erase to 0xffffffff

Mem buf size=[0x06000000][100663296]  Total bytes=[0x00080000][524288]

blocks[0x7fc04:0x80004][523268:524292]

Blocks [0x7fc04:0x80003] Buf[0x88000000]..fill buffer..erase/write

Completed loop 1,  Elapsed time in hr:min:sec:mil 00:133


*** no text signature found ***


*** Updating Partition 1 ***

Checking image header CRC ... OK

Checking platform env ID..... OK

Checking kernel image CRC ... OK

Checking rootfs image CRC ... OK

Checking u-boot image CRC ... OK

Skipping u-boot update ...... NO

Checking Platform image CRC . OK

Checking processor support .. OK

Copying kernel image ........ OK

Copying rootfs .............. OK

Copying u-boot1 to flash..... OK

Copying u-boot2 to flash..... OK

Copying u-boot to MMC........ OK

Copying platform image ...... OK


*** Updating Partition 5 ***

Checking image header CRC ... OK

Checking platform env ID..... OK

Checking kernel image CRC ... OK

Checking rootfs image CRC ... OK

Checking u-boot image CRC ... OK

Skipping u-boot update ...... NO

Checking Platform image CRC . OK

Checking processor support .. OK

Copying kernel image ........ OK

Copying rootfs .............. OK

Copying u-boot1 to flash..... OK

Copying u-boot2 to flash..... OK

Copying u-boot to MMC........ OK

Copying platform image ...... OK

Erasing SPI flash at 0x100000...Writing to SPI flash...done

Erasing SPI flash at 0x110000...Writing to SPI flash...done

UTIL RECOVER:Program time [sec:mil]:01:14:394

UTIL RECOVER:Total update time [sec:mil]:02:00:992

Re-load 0x1000Kbytes from u-boot offset 0x0 into ILRAM at 0x0

Force Address Error to reset iDRAC


U-Boot 2009.08 (Mar 10 2012 - 02:52:09) Avocent (0.0.3) EVB, Build: jenkins-12G_iDRAC_Releases-402


CPU: SH-4A

BOARD: R0P7757LC00xxRL (C0 step) board

BOOT: Secure, HRK generated

DRAM:  240MB

  (240MB of 256MB total DRAM is available on U-Boot)

ENV:   Using primary env area.

In:    serial

Out:   serial

Err:   serial

WDT2:  Booted Lower Vector, 'uboot1'

sh_mmcif: 0, sh-sdhi: 1

Net:   sh_eth.0, sh_g_eth.0

INFO: 00:002 Start-up -to- util_idrac_main()

INFO: 00:005 U-Boot 2009.08 (Mar 10 2012 - 02:52:09) Avocent (0.0.3) EVB

INFO: 00:006 U-Boot checkin date(03-02-2012) Version(1.0.175)

INFO: 00:006 iDRAC PPID
INFO: 00:003 SPI NOR init 4096 KiB N25Q032 bus=0 cs=0, speed=1000000, mode=3

INFO: 00:007 SH-4A Product: Major Ver=0x31  Minor Ver=0x13 C3 Little endian

             Family=0x10    Major Ver=0x30  Minor Ver=0x0b

PASS: 00:016 Dedicated monolithic mgmt NIC disabled

INFO: 00:128 BCM54610 OUI=0x3fffff  Model=0x3f  Revision=0x0f PhyAddr=1

INFO: 00:365 SD CARD:   Device: sh-sdhi   Manufacturer ID: 41   OEM: 3432

             Name: DELL1   Tran Speed: 25000000   Rd Block Len: 512

             SD version 2.0   High Capacity: Yes   Capacity: -843055104

INFO: 00:058 EMMC:   Device: sh_mmcif   Manufacturer ID: 90   OEM: 14a

             Name: HYNIX   Tran Speed: 25000000   Rd Block Len: 512

             MMC version 4.0   High Capacity: Yes   Capacity: 0

INFO: 00:019 CPLD: Major Ver=0x1  Minor Ver=0x0  Maint Ver=0x3

             Planar: Type=0x02  Rev=0x8  Rework=0x0  Scratch/PathRetry=0x00

PASS: 00:014 Coin cell detected good,  AD=0x397 low water=0x2c1

PASS: 00:007 PCIe C0 Ver=0.13 MCTP en, CRC=0x19592849 @0x8efbf3a8 cnt=0x18000

INFO: 00:008 Init PCIe mailbox(PCIe 0xFFEE0150=0x40010000)

INFO: 00:005 mode=normal

INFO: 00:002 reset_cause=board

PASS: 00:005 Booted Lower Vector, 'uboot1' wdt2cnt=0

INFO: 00:005 wdt0cnt=0

PASS: 00:003 SMR0 no sermux env, default 0xd4

INFO: 00:004 GRACR=0x3c HISEL=0x00 SIRQCR5_D=0x03 SIRQCR6_D=0x01 LADMSK0=0xff2

             MRSTCR0=0xfedffe7f MRSTCR1=0xfff3ff0f MRSTCR2=0x7f80feff

             BARMAP=0x1 BCR=0x85000000 NCER=0x01fc NCMCR=0x0006 NCCSR=0x0303

PASS: 00:021 etherc0=78:45:C4:F6:88:68

             getherc0=78:45:C4:F6:88:69

INFO: 00:007 Fan logic is not modified on Non-AC power up

INFO: 00:053 Env and backup CRC'ed ok

Erasing SPI flash at 0x100000...Writing to SPI flash...done

Erasing SPI flash at 0x110000...Writing to SPI flash...done

*** no text signature found ***

INFO: 02:537 Sync eMMC/SPI NOR/Alternate u-boot images

PASS: 00:076 Current u-boot1 1.0.175 verified with 'ubootN'

             Trailer Struct - Missing start token, exp=0xc0de1111 rec=0x0

PASS: 03:612 Verify OS Images N: CRC32 OK: Kernel=0x4d21804a Rootfs=0x40007db7

PASS: 00:008 Boot device=emmc  Boot partition1/N

             Boot Path Retry:P1/N=0 P5/N-1=0

INFO: 00:000 06:990


WDT2: Disabled

Initialization complete, proceed with boot

*** no text signature found ***


No.  Device

---------------------

 1   EVB SD/MMC

 4   FLASH


Current Device ==> 1


OS_WDT0_EN:180 seconds,  Re-load ILRAM:

Boot Path Retry:P1/N=0 P5/N-1=0

Copying kernel image ... OK

## Booting kernel from Legacy Image at 82000000 ...

   Image Name:   sh-linux

   Image Type:   SuperH Linux Kernel Image (gzip compressed)

   Data Size:    2535377 Bytes =  2.4 MB

   Load Address: 80001000

   Entry Point:  80002000

   Verifying Checksum ... OK

   Uncompressing Kernel Image ... OK

WDT2: Disable in do_bootm_linux()

sh_eth_init


Monolithic/DRB

init started: BusyBox v1.18.4 (2012-03-10 03:35:27 UTC)

starting pid 415, tty '': '/etc/init.d/rcS'

waitfor: pid 415 ...

setting net.ipv6.conf.default.accept_dad based on kernel bootup option

enable normal accept DAD for ipv6

Sat Jan 1 00:00:01 UTC 2000 To execute command __source /etc/sysapps_script/I_1000_mountfs.sh__

Sat Jan 1 00:00:03 UTC 2000 To execute command __source /etc/sysapps_script/I_1001_trigwdt.sh__

<========= Start H/W watchdog first... =========>

Sat Jan 1 00:00:03 UTC 2000 To execute command __source /etc/sysapps_script/I_1100_nfs.sh__

Sat Jan 1 00:00:03 UTC 2000 To execute command __source /etc/sysapps_script/I_1105_ps.sh__

XXXXXX /dev/mmcblk0p11

/dev/mmcblk0p11: recovering journal

/dev/mmcblk0p11: Clearing orphaned inode 304 (uid=0, gid=0, mode=0100644, size=156)

/dev/mmcblk0p11: clean, 660/2048 files, 2831/4096 blocks (check in 5 mounts)

e2fsck 1.41.14 (22-Dec-2010)

/dev/mmcblk0p11: clean, 660/2048 files, 2831/4096 blocks (check in 5 mounts)

Sat Jan 1 00:00:04 UTC 2000 To execute command __source /etc/sysapps_script/I_1106_clear_ps.sh__

Sat Jan 1 00:00:04 UTC 2000 To execute command __source /etc/sysapps_script/I_1150_SYS_Drv.sh__

Sat Jan 1 00:00:07 UTC 2000 To execute command __source /etc/sysapps_script/I_1170_mknode.sh__

Sat Jan 1 00:00:08 UTC 2000 To execute command __/etc/sysapps_script/config_lib_init.sh__

mounting Platform Data 1 partition

Sat Jan 1 00:00:10 UTC 2000 To execute command __source /etc/sysapps_script/I_1160_OSINET.sh__

Sat Jan 1 00:00:10 UTC 2000 To execute command __source /etc/sysapps_script/I_1200_etc_defaults.sh__

Sat Jan 1 00:00:10 UTC 2000 To execute command __source /etc/sysapps_script/I_1210_sysklog_syslogd.sh__

starting syslogd

/etc/sysapps_script/syslog.sh: /sbin/aim not running

waitfor: pid 415, wpid 705

  syslogd: /mmc1/idraclogs: Read-only file system


Jan  1 00:00:11 (none) syslogd 1.4.2: restart.

Jan  1 00:00:12 (none) kernel: klogd 1.4.2, log source = /proc/kmsg started.

Jan  1 00:00:12 (none) kernel: Cannot find map file.

Jan  1 00:00:12 (none) kernel: No module symbols loaded - kernel modules not enabled.

Jan  1 00:00:12 (none) kernel: cannot find any symbols, turning off symbol lookups

Jan  1 00:00:12 (none) kernel: Linux version 2.6.30 (jenkins@vmbrd-dh-r5-253.us.dell.com) (gcc version 4.3.4 (GCC) ) #1 Sat Mar 10 02:59:38 UTC 2012

Jan  1 00:00:12 (none) kernel: Boot params:

Jan  1 00:00:12 (none) kernel: ... MOUNT_ROOT_RDONLY - 00000000

Jan  1 00:00:12 (none) kernel: ... RAMDISK_FLAGS     - 00000000

Jan  1 00:00:12 (none) kernel: ... ORIG_ROOT_DEV     - 00000000

Jan  1 00:00:12 (none) kernel: ... LOADER_TYPE       - 00000000

Jan  1 00:00:12 (none) kernel: ... INITRD_START      - 00000000

Jan  1 00:00:12 (none) kernel: ... INITRD_SIZE       - 00000000

Jan  1 00:00:12 (none) kernel: NMI Buffer at 0x83000000

Jan  1 00:00:12 (none) kernel: Booting machvec: SH7757LCR

Sat Jan 1 00:00:12 UTC 2000 To execute command __source /etc/sysapps_script/I_trab_asdf.sh__

Sat Jan 1 00:00:12 UTC 2000 To execute command __source /etc/sysapps_script/I_usb_drv.sh__

Jan  1 00:00:12 (none) kernel: Renesas R0P7757LC0012RL support.

Jan  1 00:00:12 (none) kernel: Node 0: start_pfn = 0x40000, low = 0x4ea00

Jan  1 00:00:12 (none) kernel: Zone PFN ranges:

Jan  1 00:00:12 (none) kernel:   Normal   0x00040000 -> 0x0004ea00

Jan  1 00:00:12 (none) kernel: Movable zone start PFN for each node

Jan  1 00:00:12 (none) kernel: early_node_map[1] activIRQ 50/r8a66597_udc: IRQF_DISABLED is not guaranteed on shared IRQs

e PFN ranges

JIRQ 57/r8a66597_udc: IRQF_DISABLED is not guaranteed on shared IRQs

an  1 00:00:12 (none) kernel:     0: 0x00040000 -> 0x0004ea00

Jan  1 00:00:12 (none) kernel: On node 0 totalpages: 59904

Jan  1 00:00:12 (none) kernel: free_area_init_node: node 0, pgdat 8048f3ac, node_mem_map 804f3000

Jan  1 00:00:12 (none) kernel:   Normal zone: 468 pages used for memmap

Jan  1 00:00:12 (none) kernel:   Normal zone: 0 pages reserved

Jan  1 00:00:12 (none) kernel:   Normal zone: 59436 pages, LIFO batch:15

Jan  1 00:00:12 (none) kernel: Built 1 zonelists in Zone order, mobility grouping on.  Total pages: 59436

Jan  1 00:00:12 (none) kernel: Kernel command line: root=/dev/mmcblk0p2 rootwait rw rootfstype=squashfs mem=239616k console=ttyS2,115200
mac1=78:45:C4:F6:88:68 mac2=78:45:C4:F6:88:69 mode=normal reset_cause=board nmi_buf=0x83000000 quiet
Jan 1 00:00:12 (none) kernel: TRAB buffer at 8eb00000 allocated
Jan 1 00:00:12 (none) kernel: NR_IRQS:384
Jan 1 00:00:12 (none) kernel: PID hash table entries: 1024 (order: 10, 4096 bytes)
Jan 1 00:00:12 (none) kernel: Using tmu for system timer
Jan 1 00:00:12 (none) kernel: Dentry cache hash table entries: 32768 (order: 5, 131072 bytes)
Jan 1 00:00:12 (none) kernel: Inode-cache hash table entries: 16384 (order: 4, 65536 bytes)
Jan 1 00:00:12 (none) kernel: PVR=10300b00 CVR=73440410 PRR=00003113
Jan 1 00:00:12 (none) kernel: I-cache : n_ways=4 n_sets=256 way_incr=8192
Jan 1 00:00:12 (none) kernel: I-cache : entry_mask=0x00001fe0 alias_mask=0x00001000 n_aliases=2
Jan 1 00:00:12 (none) kernel: D-cache : n_ways=4 n_sets=256 way_incr=8192
Jan 1 00:00:12 (none) kernel: D-cache : entry_mask=0x00001fe0 alias_mask=0x00001000 n_ahid_init: Desc: Keyboard/Mouse Function
liases=2
Jan hid_init: Name: g_kbdmouse
1 00:00:12 (nonehid_init: Version: 20110426
) kernel: Memoryhid_bind: Using Major Number 233
: 232192k/239616hid_bind: using r8a66597_udc, Keyboard ep1 Mouse ep2
k available (347hid_bind: Mouse REL ep3
0k kernel code, 1200k data, 156k init)
Jan 1 00:00:12 (none) kernel: Calibrating delay loop... 230.19 BogoMIPS (lpj=1150976)
Jan 1 00:00:12 (none) kernel: Security Framework initialized
Jan 1 00:00:12 (none) kernel: Mount-cache hash table entries: 512
Jan 1 00:00:12 (none) kernel: CPU: SH7757
Jan 1 00:00:12 (none) kernel: net_namespace: 980 bytes
Jan 1 00:00:12 (none) kernel: PCI: Using configuration type 1
Jan 1 00:00:12 (none) kernel: NET: Registered protocol family 16
Jan 1 00:00:12 (none) kernel: sh pinmux: sh7757_pfc handling gpio 0 -> 504
Jan 1 00:00:12 (none) kernel: bio: create slab at 0
Jan 1 00:00:12 (none) kernel: usbcore: registered new interface driver usbfs
Jan 1 00:00:12 (none) kernel: usbcore: registered new interface driver hub
Jan 1 00:00:12 (none) kernel: usbcore: registered new device driver usb
Jan 1 00:00:12 (none) kernel: DMA: Registering DMA API.
Jan 1 00:00:12 (none) kernel: DMA: Registering sh_dmac handler (24 channels).
Jan 1 00:00:12 (none) kernel: Autoconfig PCI channel 0x80488900
Jan 1 00:00:12 (none) kernel: Scanning bus 00, I/O 0xfed00000:0xff100000, Mem 0x04000000:0x08000000
Jan 1 00:00:12 (none) kernel: NET: Registered protocol family 2
Jan 1 00:00:12 (none) kernel: IP route cache hash table entries: 2048 (order: 1, 8192 bytes)
Jan 1 00:00:12 (none) kernel: TCP established hash table entries: 8192 (order: 4, 65536 bytes)
Jan 1 00:00:12 (none) kernel: TCP bind hash table entries: 8192 (order: 3, 32768 bytes)
Jan 1 00:00:12 (none) kernel: TCP: Hash tables configured (established 8192 bind 8192)
Jan 1 00:00:12 (none) kernel: TCP reno registered
Jan 1 00:00:12 (none) kernel: NET: Registered protocol family 1
Jan 1 00:00:12 (none) kernel: Switched to high resolution mode on CPU 0
Jan 1 00:00:12 (none) kernel: enable PCIe shared memory area
Jan 1 00:00:12 (none) kernel: audit: initializing netlink socket (disabled)
Jan 1 00:00:12 (none) kernel: type=2000 audit(946684800.310:1): initialized
Jan 1 00:00:12 (none) kernel: squashfs: version 4.0 (2009/01/31) Phillip Lougher
Jan 1 00:00:12 (none) kernel: JFFS2 version 2.2. (NAND) (SUMMARY) © 2001-2006 Red Hat, Inc.
Jan 1 00:00:12 (none) kernel: fuse init (API version 7.11)
Jan 1 00:00:12 (none) kernel: msgmni has been set to 453
Jan 1 00:00:12 (none) kernel: alg: No test for cipher_null (cipher_null-generic)
Jan 1 00:00:12 (none) kernel: alg: No test for ecb(cipher_null) (ecb-cipher_null)
Jan 1 00:00:12 (none) kernel: alg: No test for digest_null (digest_null-generic)
Jan 1 00:00:12 (none) kernel: alg: No test for compress_null (compress_null-generic)
Jan 1 00:00:12 (none) kernel: alg: No test for stdrng (krng)
Jan 1 00:00:12 (none) kernel: io scheduler noop registered
Jan 1 00:00:12 (none) kernel: io scheduler anticipatory registered
Jan 1 00:00:12 (none) kernel: io scheduler deadline registered (default)
Jan 1 00:00:12 (none) kernel: io scheduler cfq registered
Jan 1 00:00:12 (none) kernel: Serial: 8250/16550 driver, 2 ports, IRQ sharing disabled
Jan 1 00:00:12 (none) kernel: SuperH SCI(F) driver initialized
Jan 1 00:00:12 (none) kernel: sh-sci: ttyS0 at MMIO 0xfe4b0000 (irq = 40) is a scif
Jan 1 00:00:12 (none) kernel: sh-sci: ttyS1 at MMIO 0xfe4c0000 (irq = 76) is a scif
Jan 1 00:00:12 (none) kernel: sh-sci: ttyS2 at MMIO 0xfe4d0000 (irq = 104) is a scif
Jan 1 00:00:12 (none) kernel: console [ttyS2] enabled
Jan 1 00:00:12 (none) kernel: sh-sci: ttyS3 at MMIO 0xfe4c0000 (irq = 76) is a scif
Jan 1 00:00:12 (none) kernel: sh-sci: ttyS4 at MMIO 0xfe4c0000 (irq = 76) is a scif
Jan 1 00:00:12 (none) kernel: sh-sci: ttyS5 at MMIO 0xfe4c0000 (irq = 76) is a scif
Jan 1 00:00:12 (none) kernel: sh-sci: ttyS6 at MMIO 0xfe4c0000 (irq = 76) is a scif
Jan 1 00:00:12 (none) kernel: brd: module loaded
Jan 1 00:00:12 (none) kernel: loop: module loaded
Jan 1 00:00:12 (none) kernel: nbd: registered device at major 43
Jan 1 00:00:12 (none) kernel: sh_eth_init
Jan 1 00:00:12 (none) kernel:
Jan 1 00:00:12 (none) kernel: Monolithic/DRB
Jan 1 00:00:12 (none) kernel: sh_mii: probed
Jan 1 00:00:12 (none) kernel: Base address at 0xfee00000, 00:00:00:00:00:00, IRQ 315.
Jan 1 00:00:12 (none) kernel: sh_mii: probed
Jan 1 00:00:12 (none) kernel: Base address at 0xfef00800, 00:00:00:00:00:00, IRQ 84.
Jan 1 00:00:12 (none) kernel: sh_spi sh_spi.0: registered master spi0
Jan 1 00:00:12 (none) kernel: m25p80 spi0.1: n25Q032a (4096 Kbytes)
Jan 1 00:00:12 (none) kernel: Creating 9 MTD partitions on "m25p80":
Jan 1 00:00:12 (none) kernel: 0x000000000000-0x000000080000 : "u-boot1"
Jan 1 00:00:12 (none) kernel: 0x000000080000-0x000000100000 : "u-boot2"
Jan 1 00:00:12 (none) kernel: 0x000000100000-0x000000110000 : "env1"
Jan 1 00:00:12 (none) kernel: 0x000000110000-0x000000120000 : "env2"
Jan 1 00:00:12 (none) kernel: 0x000000120000-0x000000130000 : "fru"
Jan 1 00:00:12 (none) kernel: 0x000000130000-0x000000140000 : "res1"
Jan 1 00:00:12 (none) kernel: 0x000000140000-0x0000001c0000 : "tracebuf"
Jan 1 00:00:12 (none) kernel: 0x0000001c0000-0x000000340000 : "lcl"
Jan 1 00:00:12 (none) kernel: 0x000000340000-0x000000400000 : "res2"
Jan 1 00:00:12 (none) kernel: sh_spi sh_spi.0: registered child spi0.1
Jan 1 00:00:12 (none) kernel: spi_sh: version 2009-06-10
Jan 1 00:00:12 (none) kernel: mknod /dev/aess_wdtdrv c 10 130
Jan 1 00:00:12 (none) kernel: aess_wdtdrv: initialized. (nowayout=0)
Jan 1 00:00:12 (none) kernel: device-mapper: ioctl: 4.14.0-ioctl (2008-04-23) initialised: dm-devel@redhat.com
Jan 1 00:00:12 (none) kernel: sh_mmcif: driver version 2010-03-17
Jan 1 00:00:12 (none) kernel: sh-sdhi: power control pin initiated
Jan 1 00:00:12 (none) kernel: mmc1: power off - 8f
Jan 1 00:00:12 (none) kernel: heartbeat: version 0.1.1 loaded
Jan 1 00:00:12 (none) kernel: sermux sermux: version 2010-05-26
Jan 1 00:00:12 (none) kernel: nf_conntrack version 0.5.0 (3744 buckets, 14976 max)
Jan 1 00:00:12 (none) kernel: IPv4 over IPv4 tunneling driver
Jan 1 00:00:12 (none) kernel: ip_tables: (C) 2000-2006 Netfilter Core Team
Jan 1 00:00:12 (none) kernel: TCP cubic registered
Jan 1 00:00:12 (none) kernel: NET: Registered protocol family 10
Jan 1 00:00:12 (none) kernel: lo: Disabled Privacy Extensions
Jan 1 00:00:12 (none) kernel: tunl0: Disabled Privacy Extensions
Jan 1 00:00:12 (none) kernel: ip6_tables: (C) 2000-2006 Netfilter Core Team
Jan 1 00:00:12 (none) kernel: IPv6 over IPv4 tunneling driver
Jan 1 00:00:12 (none) kernel: sit0: Disabled Privacy Extensions
Jan 1 00:00:12 (none) kernel: NET: Registered protocol family 17
Jan 1 00:00:12 (none) kernel: RPC: Registered udp transport module.
Jan 1 00:00:12 (none) kernel: RPC: Registered tcp transport module.
Jan 1 00:00:12 (none) kernel: 802.1Q VLAN Support v1.8 Ben Greear